

Get started on your triConvey journey by importing all essential contact and matter data from your previous legal software or other sources.
Table of Contents
- Disclaimer
- Data that can be imported
- Step 1: Preparing your source data
- Step 2: Starting a new import
- Step 3: Mapping columns
- Step 4: Reviewing the uploaded data
- Step 5: Submitting the import
- Troubleshooting
- Help with formatting and mapping my data.
Disclaimer
The triConvey Data Import Tool is a self-service utility. Your firm is solely responsible for the accuracy, preparation, and outcome of any data imported. triConvey does not provide assistance with preparing, editing, or importing your data.
- Your data imports as entered. The tool does not correct errors, duplicates, or incomplete records. Ensure your source file is accurate and complete before uploading.
- Each column maps one-to-one. Multiple values for the same field (such as two email addresses) must be merged into a single cell, separated by a semicolon (;), before uploading.
- Our team cannot assist with data preparation. We can confirm system availability, explain validation errors, and direct you to support documentation — but we are not able to prepare or edit your spreadsheets, build your column mappings, or correct records following an import.
By using this tool, your firm accepts full responsibility for the accuracy and completeness of imported data. triConvey is not liable for errors, duplicate records, or system issues resulting from incorrect source data. If an import causes data corruption or financial discrepancies, remediation may require professional services at additional cost.
Data that can be imported
- Staff
- Contacts
- Matters
- Matter Tags
- Matter Roles
- Matter Critical Dates
- Matter Archive Details
- Matter Account Balances
- Activity Codes
- Unbilled Time/Fee Entries
- Unbilled Disbursement Entries
- Invoices
- Billed Invoice Entries
- Memos
- Tasks
- Calendar Events
- Safe Custody
A full list of supported fields can be found here.
Step 1: Preparing your source data
Prepare your source data to ensure a smooth upload and import process. To get started:
1. Export the above listed data from your previous software into any of the following file types:
- CSV (comma-separated values)
- XSLX (Microsoft Excel 2007 and later)
- XLS (Microsoft Excel 97 to 2003)
2. Follow the Preparing your source data for import article.
We recommend importing only relevant/active data, for example, minimising importing items such as "Closed" Matters and "Completed" Tasks where possible.
Step 2: Starting a new import
Once your data has been formatted as per the recommendations outlined in Step 1, you are ready to upload it to triConvey.
1. Select the gear icon in the lower-left corner of the triConvey Companion Site Web App.
2. Select Data Import/Export.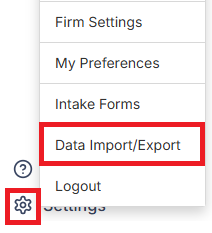
3. Select +New import/export.

4. Tick the Data Import checkbox.
5. In the text box provided, select the system your data is coming from. If you can't find your system in the list, type a custom value, then select this option from the menu.
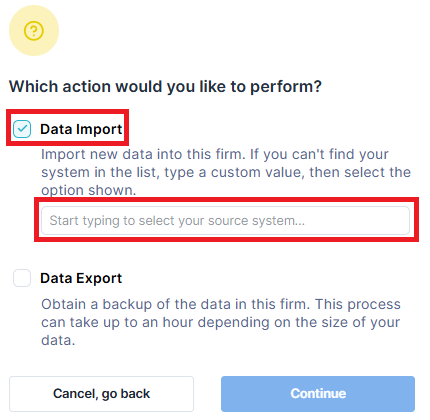
6. Click Continue.
7. Choose the items to include in the import, then click Proceed.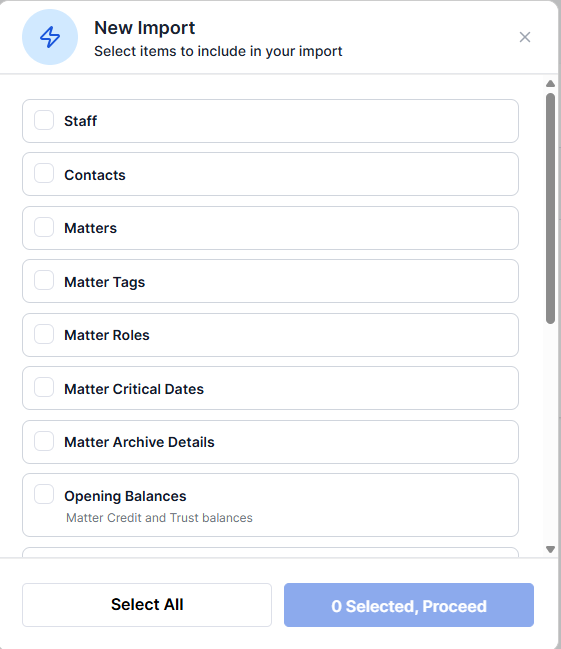
8. Select Upload under the data you wish to import into triConvey.
Tip: Some data types ae unavailable (greyed out) until prerequisite data is uploaded and clear of errors. Selecting Cancel import will discard all data under this import, allowing you to start over.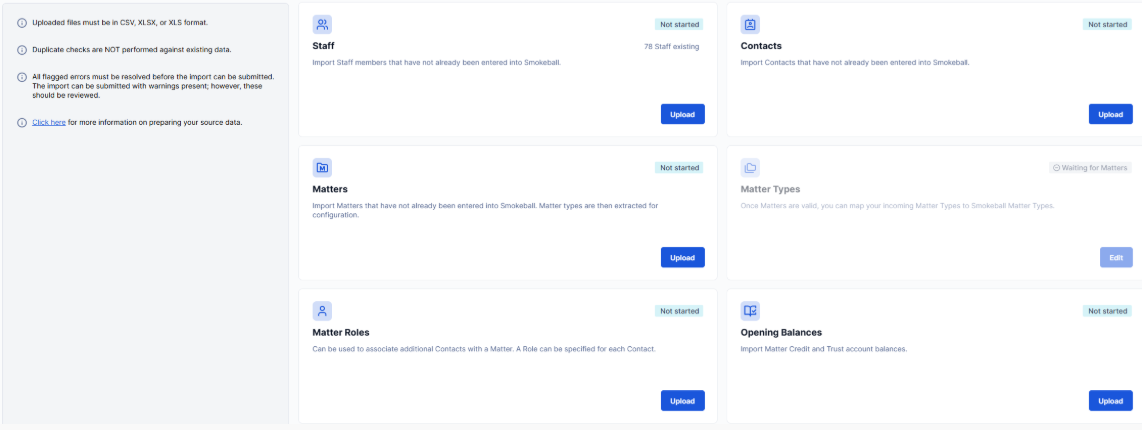
Once an import has been started, it will appear on this screen as In-Progress. You can come back to this at any time before submitting the import.
Step 3: Mapping columns
Once a file has been uploaded, it is time to map the columns you have in the file with triConvey's data columns.
1. Select the row that is the header row in your source data. This step will be skipped if the tool can automatically detect the header row.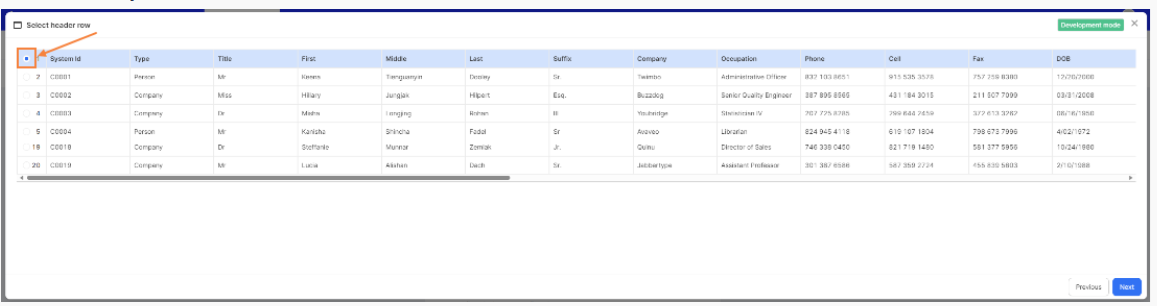
2. Click Next.
3. You will now be presented with the Map columns window. Under the Destination Columns section, use the drop-down menu to select a suitable destination field for each uploaded column.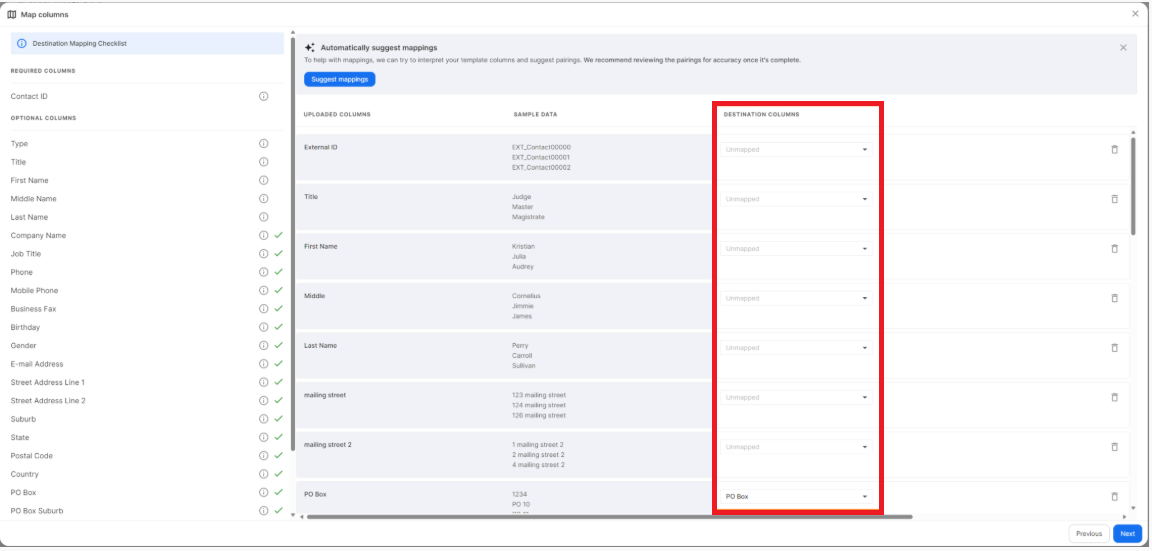
- The Sample Data column displays a preview of data from the corresponding column in the source data. (e.g. the Sample Data for the 'Last Name' column will extract Last Names from your source data).
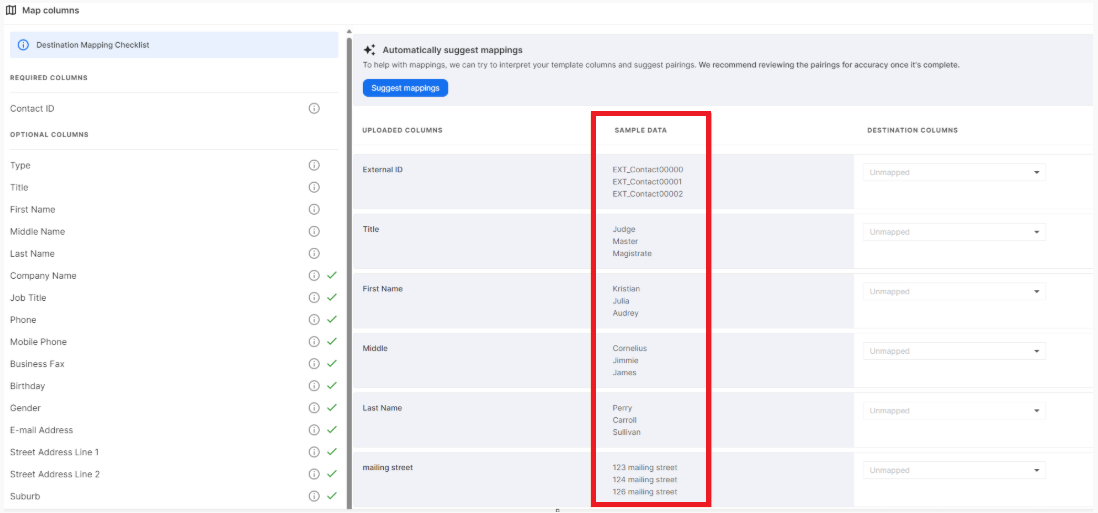
- The tool may automatically map some columns that it thinks will match with your data. You can change this by choosing another option from the Destination Columns drop-down menu.
- Select Suggest mappings (not always available) at the top of the table to use AI-generated recommended mappings. We recommend reviewing the suggestions before proceeding.
4. Click Next once done. You may only proceed if all Required Columns have been mapped.
An error message may appear if a required column has not been mapped, indicating the problem column that needs to be mapped.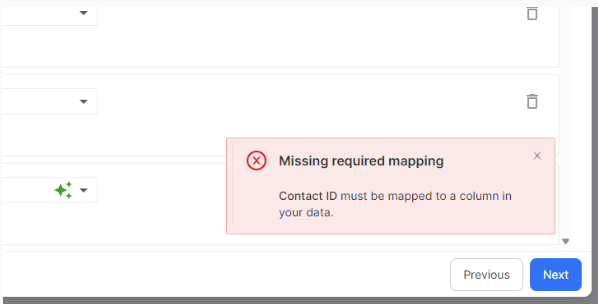
If your source file does not contain a column that can be mapped to a "Required" triConvey column, the following actions will need to be taken:
1. Close the mapping view.
2. Open your source data file (in Excel or similar) and add a column that can be used to map to the "Required" triConvey column (the column name does not need to match the triConvey column name).
3. Re-upload the source file and proceed to map the columns.
Have issues with mapping columns? Review Preparing your source data for import to fix common pitfalls, then re-upload your file.
Step 4: Reviewing the uploaded data
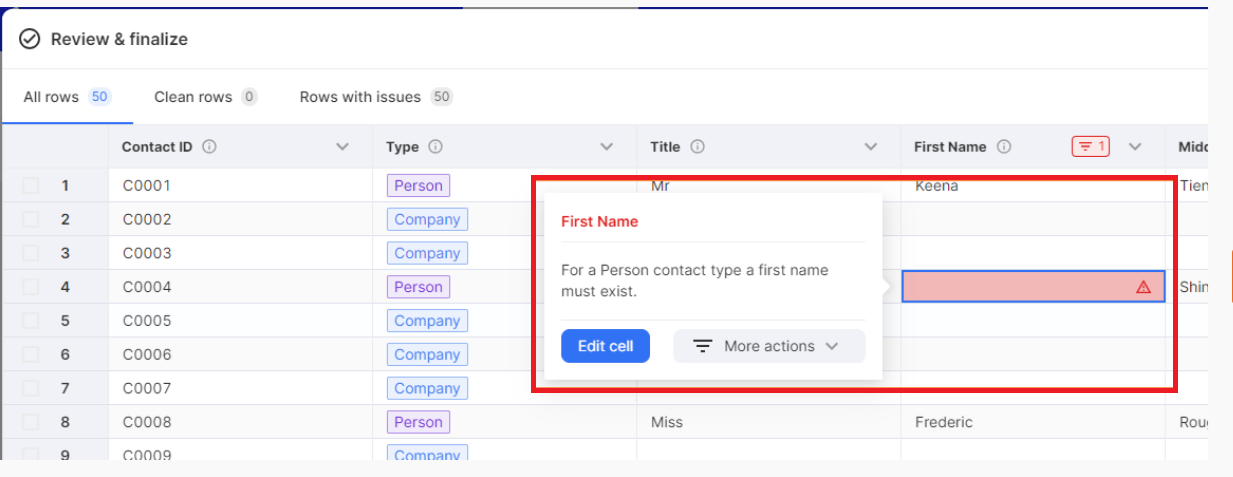
Once mapping has been completed, all the data will be presented in a table. This view points out any validation issues in the data and allows you to edit the fields directly before saving the upload.
- Any errors in the data are highlighted in red.
- Any warnings in the data are highlighted in yellow.
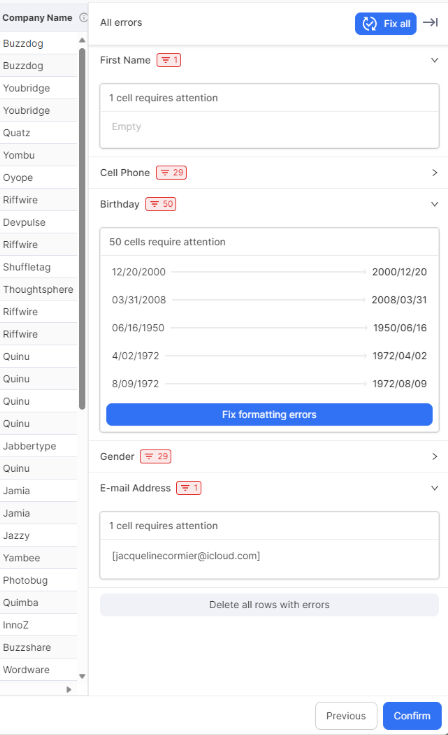
The right-hand panel also shows a summary of all errors and warnings. Where a suggested fix is available, you can select Fix formatting errors to fix multiple errors in a column in bulk.
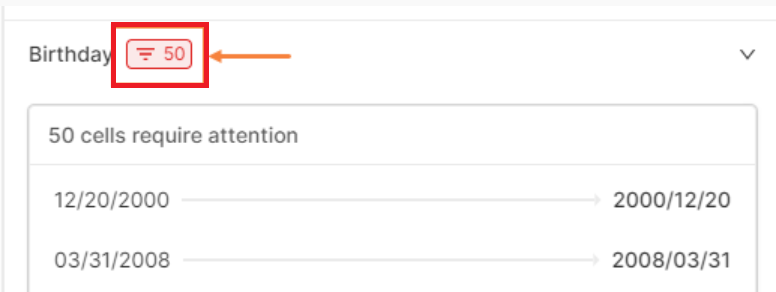
Click on the counter filter to filter the view by rows containing specific issues. Click again to clear the filter and show all the data.
Useful tips to help navigate and edit data
- Filter tabs to the top right of the data to show clean rows/rows with issues.
- "Find and Replace" button.
- Keyboard shortcuts:
- Ctrl + Z = undo
- Shift + arrows = select cells
- Backspace or Delete = delete value from cell(s)
- Ctrl + F = find a value
Additional rows can also be added directly from this view using the "Add Row" Button.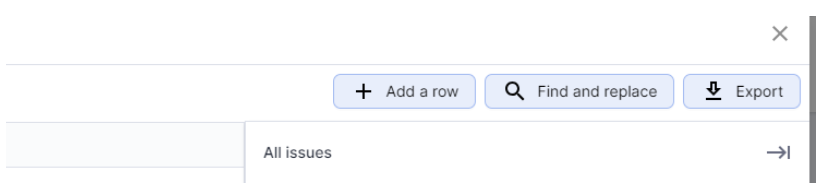
From this screen, you can Save a file upload.
You can save with errors and warnings still present and, if required, come back to continue fixing later. All errors must be fixed before the overall import can be submitted.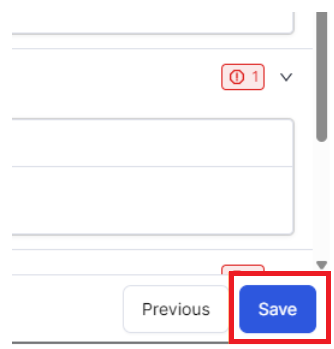
The Data Import screen will show a summary of any errors and warnings still present in the data. At this point, you are free to close the tool and resume the in-progress import later.
To make any further adjustments, select Edit to reopen the uploaded data.
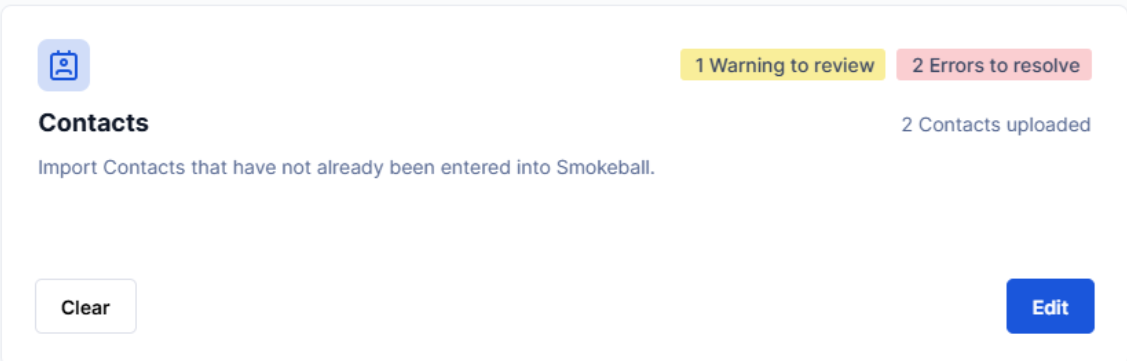
The overall import cannot be submitted until all data types are clear of errors (the import can be submitted with warnings). Refer to the summary of import errors from the import screen.
Repeat the above steps for every data type you wish to upload.
Matters & Matter Types
If importing Matters, an additional selection is required when uploading your Matter source file to indicate if you are importing matters within your firm's state only, or also other states.
The selection made here will dictate the triConvey Matter Types shown to you when you reach the Matter Type mapping stage, where you will map your input Matter Types to those supported in triConvey.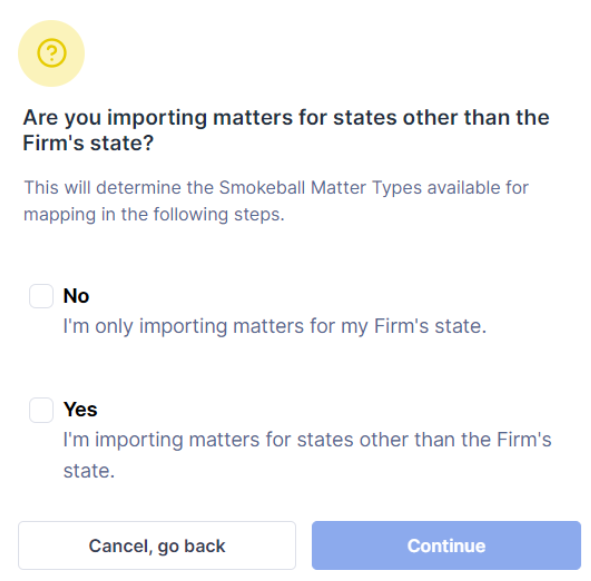
When mapping your input Matter Types to triConvey Matter types, some triConvey Matter Types have multiple "acting for" options, for example, Loan Agreement - Borrower and Loan Agreement - Guarantor. Where this is the case, you will see various options available for selection in the triConvey Matter Type dropdowns and can select the most suitable choice.
In the above example, "ACT" is the state, "Commercial" is the matter type category, "Loan Agreement" is the matter type, and "Borrower" is the "acting for" role.
Tip: When mapping matter types, expand the column widths to get a better view of the dropdown options.
Step 5: Submitting the import
Once you have uploaded, mapped, and fixed all outstanding errors across all data to be imported, you can preview and submit the import using the Preview & Submit button in the top-right corner.
Preview gives you a holistic review of your prepared import data before you submit it to your account, covering Staff, Contacts, Matters & Matter Type Mapping, Financials, and more. Each of these is shown in its own interactive, searchable, and sortable view, so you can quickly find and check the records you care about. Items such as Matters, Contacts, Invoices, Tasks, and Memos also have a detailed view, showing the full record along with any associated or linked records. A financial summary is also included at both an import-wide and matter level, so you can confirm the numbers are what you expect.

Use Preview to check that the data is accurate and complete, and to catch anything wrong while it's still easy to fix. If something's not right, you can fix it directly within the import tool using the Edit button on that item, or correct your source file and upload it again. You can repeat this correction-and-review cycle as many times as you need before submitting the import.
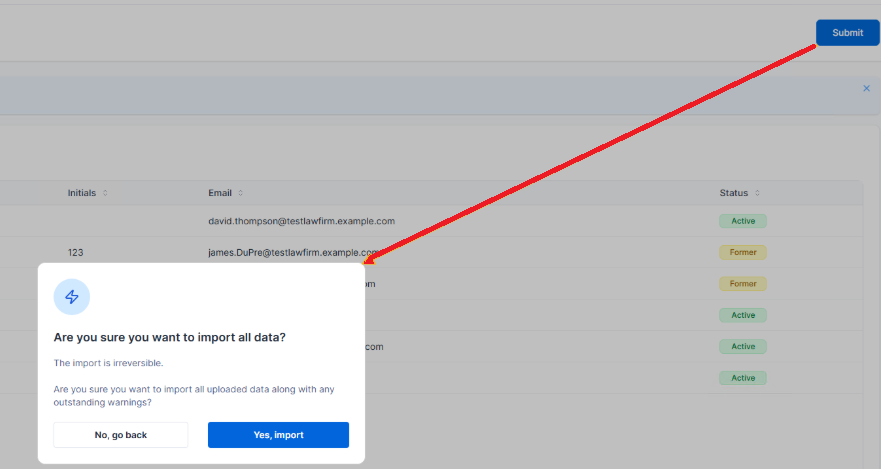
A few import items are not yet previewable, including matter roles, matter tags, calendar events, and safe custody. If your import contains only items that are not yet previewable, you will see this submission confirmation pop-up, bypassing the ability to preview your import. Otherwise, you will be taken to the preview screen.When you're ready to submit your import, click the Submit button in the top-right corner of the Preview screen. Then confirm in the confirmation prompt.
Tip: Once an import is submitted, it cannot be reversed.
On the Data Import screen, the import status will change from In-progress to Submitted.
Once the import has been validated, the status will change to Loading.
Then Complete, and your data now resides in triConvey.
Clicking "View summary" will show a count of data included in the import.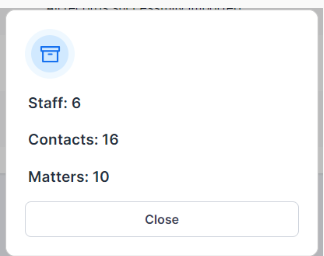
Troubleshooting
Validation
Once an Import has been submitted, if further validation issues are identified in the data, the status of the import will change to Failed Validation. A downloadable error file will be available to indicate the problem data, allowing you to re-open the current import, fix and any issues, then resubmit it.
Failed records
If an import completes but some records failed to load into triConvey, the status of the import will be Complete and a downloadable error file will be available to indicate the failed records and reason for failure. Using the error file, a subsequent import can be performed for the failed records.
Unexpected
Once an Import has been submitted, if an unexpected system issue occurs, the status of the import will change to Failed Validation. If this is the case, please contact Support via the top right help (?) icon.
Help with formatting and mapping my data.
Refer to Preparing your source data for import if you encounter any issues with mapping columns in the Data Import tool.
Was this article helpful?
That’s Great!
Thank you for your feedback
Sorry! We couldn't be helpful
Thank you for your feedback
Feedback sent
We appreciate your effort and will try to fix the article