A Matter is a digital copy of your paper file that allows you to store all related data, documents, emails, tasks, and other documentation in one place for easy access.
triConvey is tailored to your area(s) of law and jurisdiction, so every matter type will vary based on what you need for each file.
Table of Contents
- Getting Started
- triConvey Desktop App
- triConvey Companion Site Web App
- Access billing-specific Matter options
Getting Started
You can create matters from the triConvey Desktop App or the triConvey Companion Site Web App. Matters created in one place are viewable from both.
triConvey Desktop App
1. Select New Matter from the triConvey Action Bar.
2. Select the State and Matter Type from the dropdown menus.
3. Depending on the Matter Type, select Create or Next.
Tip: Some State specific Matter Types will require you to enter a Title Reference. Refer to Matter Types for State specific instructions on how to Create a New Matter.
4. triConvey will open the matter in its own window, differentiated from the main triConvey App by a dark blue coloured banner at the top.
Next Steps
After creating a new matter:
- Add matter details.
- Create new or add existing contacts.
- Show or hide relevant parties and data required, so that only the most important fields are visible.
- Enter Billing Info.
- Refer to Matter Types for State specific instructions on how to finalise creating a new matter.
Handy Hints
- For quick access, you can create Matter Favorites by clicking on the star icon or Matter Templates by selecting the tab.
- If you are unsure which matter type to use for a specific matter, reach out to your Account Manager or view our Matter Types for additional best practices.
- The minimum data required to save a matter is a Matter Number located in Info, and the Client info.
triConvey Companion Site Web App
1. Either:
- select Matters from the left panel and then Add Matter; or

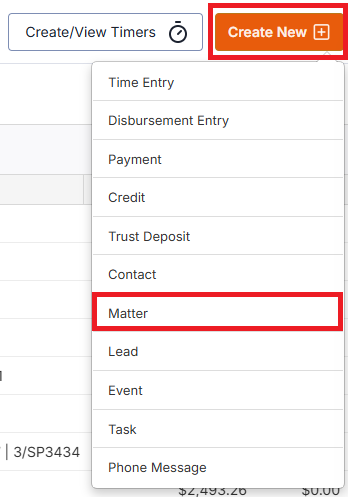
- select Create New from the top-right corner and then select Matter.
2. Choose the state, area of law and matter type and then select Next.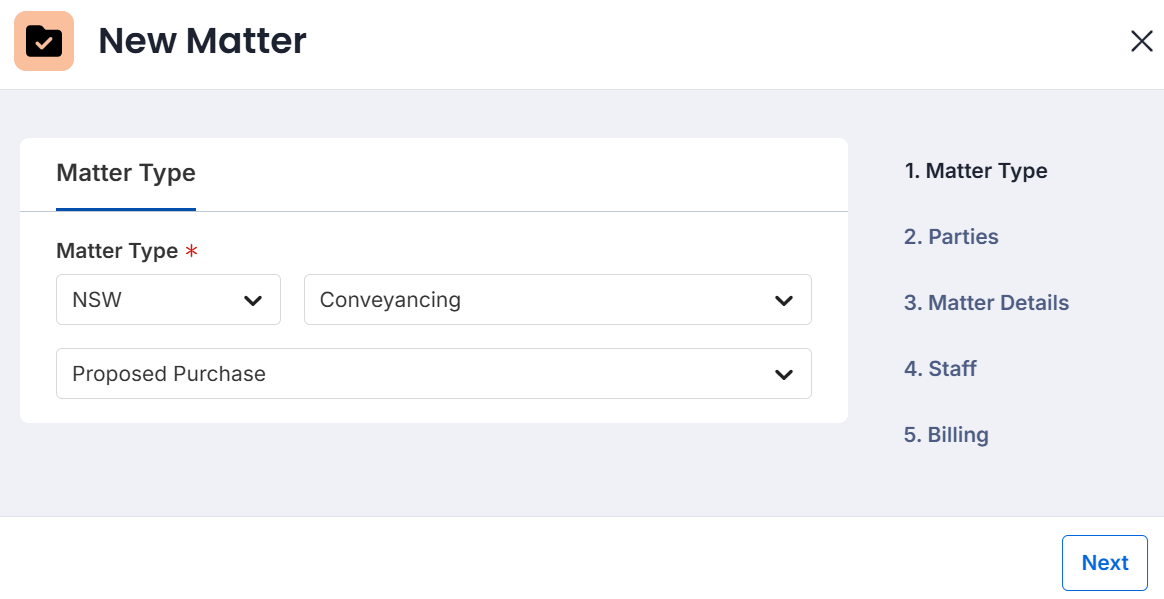
3. Start typing in the name of the Parties to the matter and select their name from the list. You can also add a new contact from here at the bottom of the list.
- If there are multiple clients or other sides in your matter, select + New Client or +New Other Side to add them. You can add other contacts to the matter later via Matter Settings.

4. Select/review the client Role from the drop-down list.
5. (Optional) Enter details of the Other Side/Other Side Solicitor in the matter.
6. Select Next.
7. Enter the Matter Description and then select Next.
Tip: You can also change the Matter Opened date if applicable.
8. All Staff fields are optional for completion. Select Next.
Tip: You can also add Referral details (including custom Referral Types) here.
9. All Billing fields are optional for completion. Enter basic billing information if you have this on hand.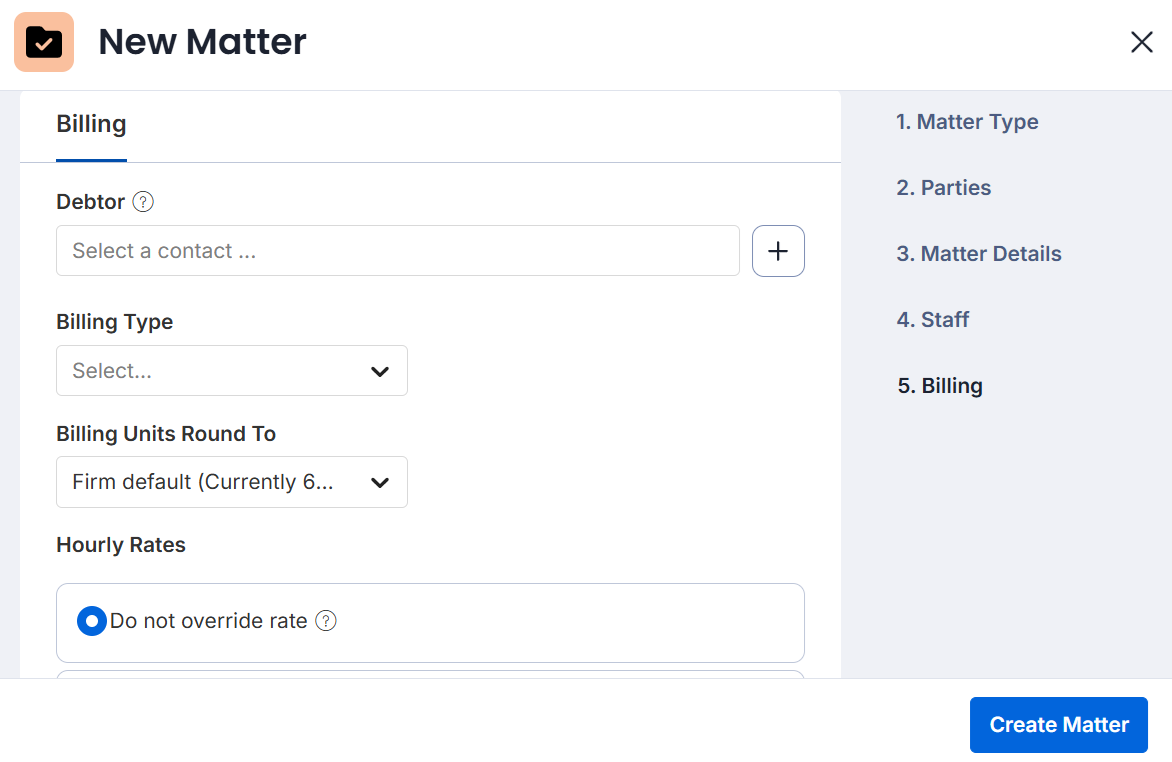
- Select a Debtor from the list by selecting an existing contact or creating a new contact. You can also add multiple debtors.
- Select the Billing Type and enter more details when prompted.
- Select the Billing Units that apply to this matter. Learn more about billing units.
- Choose the Hourly Rate configuration:
- Do not override rate: This uses the rate designated for that staff member in their staff settings.
- Use rate sets: Apply a rate set to this matter.
- Override rate for all staff: Enter a custom rate amount that is applied to all staff listed in this matter.
- Override default rate per staff member: Enter custom rate amounts for individual staff members listed in this matter. Select the plus icon to configure more than one staff member.
- Select the Billing Frequency, which allows you to filter invoices based on billing frequency for reporting purposes.
10. Select Create Matter.
Tips: The newly created matter will be available from the triConvey Desktop App also.Access billing-specific Matter options
You can enter more details on the matter or edit existing details, by clicking on the matter in the matter list and selecting Edit Matter.
Use the Quick Links to navigate through each setting.
- Client/Contacts
- In the Client/Contacts section, you can review, edit, and add clients, debtors, other sides and other contacts on a matter.
- Select View to open the contact page in a new tab and upon closing the tab will return you to the Edit Matter screen. The Edit link will display a pop-up box allowing you to edit details without leaving the page.
- Note that Other Contacts you add on this screen will appear as Additional Contacts in the triConvey Companion Site Web App.
- Matter Details
- The Matter Details section allows you to review and edit the matter type, matter number, matter status, matter opened/closed date and matter description.
- Staff
- The Staff section allows you to review and edit Person Responsible, Person Assisting, or Introducer on a matter. You can also edit the Referrer and Referral Type.
- Billing Fees and Rates
- The Billing Fees and Rates section allows you to select and edit the matter's billing type and billing rate. In this setting, you can override the default rate for the matter by individual staff members or for all staff.
- Trust Settings
- Use the Trust Settings section to activate the evergreen retainer on a matter and set the minimum threshold and replenishment amounts. If you do not see this option, review our article on Evergreen Retainers to learn how to activate this feature.
You can also set the default trust account for trust payments, if your firm has multiple trust accounts.
- Use the Trust Settings section to activate the evergreen retainer on a matter and set the minimum threshold and replenishment amounts. If you do not see this option, review our article on Evergreen Retainers to learn how to activate this feature.
- Late Payment
- Set interest on matters with outstanding balances, including any grace period and the date you want the interest to start calculating. Learn more about Interest.
- Communication
- Set up any relevant CC or BCC email addresses that should receive email invoices and reminders. You can also indicate the default document sending preference here, especially if the client prefers to receive invoices in a way other than email.
- Invoice Settings
- Review and edit certain invoice settings for a matter including the invoice template, title, subtitle, eInvoices, and notes. Learn more about Invoice Settings.
Was this article helpful?
That’s Great!
Thank you for your feedback
Sorry! We couldn't be helpful
Thank you for your feedback
Feedback sent
We appreciate your effort and will try to fix the article