A Matter is a digital copy of your paper file that allows you to store all related data, documents, emails, tasks, and other documentation in one place for easy access.
triConvey is tailored to your area(s) of law and jurisdiction, so every matter type will vary based on what you need for each file.
Table of Contents
Getting Started
You can create matters from the triConvey Desktop App or the triConvey Companion Site Web App. Matters created in one place are viewable from both.
triConvey Desktop App
1. Select New Matter from the triConvey Action Bar.
2. Select the State and Matter Type from the dropdown menus.
3. Depending on the Matter Type, select Create or Next.
Tip: Some State specific Matter Types will require you to enter a Title Reference. Refer to Matter Types for State specific instructions on how to Create a New Matter.
4. triConvey will open the matter in its own window, differentiated from the main triConvey App by a dark blue coloured banner at the top.
Next Steps
After creating a new matter:
- Add matter details.
- Create new or add existing contacts.
- Show or hide relevant parties and data required, so that only the most important fields are visible.
- Enter Billing Info.
- Refer to Matter Types for State specific instructions on how to finalise creating a new matter.
Handy Hints
- For quick access, you can create Matter Favorites by clicking on the star icon or Matter Templates by selecting the tab.
- If you are unsure which matter type to use for a specific matter, reach out to your Account Manager or view our Matter Types for additional best practices.
- The minimum data required to save a matter is a Matter Number located in Info, and the Client info.
triConvey Companion Site Web App
1. Either:
- select Matters from the left panel and then Add Matter; or

- select Create New from the top-right corner and then select Matter.
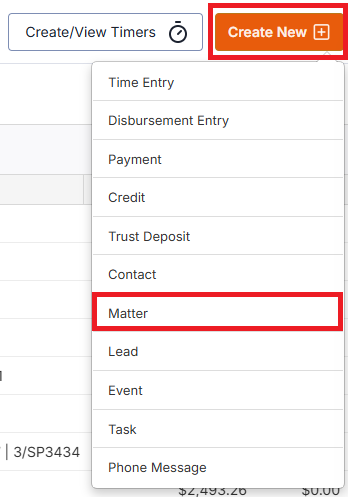
2. Choose the state, area of law and matter type and then select Next.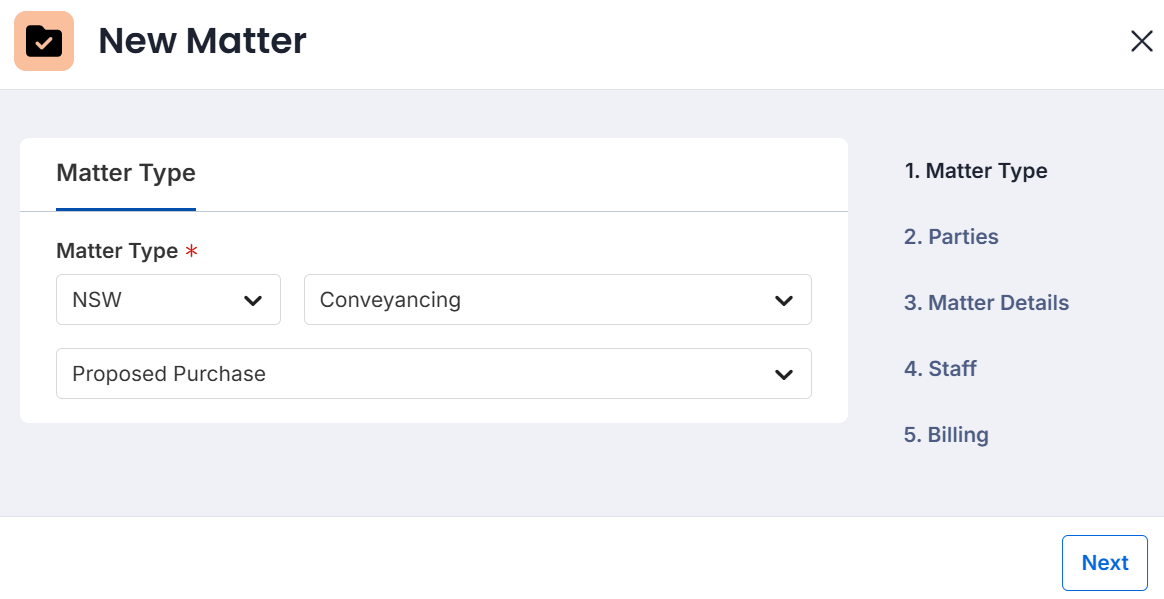
3. Enter the Client and Client Role. Depending on the matter type, you may also add other parties such as Vendor/Seller.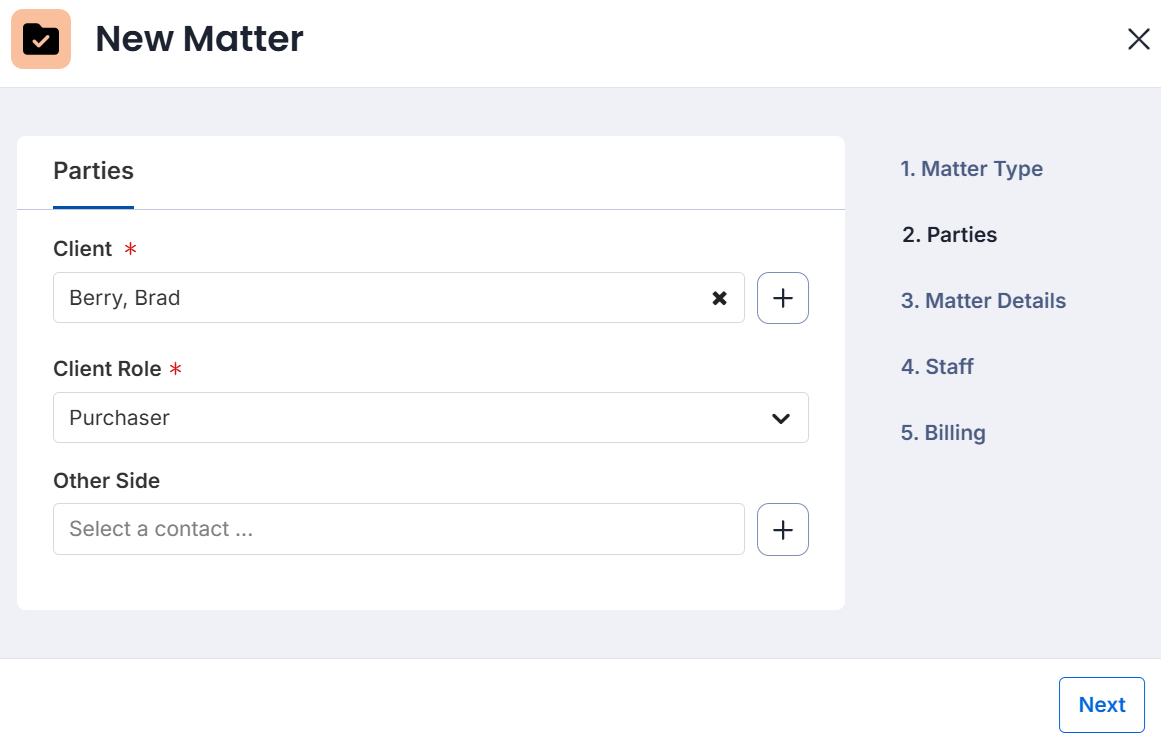
- When entering a client, the field will search and allow you to select an existing contact.
- If your client is a new contact, select +Add Contact.
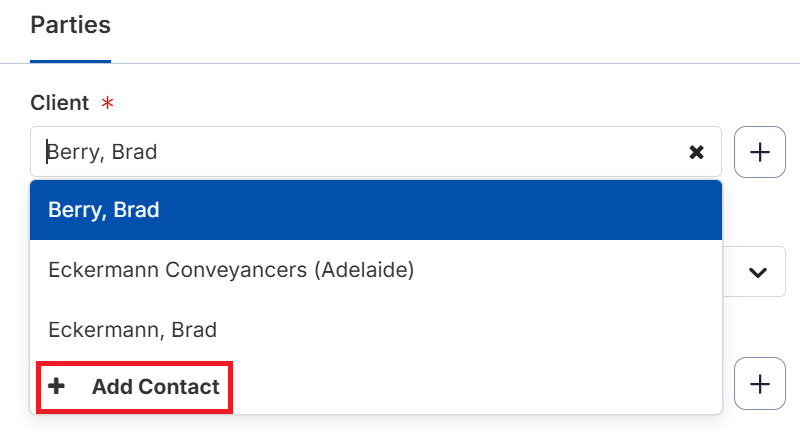
Tip: If there are multiple parties to a matter, select the plus icon to add them.4. Select Next.
5. Enter the Matter Description and then select Next.
Tip: You can also change the Matter Opened date if applicable.
6. All Staff fields are optional for completion. Select Next.
Tip: You can also add Referral details (including custom Referral Types) here.
7. All Billing fields are optional for completion. Enter the billing type you will use for this matter and other billing information.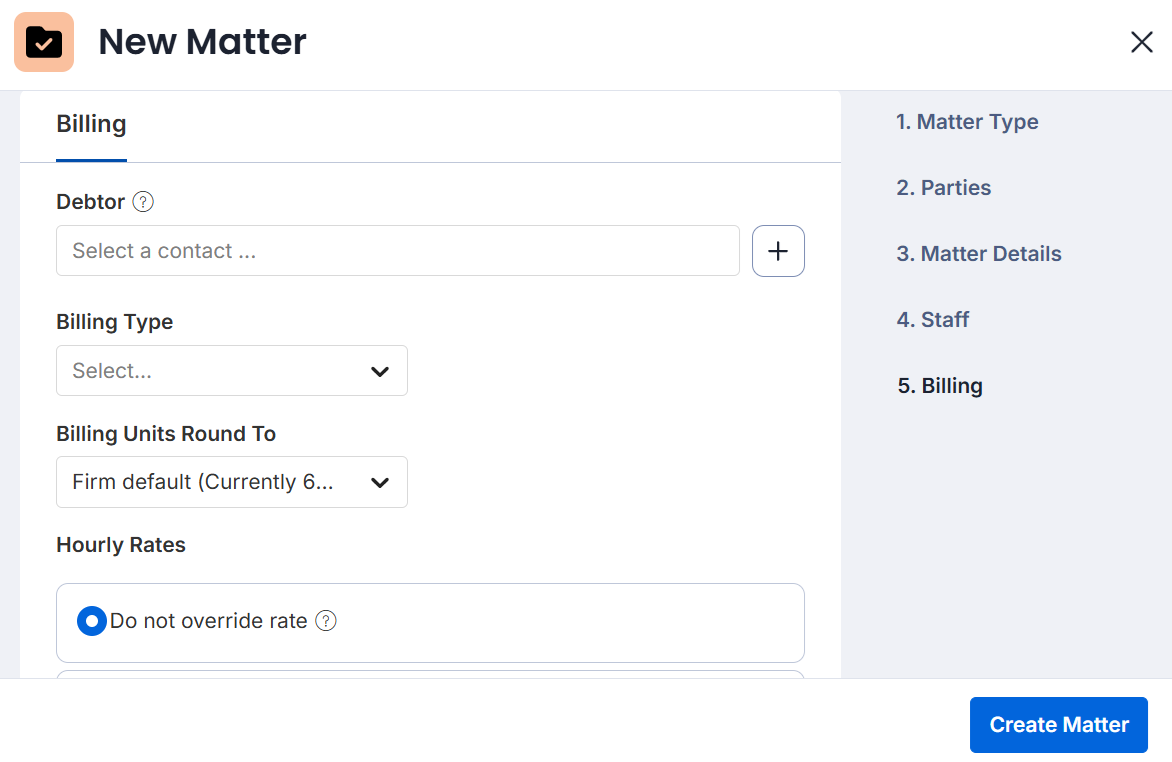
8. Select Create Matter.
Tips: The newly created matter will be available from the triConvey Desktop App also.Was this article helpful?
That’s Great!
Thank you for your feedback
Sorry! We couldn't be helpful
Thank you for your feedback
Feedback sent
We appreciate your effort and will try to fix the article