Learn how to use Intake to collect data from prospective leads on your website.
Table of Contents
- Embed a Lead Intake Form on your Website (Web Enquiries)
- Generate the code
- Create a custom Lead Intake Form
- Generate a link or QR code from the Form Builder
- Copy an existing link or QR code or view forms with links attached
- View submitted forms for a matter
- View submitted forms across all matters
- Send a follow-up form
Embed a Lead Intake Form on your Website (Web Enquiries)
There are four ways you can use LeadPro to start collecting leads:
1. Providing a link for prospects to click on and access the form.
2. Embedding a form on your website so prospects can fill in details from the website.
3. Embedding a "Contact Us" button on your website that prospects can click on to access the Lead Intake form.
4. Providing a QR code for prospects to scan with their smartphone and access the form.
Tip: Embedding the form or Contact Us button may require the assistance of your website developer to incorporate code from triConvey into your website's theme.Generate the code
2. Select Intake Forms.
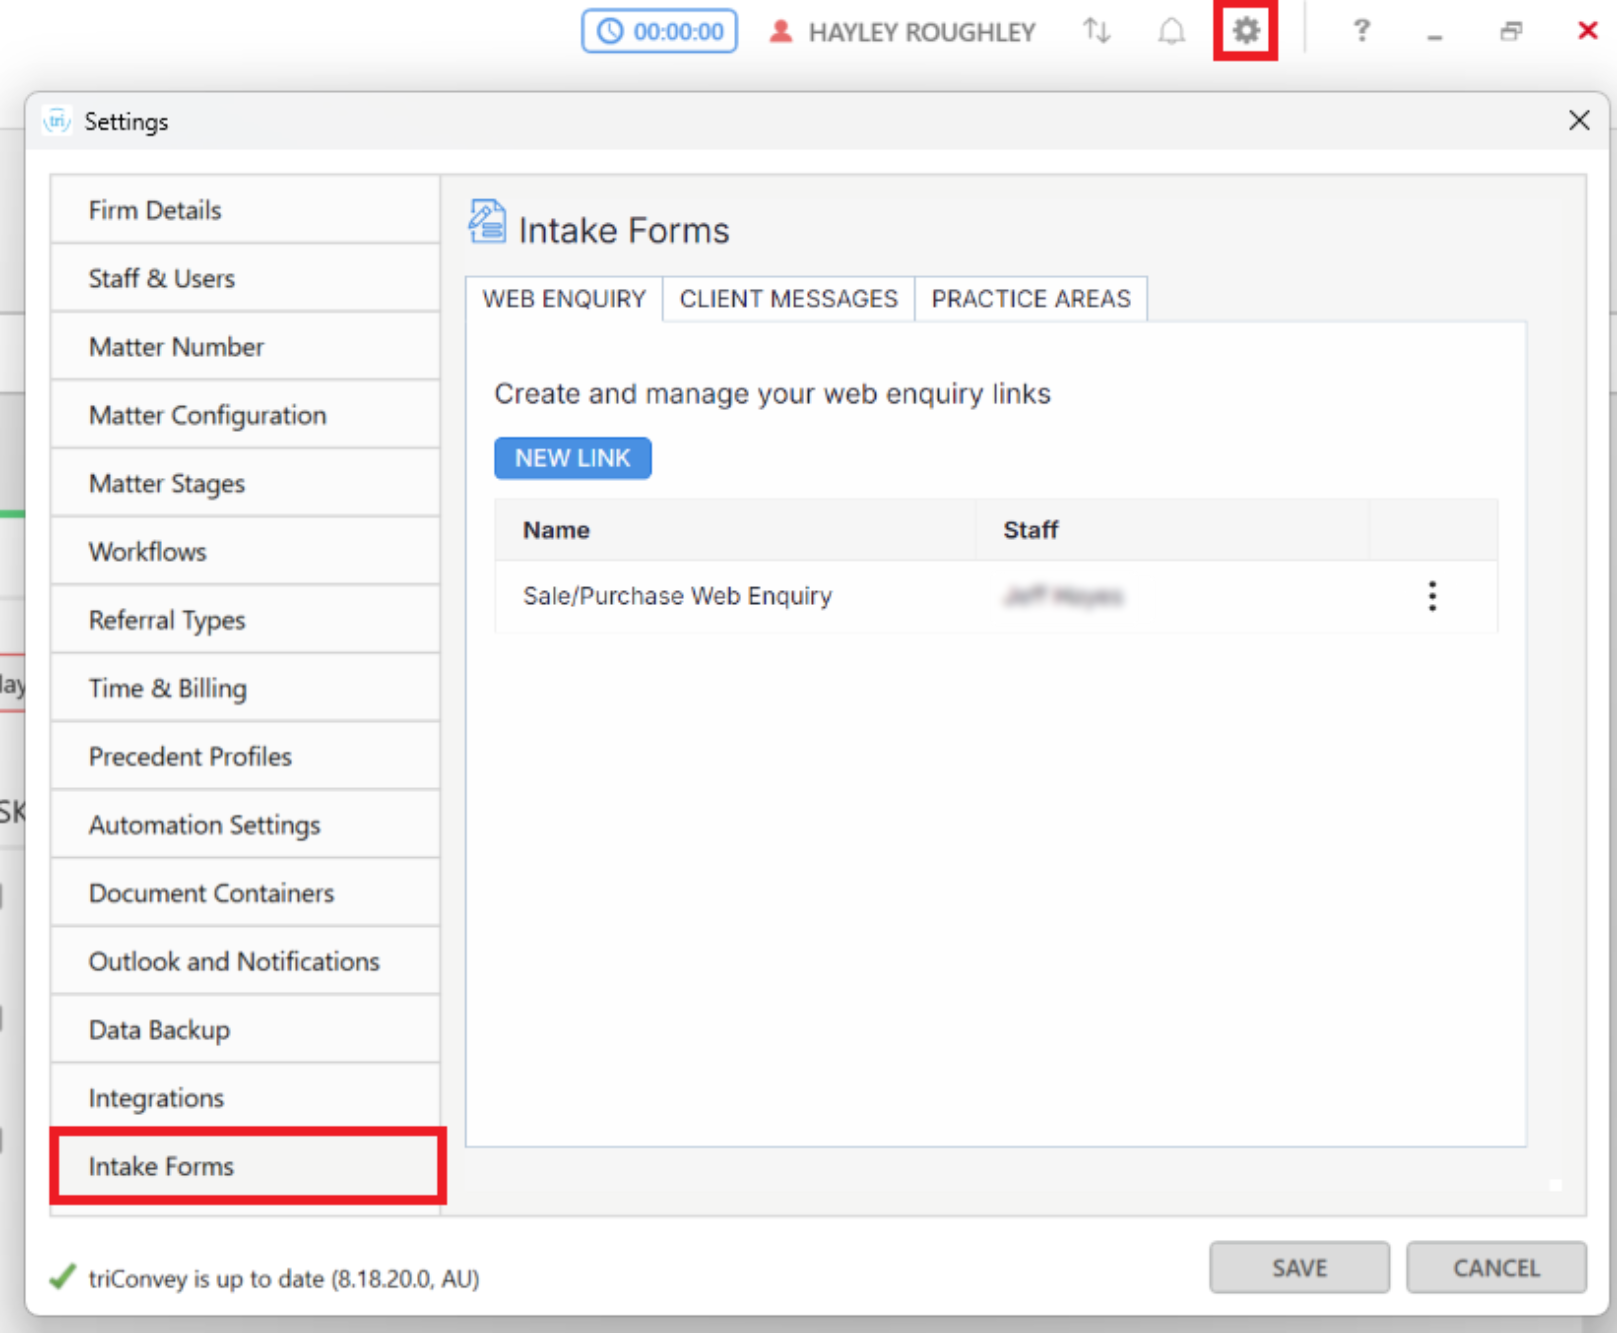
3. Select the General tab and confirm that your state and practice areas of law are displayed. Click into either of the dropdown fields to make changes.

4. Under the Web Enquiries tab, select Create Link.

5. The Create New Link window will open. Choose the form you wish to share from the Form drop-down menu.

Tip: Your firm's custom lead forms will appear first, followed by forms created by us (listed under triConvey Forms).6. Under the Staff drop-down menu, select or type in the names of staff members who will receive a notification when someone has submitted a form.

7. (Optional) If you have a Google Analytics measurement ID/tag ID, enter it in the Google Analytics measurement ID field to track the form.

8. You can choose to get a link to the form, generate a code for an embedded form or add a 'Contact Us' button on your website.
Embedded  | Your website designer can change how this button looks |
9. Select Copy Code next to the option you prefer.

10. Paste the code into a Notepad file and send this to your website designer.
Tip: Adding the intake form code to your website is outside the scope of triConvey Support. Please reach out to whoever manages your website's theme to implement this on your website.
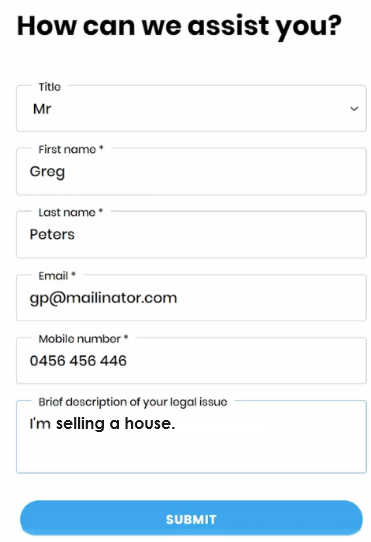
Once this is on your website, prospective leads simply need to fill out the form, and you will receive these responses in triConvey.

2. Select Intake Forms.
3. Select the General tab and confirm that your state and practice areas of law are displayed. Click into either of the dropdown fields to make changes.

4. Under the Web Enquiries tab, click Create Link.

5. The Create New Link window will open. Choose the form you wish to share from the Form drop-down menu.

Tip: Your firm's custom lead forms will appear first, followed by forms created by us (listed under triConvey Forms).6. Under the Staff drop-down menu, select or type in the names of staff members who will receive a notification when someone has submitted a form.

7. (Optional) If you have a Google Analytics measurement ID/tag ID, enter it in the Google Analytics measurement ID field to track the form.

8. You can choose to get a link to the form, generate a code for an embedded form or add a 'Contact Us' button on your website.
Embedded | Your website designer can change how this button looks  |
9. Select Copy Code next to the option you prefer.

10. Paste the code into a Notepad file and send this to your website designer.
Tip: Adding the intake form code to your website is outside the scope of triConvey Support. Please reach out to whoever manages your website's theme to implement this on your website.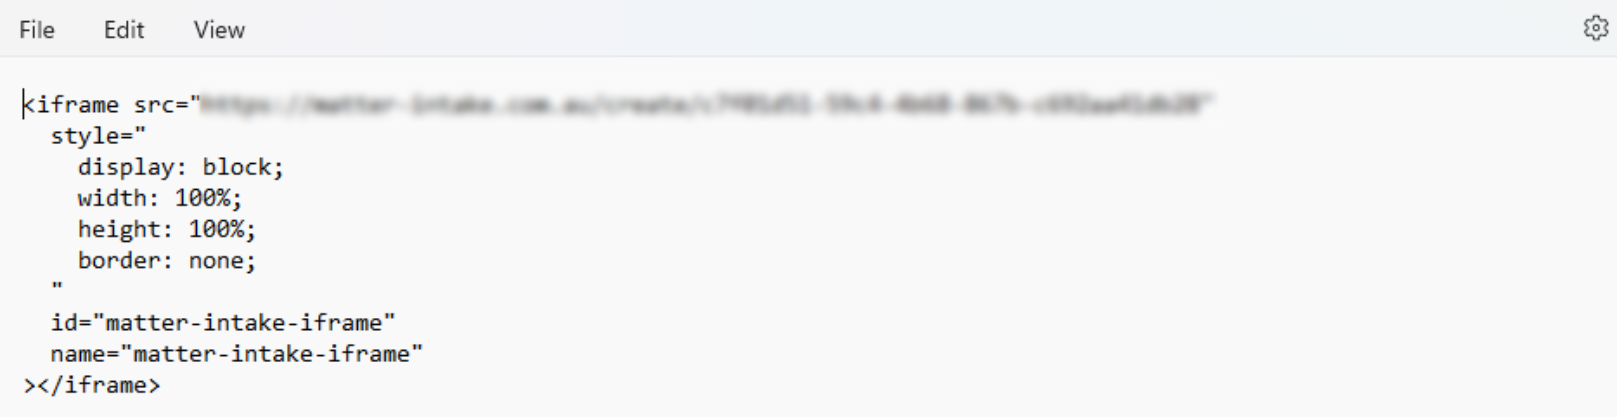
Once this is on your website, prospective leads simply need to fill out the form, and you will receive these responses in triConvey.
Create a custom Lead Intake Form
You can easily create a Lead Intake Form with the fields of your choice. Refer to the Create a custom Intake Form article for more information on how to set this up.
Generate a link or QR code from the Form Builder
An alternative way to access all the settings outlined above is via the Form Builder.
1. Open your custom Lead Intake form in the Form Builder.
2. Select the Share tab at the top of the screen.
3. Select Create Link and QR Code.

4. Enter an internal name for the link (e.g. Website, Signature) for staff to easily recognise. Then, use the drop-down menu to select the staff members who will be notified when a prospect completes the form. If you have a Google Analytics Measurement ID, enter this in the Analytics Tracking section.
5. Select Create Link and QR Code.
6. The link will be listed in the Share tab. Click on Share next to the link you would like to share to see the different sharing options available.
- Copy Link copies the URL to this form to your clipboard.
- Copy Code: to Embed on Website copies the HTML code to embed this form on your website.
- Copy Code: "Contact Us" Button copies the HTML code to embed this form in a button that you can add to your website.

- View QR Code opens a window where you can save the QR code image of this form to your PC.


Copy an existing link or QR code or view forms with links attached
If you need to access the link or QR code at a later time, you can do so from the list of Intake Forms.
1. Navigate to your list of Intake Forms:
- From the triConvey Desktop App, select File from the top-left corner of triConvey, then select Intake Forms.
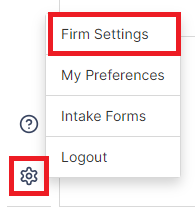
- From the triConvey Companion Site Web App, select the gear icon, then select Intake Forms.
2. Lead Intake Forms with existing links generated will have a globe icon displayed under the Form Type.
3. Find the Lead Intake Form you wish to share, then select the three dots icon next to it.
4. Select the relevant Copy option or View QR Code under Web Enquiry Link Actions.
View submitted forms for a matter

To add or remove staff members who get these notifications:
1. Select the gear icon from the top-right corner of the triConvey Desktop App.
2. Select Intake Forms.

3. Select the three dots icon next to the form name and click Change Settings.

4. Under the Staff drop-down menu, select or deselect staff members.

5. Click Update to save changes.
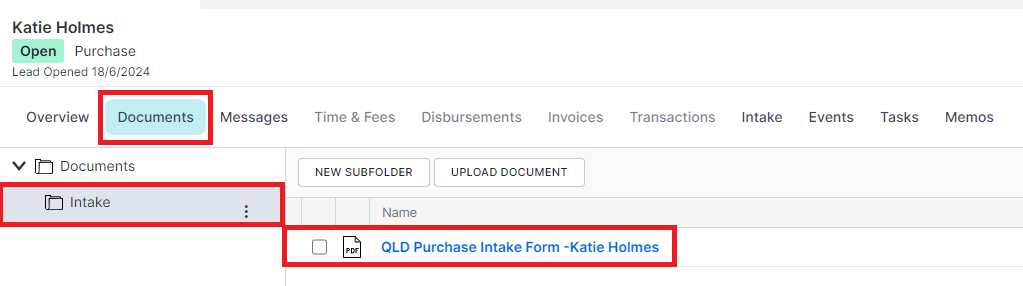
When you click on the Lead file in triConvey, the lead contact card is automatically created and populated with the lead's contact information. A copy of the lead intake form can be found in the Intake folder within the matter files.


To add or remove staff members who should receive these notifications:
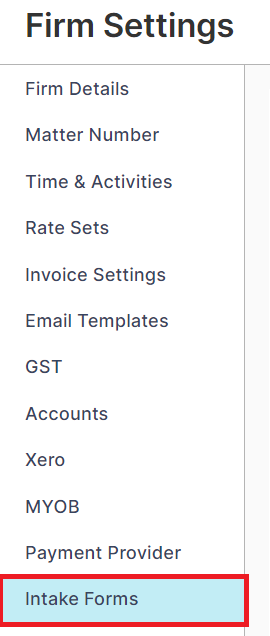
1. Open Firm Settings and then select Intake Forms.
2. Select the three dots icon next to the form name and click Change Settings.

3. Under the Staff drop-down menu, select or deselect staff members.

4. Click Update to save changes.
When you click on the Lead file, the lead contact card is automatically created and populated with the lead's contact information. A copy of the lead intake form can be found in the Intake folder within the matter files.
View submitted forms across all matters
To view all web enquiries shared across all matters, along with their progress, click on Intake from the left menu on either the triConvey Desktop App or Web App.
Desktop App view

Web App view

Send a follow-up form
You can request more information from the lead before you decide to take them on as a client.
Tip: Not all matter types contain follow-up forms.1. To send a follow-up to the web enquiry open the lead file and select the Intake tab from either:
- the triConvey Desktop App; or

- the triConvey Companion Site Web App.

2. Select Share Form.
Tip: The Lead's contact details are automatically populated.
3. Select the type of form you wish to send from the Forms drop-down menu (if applicable).
4. Select the Client Portal toggle if you wish to send the form via Messages or the Email toggle if you wish to send the form as an email.
5. Select the Custom Field icon within the Message section to insert specific fields from your matter into the message.
Tip: This message can be customised for all matters in Firm Settings > Intake > Client Messages.
6. Once you are ready to send this form to the lead, select Share to share as a Client Portal message or click the Open Email button if sending the form via email.
Was this article helpful?
That’s Great!
Thank you for your feedback
Sorry! We couldn't be helpful
Thank you for your feedback
Feedback sent
We appreciate your effort and will try to fix the article