triConvey's calendar syncs directly with Outlook. Every event created in Outlook will appear in triConvey and every event entered in triConvey will appear in Outlook. triConvey also will add calendar events to Activity Intelligence.
Table of Contents
- Getting Started
- Create Events in triConvey Desktop App
- Create Events in triConvey Companion Site Web App
- Create an event that is not linked to a matter
Getting Started
The best practice is to create calendar events from a specific matter. Each matter has an Events tab that includes previous and upcoming events in relation to a specific matter. You can create events on the triConvey Desktop App or triConvey Companion Site web app.
Create Events in triConvey Desktop App
Creating a calendar event in the triConvey Desktop App is very similar to Outlook where you can enter location, time, reminders, comments, etc.
1. Select Events from the Matter Action Bar.
2. Create a calendar event by entering the Location, Start date, End date, Reminders and Comments.

Set Reminders
You can also add multiple reminders for one or more users. The reminder will come through in a separate window to the main triConvey application where users will be able to snooze or dismiss them.

You can also create calendar events from the triConvey Home Dashboard Action Bar but make sure you assign an appropriate matter (if applicable).

You can check for any reminders by clicking on the bell icon on triConvey Home Dashboard.

Create from Critical Dates
On various layouts in triConvey where you enter Critical Dates, there will also be a Create Events or Update Events button.
Clicking on this button will allow you to create events and any selected calendars.

You may find a Group Calendar useful to add events to, such as Court Dates or Settlements. Learn how to create a Group Calendar.
Create Events in triConvey Companion Site Web App
It is best practice to create a calendar event from within a matter when you're in the Web App:
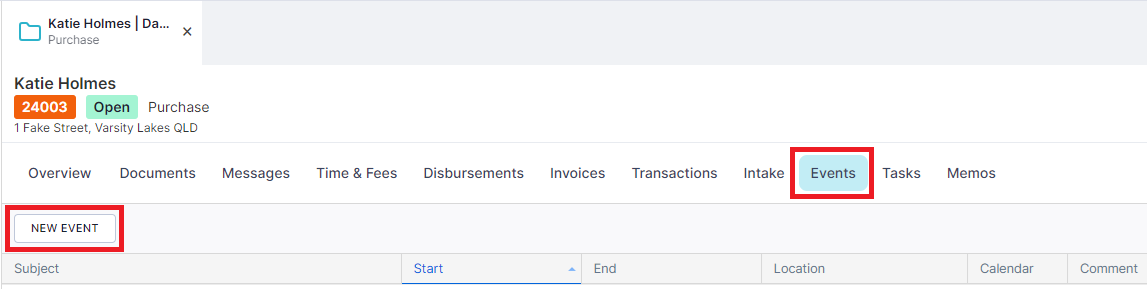
1. Open a Matter and select the Events tab.
2. Select New Event.
- Use the toggles to make an event Recurring or All Day.
- You must enter a Subject, Start date, End date and Attendees.
4. Select Save. You can also select Save & New if you wish to create consecutive events. 
Create an event that is not linked to a matter
It is also possible to create a general calendar event that is not linked to a specific matter:
1. Select Calendar from the left panel.
2. Select New Event.
Desktop App display
Web App display

3. Enter information in the pop-up window.
Tip: Unlike creating the event in a matter, the Matter field will appear as a blank field.
4. Select Save. You can also select Save & New if you wish to create consecutive events.
Was this article helpful?
That’s Great!
Thank you for your feedback
Sorry! We couldn't be helpful
Thank you for your feedback
Feedback sent
We appreciate your effort and will try to fix the article