triConvey offers Two-Factor Authentication (2FA) for increased security and peace of mind. Two-factor Authentication is the method for users to add additional security to their account by requiring two separate, distinct forms of identification in order to access your account.
Table of Contents
- Getting Started
- Setting Up 2FA
- Navigating the triConvey Security Site
- Setting up 2FA on an Authenticator App
- Setting up 2FA on a browser extension authenticator
- Setting up 2FA Rescue
- What to expect after setting up 2FA
- triConvey is not accepting my code
- Recovering your 2FA
- Important notes regarding triConvey account security
- Frequently Asked Questions
2FA Becomes Mandatory on 31 October 2025

Two Factor Authentication (2FA) will be required to log in to triConvey from 31 October 2025 onward.  Follow the steps in this article to set up 2FA.
Getting Started
The individual user must enable Two Factor Authentication for themselves only.
Setting Up 2FA
To get started with setting up 2FA, log in to the triConvey Security Site https://security.smokeball.com.au/MFA?BrandName=triConvey
Alternatively, you can access the Security Site from with triConvey from either the Desktop App or the Companion Site Web App.
2. Select Staff & Users and double-click on the staff member's name.
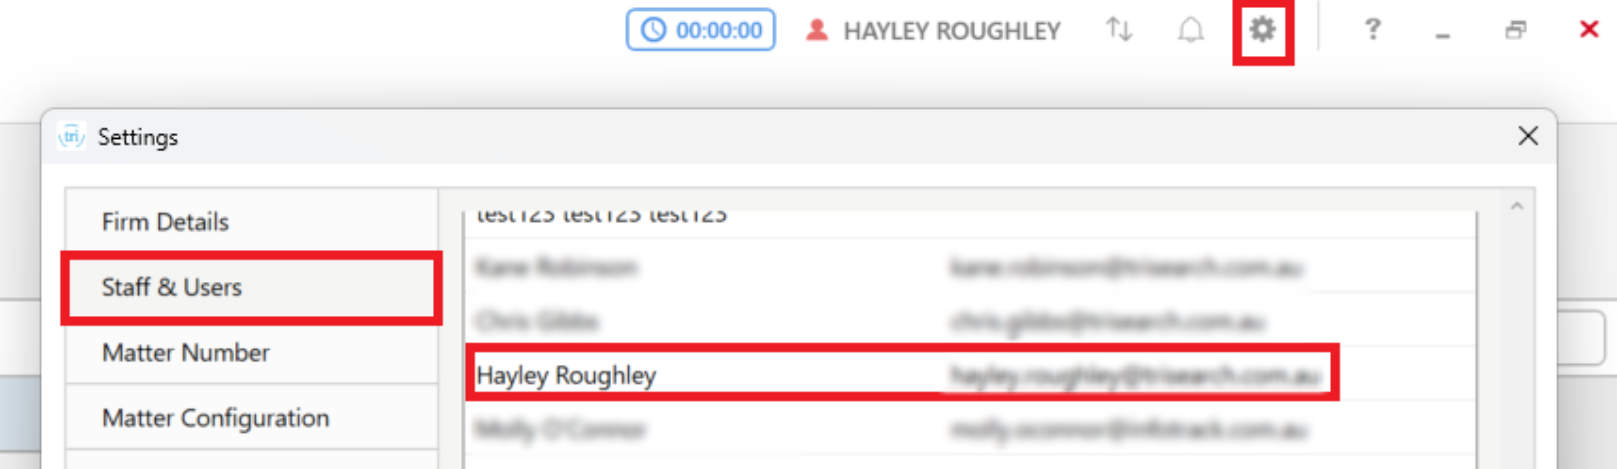
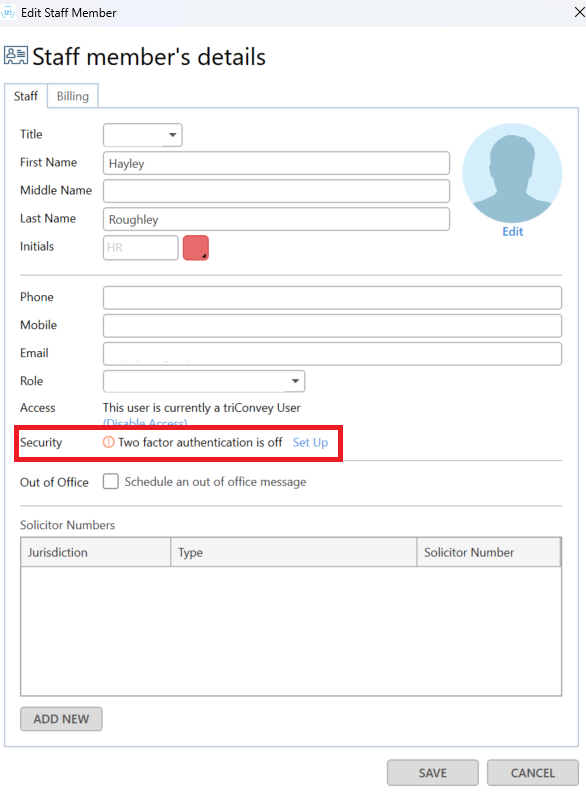
3. In the Edit Staff Member window, scroll down to the Security section and click Set up.
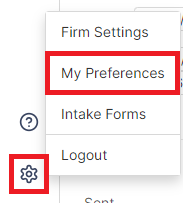
2. Select My Preferences.
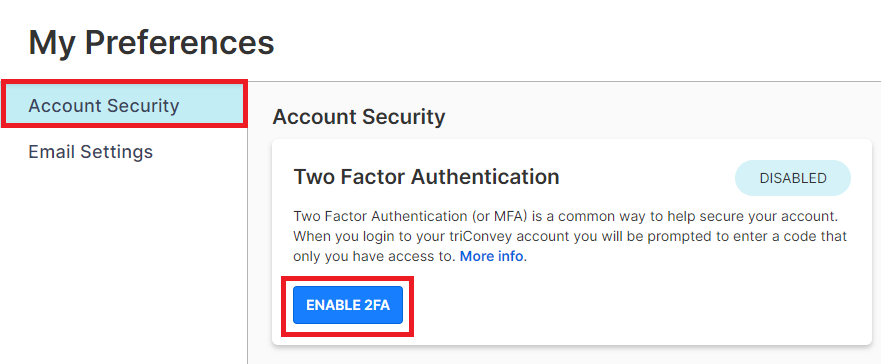
3. From Account Security, select Enable 2FA.
Navigating the triConvey Security Site
1. Enter your triConvey password.
2. Follow the prompts in the 2FA setup wizard.
3. Choose between your preferred method for 2FA, either Authenticator App or Browser extension authenticator.
4. Select Next.
Setting up 2FA on an Authenticator App
You will be presented with some QR codes to download Google Authenticator for your device. Select Next if you already have an Authenticator app installed on your device.
You are not restricted to only Google Authenticator - other Authenticator apps such as Microsoft Authenticator will work too.
On your Authenticator app, choose the option to Scan a QR code. Point your device at the QR code on the screen, then select Next.
 |  |
Enter the code displayed in your Authenticator app. Be quick, as the code will change to a new one after a short period.
Select Verify. If successful, you have completed setting up 2FA on your device. Continue the wizard to set up a Rescue Method.
Setting up 2FA on a browser extension authenticator
You will then be presented with some links to search for Authenticator browser extensions for your preferred browser.
You are not restricted to only the named Authenticator extensions - other Authenticator extensions will work too.
Copy and paste the setup key into your extension, then select Next.
Enter the code displayed in your Authenticator extension. Be quick, as the code will change to a new one after a short period.
Select Verify. If successful, you have completed setting up 2FA on your browser extension authenticator. Continue the wizard to set up a Rescue Method.
Setting up 2FA Rescue
Setting up a 2FA rescue method is mandatory in case you ever need to reset your authentication. You must set up at least one of the following methods:
- Recovery phone number
- Rescue code

Setting up your 2FA Recovery Phone Number
1. Tick Recovery phone number.
2. Enter your phone number in the field and select Add.
3. You will receive an SMS text with a confirmation code. Enter the code and press submit.
4. Select Edit if you need to change the phone number, or Resend code to receive a new confirmation code.
5. You have now completed 2FA setup. You may also set up the rescue code recovery method, or select finish to complete the wizard.
Setting up your 2FA Recovery Rescue Code
The rescue code is another method for 2FA that can be used to recover and reset your 2FA account. Copy and save your rescue code in a secure location. You will not get another chance to see this code.
When you select I've saved my code, you will get a confirmation to double-check you have saved the code in a secure location. Select Yes, it’s safe to complete setting the Rescue Code recovery method.
You have now completed 2FA setup. You may also set up the phone number recovery method, or select finish to complete the wizard.
What to expect after setting up 2FA
Once Two Factor Authentication has been enabled, you will now be required to verify yourself each time you log in to triConvey (via desktop, billing or mobile).
 |  |
2FA will only be required when you are logged out of triConvey. You will still be able to close and reopen triConvey as normal without needing to log in.
triConvey is not accepting my code
If you are frequently experiencing an "Invalid Code" error when entering your verification code, ensure that the time on your mobile device and Windows/Mac device is in sync with global time. 2FA is sensitive to time differences, even by a few seconds.
Recovering your 2FA
If you have lost access to your Authenticator App or browser extension authenticator, follow the steps below to reset your 2FA.
1. On 2FA code entry, select Need help?
2. Select your preferred recovery method. If you have only set up one method, you will be taken straight through to that method for recovery.
- If you have set up a recovery phone number, we will send an SMS with a recovery code to the number you set up 2FA with.

- Enter the code and select Verify. You will see the below confirmation message once complete. You must now proceed to set up your 2FA again before you can access triConvey.

- If you have set up a rescue code, enter it into the text box.

- Select Verify. You will see the below confirmation message once complete. You must now proceed to set up your 2FA again before you can access triConvey.

Important notes regarding triConvey account security
- You must enable 2FA for yourself only.
- View which users have 2FA enabled by checking the additional column in their Staff and Users tab in Settings.

Frequently Asked Questions
Was this article helpful?
That’s Great!
Thank you for your feedback
Sorry! We couldn't be helpful
Thank you for your feedback
Feedback sent
We appreciate your effort and will try to fix the article