To remove a user from triConvey, follow these steps to ensure the offboarding process is as smooth as possible.
Table of Contents
- Step 1: Reassign tasks
- Step 2: Reassign workflows
- Step 3: Reassign events
- Step 4: Remove the staff member from document containers
- Step 5: Remove the staff member from automated documents
- Step 6: Review matter billing rates
- Step 7: Review matters and leads
- Step 8 (if applicable): Remove user signature from invoices
- Step 9: Review activity codes
- Step 10: Review Messages
- Next steps
Step 1: Reassign tasks
Note: If you are reassigning all of the offboarding staff member's tasks to one staff member, you can utilise the bulk reassign function in the offboarding staff member's card.Tasks that are assigned to the staff member being removed will need to be reassigned to another staff member.
1. Select Tasks from the left panel of the triConvey Home Dashboard.
2. Select the staff member being removed from the Assignees list.
Tip: If it is linked to a workflow, select Unlink before reassigning.
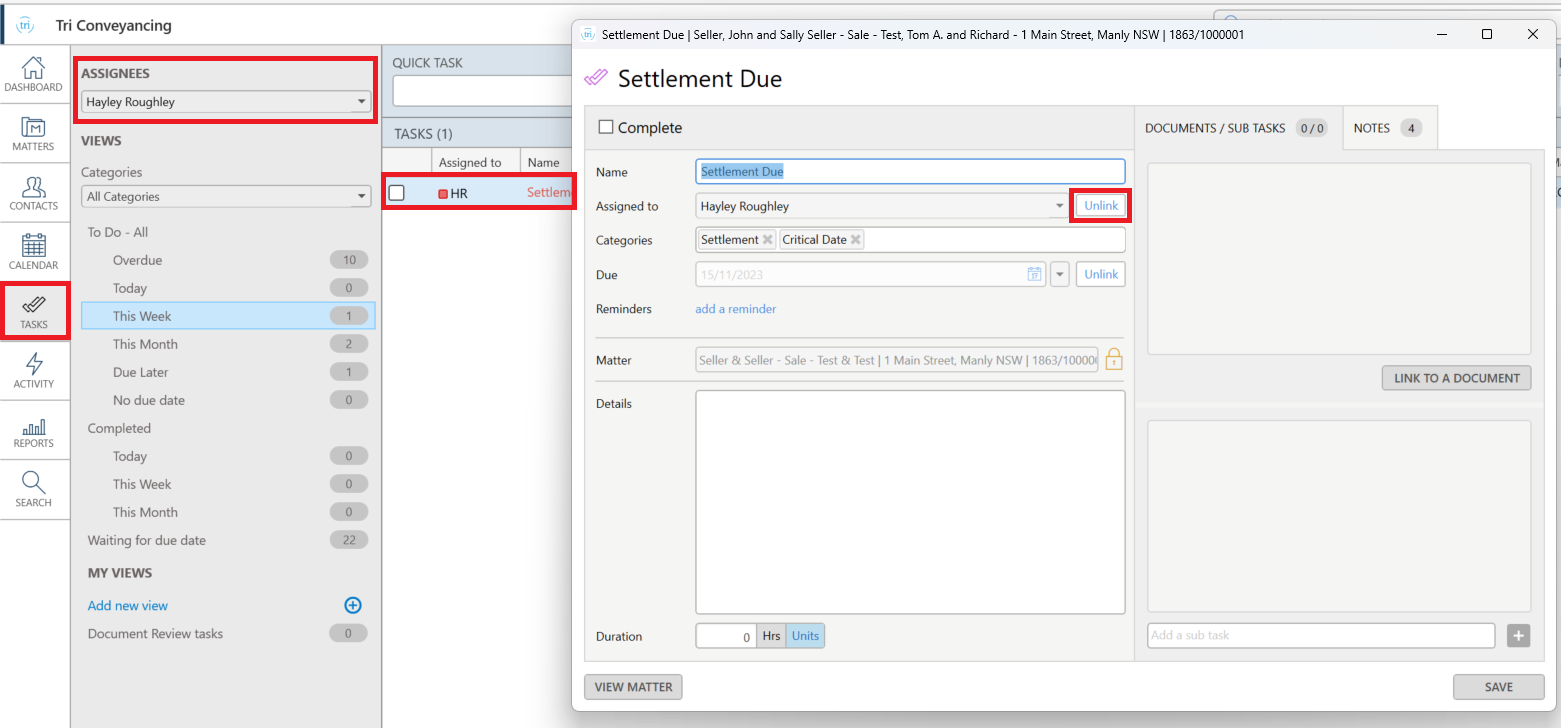
4. Repeat for all tasks assigned to this staff member.
Step 2: Reassign workflows
Note: If you are reassigning all of the offboarding staff member's workflows to one staff member, you can utilise the bulk reassign function in the offboarding staff member's card.1. Select the gear icon from the top right corner of the triConvey Desktop App.
2. Select Workflows.

3. Double-click an individual workflow to open it.
4. Check the Assign to field under each task in the workflow. If the staff member being removed is listed under Staff, reassign the task to another staff member.

5. If applicable, remove any references to the user from the workflow’s Details section.

6. Select Save & Close.
7. Repeat this process for each workflow that the staff member being removed has tasks assigned to.
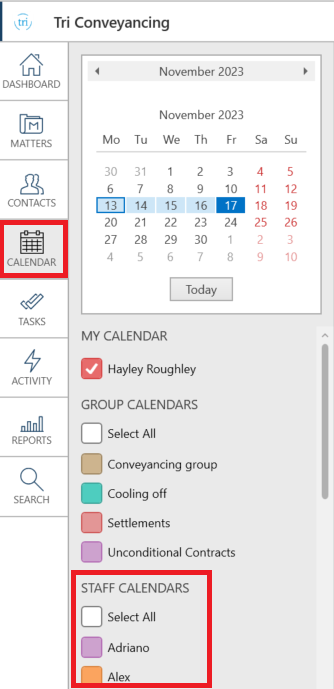
Step 3: Reassign events
Note: If you are reassigning all of the offboarding staff member's events to one staff member, you can utilise the bulk reassign function in the offboarding staff member's card.1. Select Calendar from the left panel of the triConvey Home Dashboard.
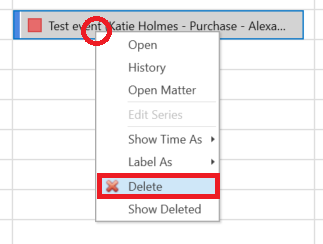
3. Right-click on the event and select Delete, or choose Open and assign it to a new user using the Staff drop-down menu.
Step 4: Remove the staff member from document containers
Remove the user from your firm’s logo and signature block
1. Select the gear icon from the top right corner of the triConvey Desktop App.
2. Select Document Containers.
3. Right-click on a container and select Modify.

4. This will open the container/form in Microsoft Word, and you must remove user fields within the document. Learn more about modifying containers.
5. Repeat for all applicable document containers.
Step 5: Remove the staff member from automated documents
1. Open a Matter from the triConvey Desktop App.
2. Select Precedent from the Matter Action Bar.

3. Right-click on a form, the staff member being removed worked on, and then select Modify to open the document and make corrections. Learn more about automation.
Step 6: Review matter billing rates
1. In the triConvey Desktop App, open each matter assigned to the staff member being removed.
2. Double-click on Info under Matter Details.
3. Select the Billing tab.
4. Remove any staff rate overrides and then select OK. 
5. Return to the triConvey Home Dashboard and select the gear icon from the top right corner.
6. Select Time & Billing and then select the Rate Sets tab.
7. Double-click on an applicable Rate Set.
8. Remove the user's name from the current and future rate set tables and then click Save. 
Step 7: Review matters and leads
If the user is listed as the Person Responsible or Person Assisting on a matter or lead, reassign them to another staff member.
Note: If you are reassigning all of the offboarding staff member's matters or leads to one staff member, you can utilise the bulk reassign function in the offboarding staff member's card.To view a list of matters associated with the user:
1. Filter the Matter View with their name in the Person Responsible drop-down menu under All Statuses.
2. Clear the Person Responsible field and then select the user's name under the Staff drop-down menu. 
3. Repeat the above steps for all leads in your firm. 
Step 8 (if applicable): Remove user signature from invoices
1. From the triConvey Companion Site Web App, select the gear icon from the bottom-left corner.

2. Select Firm Settings and then select Invoice Settings.
3. Select a template with the staff member's signature and then select the PDF Invoices tab.

5. Delete the signature image file and remove the user's name from the Signature Name field.
6. Repeat the above steps for other templates as needed.
Step 9: Review activity codes
1. Select the gear icon from the top right corner of the triConvey Desktop App.

2. Select Time & Billing.
3. Scroll down to the Activities table.
4. Check for any custom activity codes specific to the user and double-click on these codes to modify them.
5. You can also right-click on the code and select Delete Activity to remove it.

Step 10: Review Messages
You can set the staff member as Former Staff. When doing so, you will be prompted to assign their Messages to another staff member.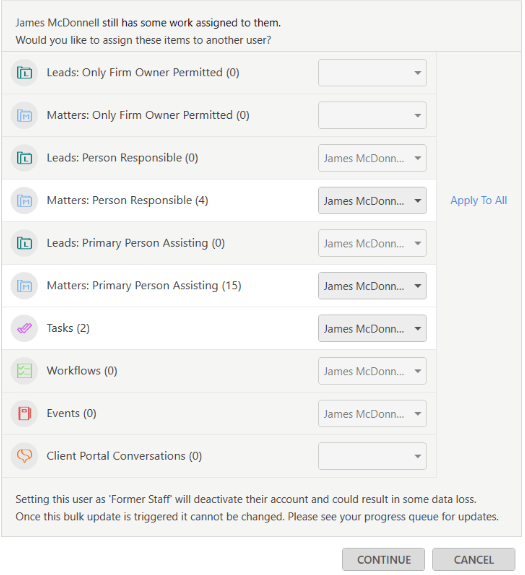
Next steps
Verify completing all these steps by reviewing the following reports:
- Matter - Full List
- Lead - Full List
- Event List
Was this article helpful?
That’s Great!
Thank you for your feedback
Sorry! We couldn't be helpful
Thank you for your feedback
Feedback sent
We appreciate your effort and will try to fix the article