

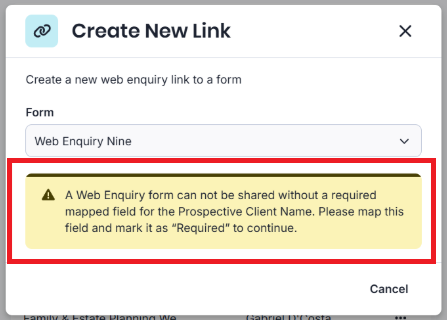
Use this article to troubleshoot the below error message that appears when a custom intake form does not have properly mapped fields.
Table of Contents
- The form has existing fields to record First Name and/or Last Name
- The form does not have fields set up to collect First Name and/or Last Name
Firstly, open the affected form in the Form Builder:
1. From the triConvey Desktop App, select File from the top left corner.
2. Select Intake Forms. 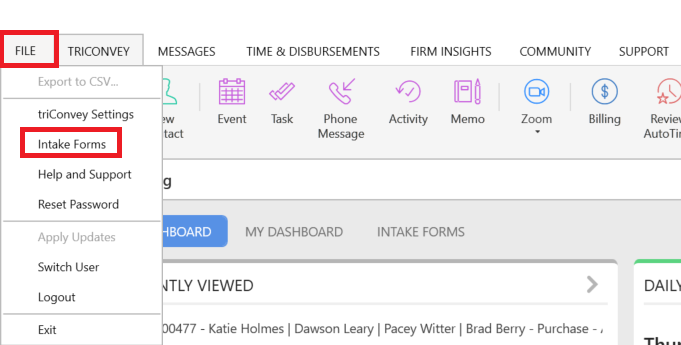
3. Click on the affected Lead form to open it in the Form Builder.
This error message appears because the form does not have a Mapped field component that points to Prospective Client > Person > First Name and/or Prospective Client > Person > Last Name. Refer to the steps below that best describe your current situation:
- The form has existing fields to record First Name and/or Last Name
- The form does not have fields set up to collect First Name and/or Last Name
The form has existing fields to record First Name and/or Last Name
If you already have components in the form for First and Last Name, they may have been added as Short answer components instead of Mapped field components. To convert it into a Mapped field:
1. Click on the component type on the bottom-left corner of the component and select Mapped fields.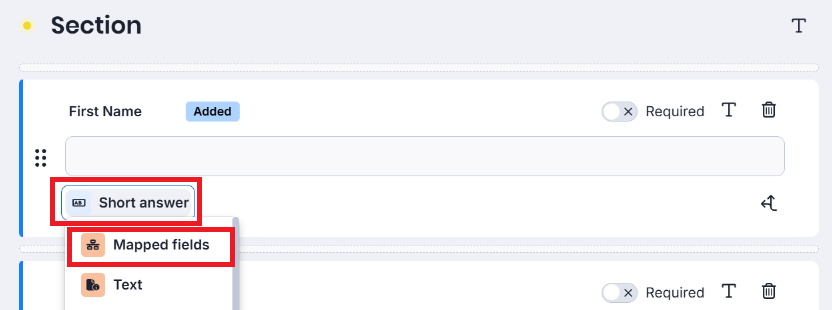
2. Click on Prospective Client, then click on Person. Tick First Name or Last Name (whichever is relevant for your component), then select Update field.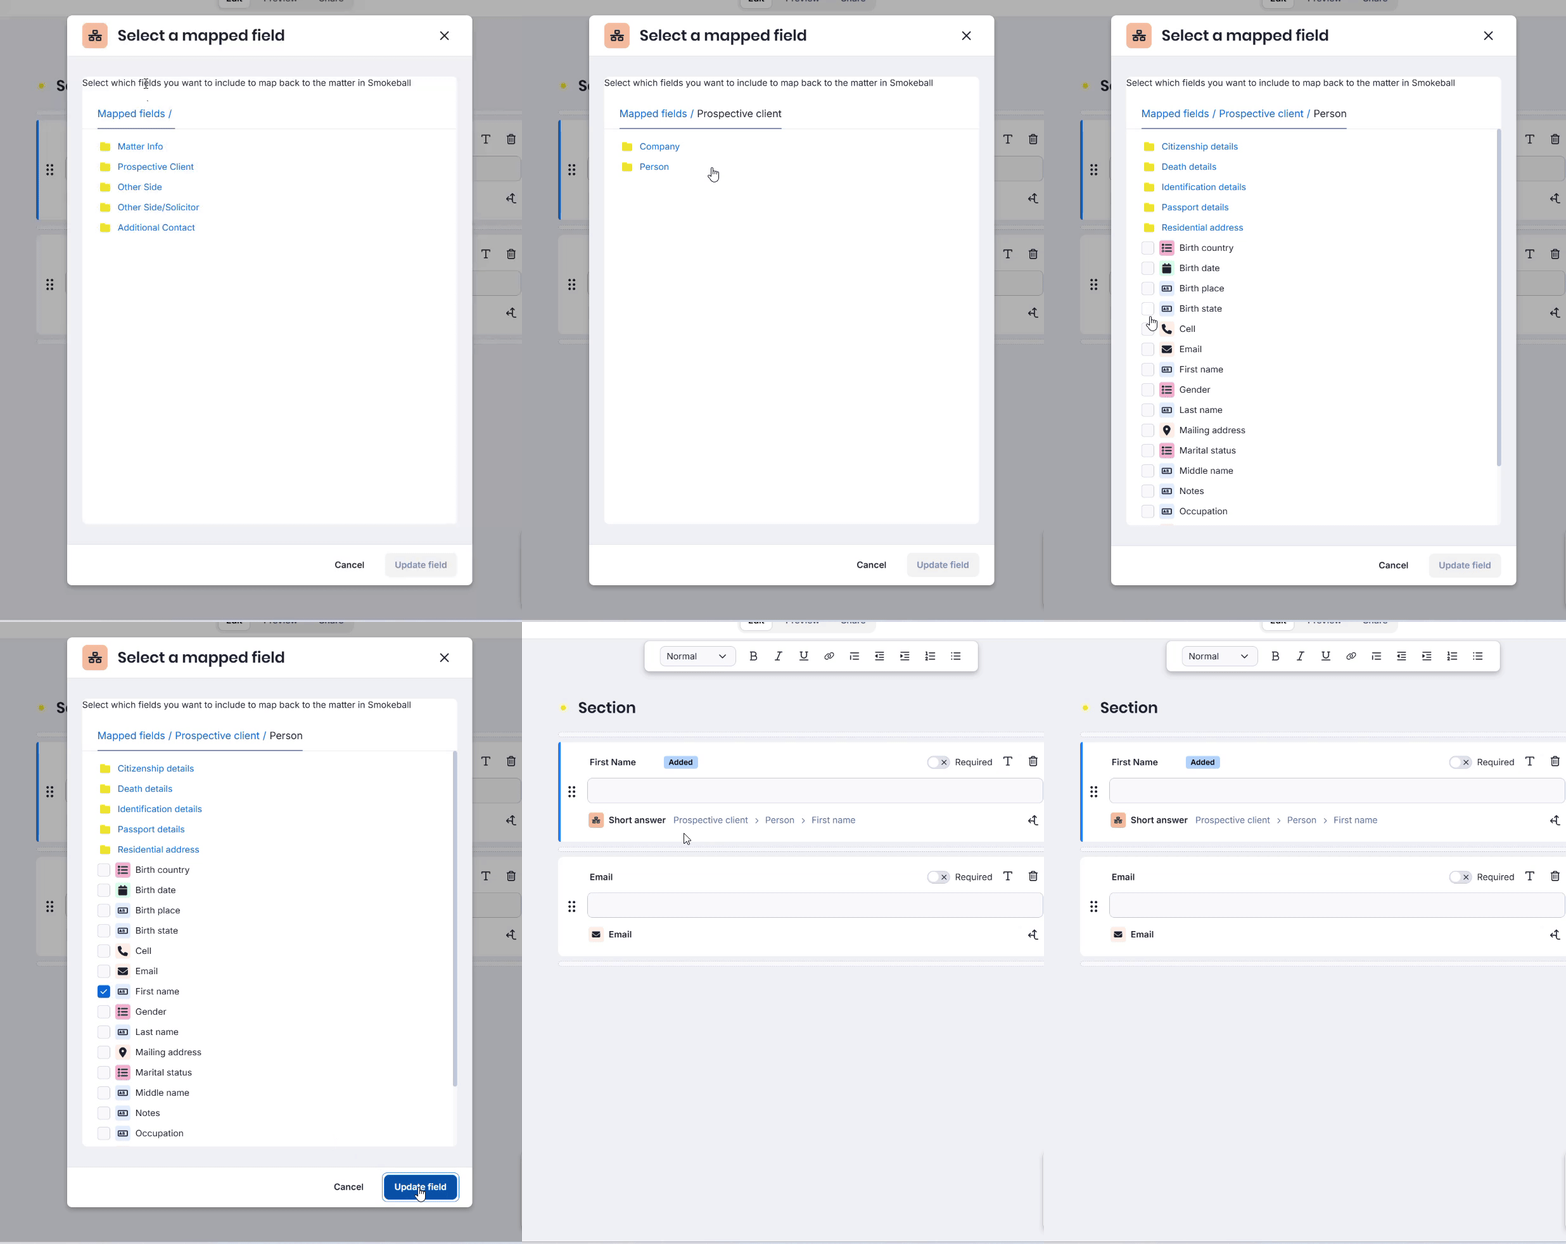
3. Toggle on Required on the top-right corner of the component, if it isn't already on.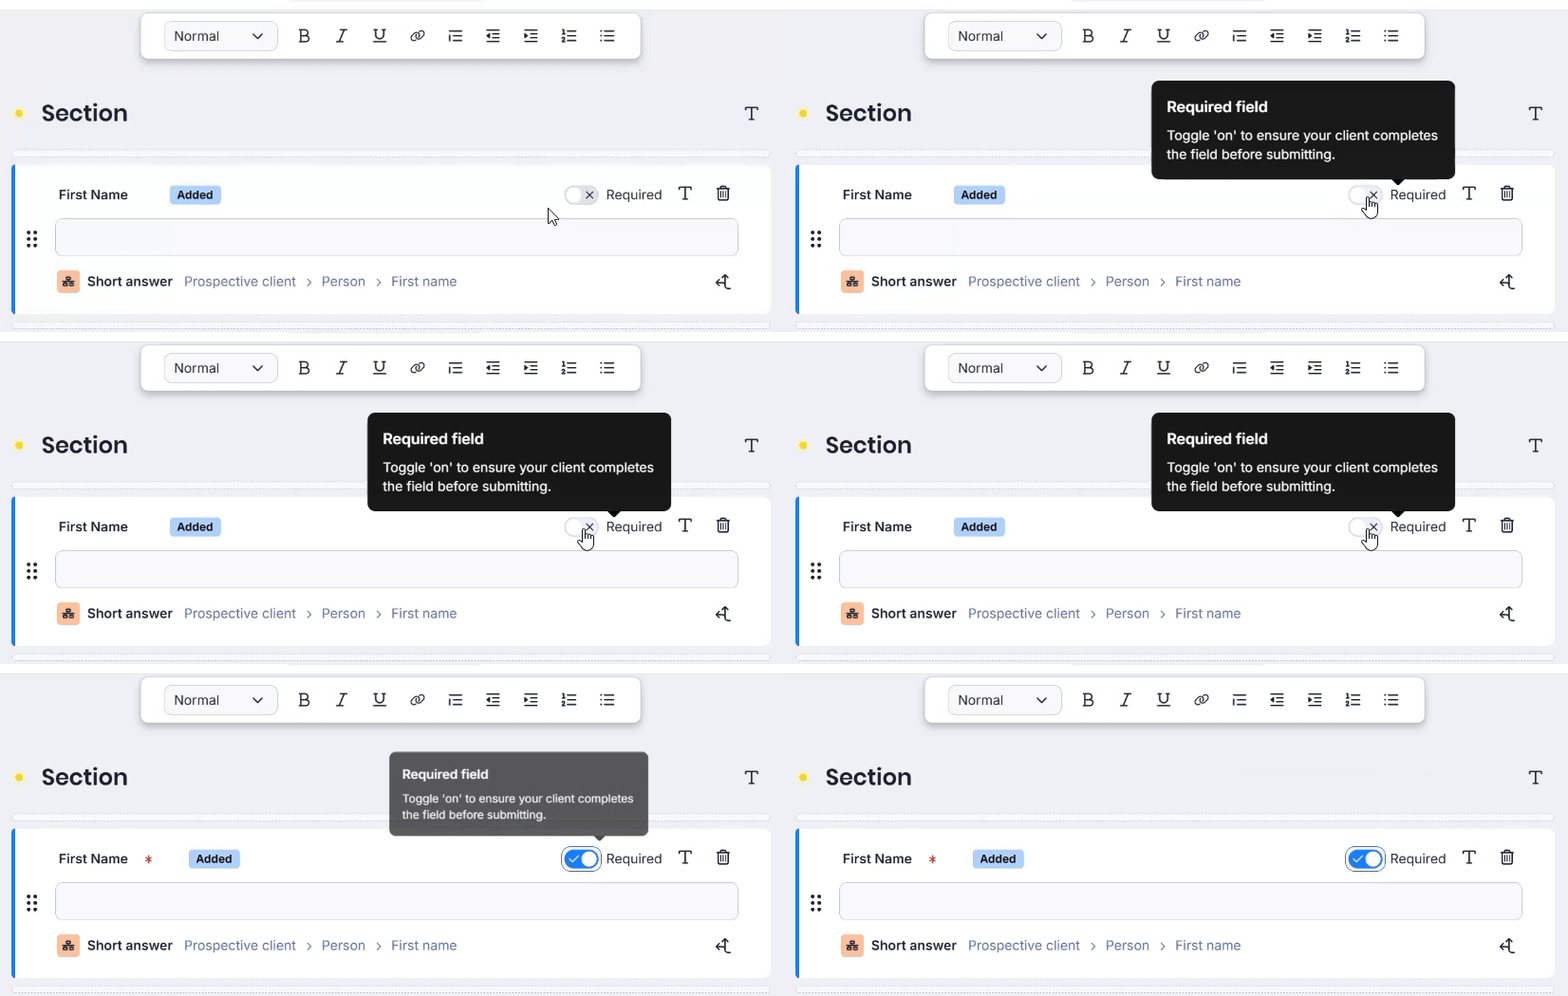
4. If you also have a Last Name component added as a Short answer component, repeat the steps above to convert it into a Mapped field and select Prospective client > Person > Last Name.
The form does not have fields set up to collect First Name and/or Last Name
With Lead Type Intake Forms, you must have, at a minimum, either the Prospective Client > Person > First Name or Prospective Client > Person > Last Name as components in the form in order for it to record the form respondent as a contact in triConvey. To add a component:
1. In the Form Builder, drag the Mapped fields component from the right-hand panel into the form.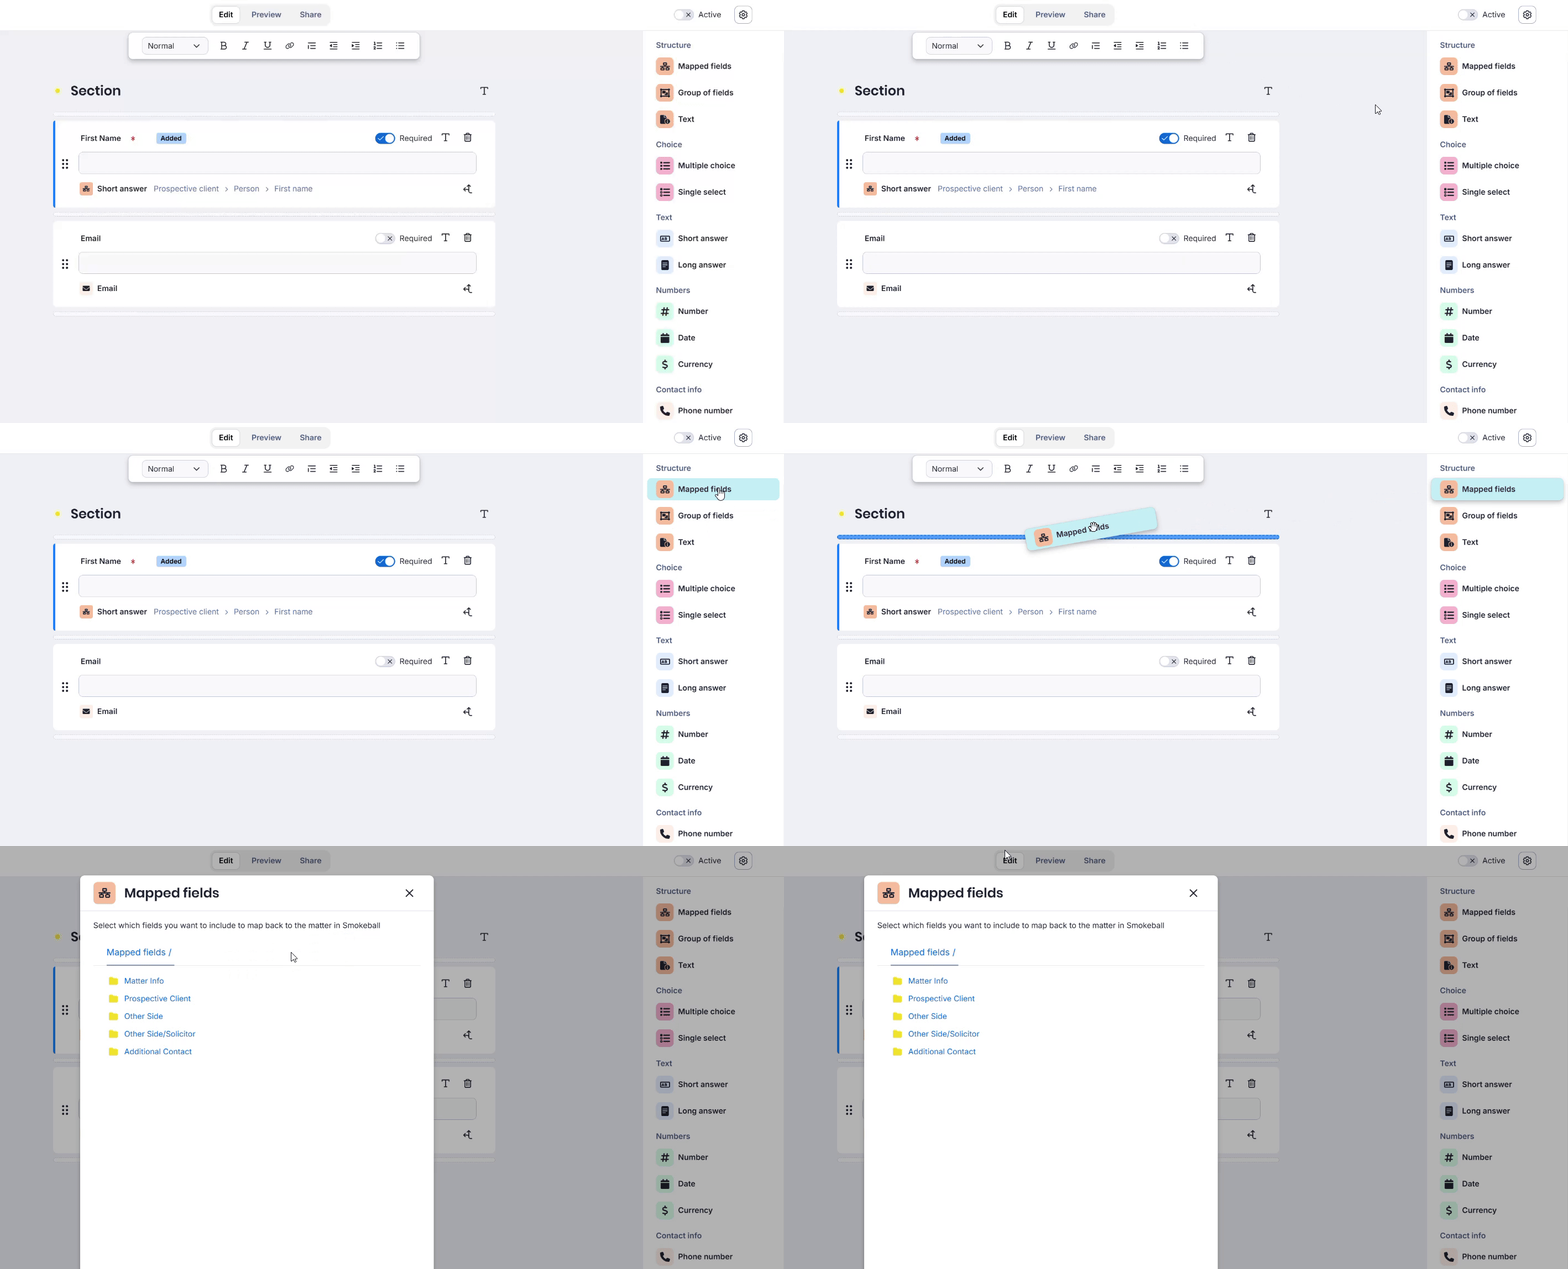
2. Click Prospective Client > Person and tick First Name or Last Name from the list.
3. Select Confirm. 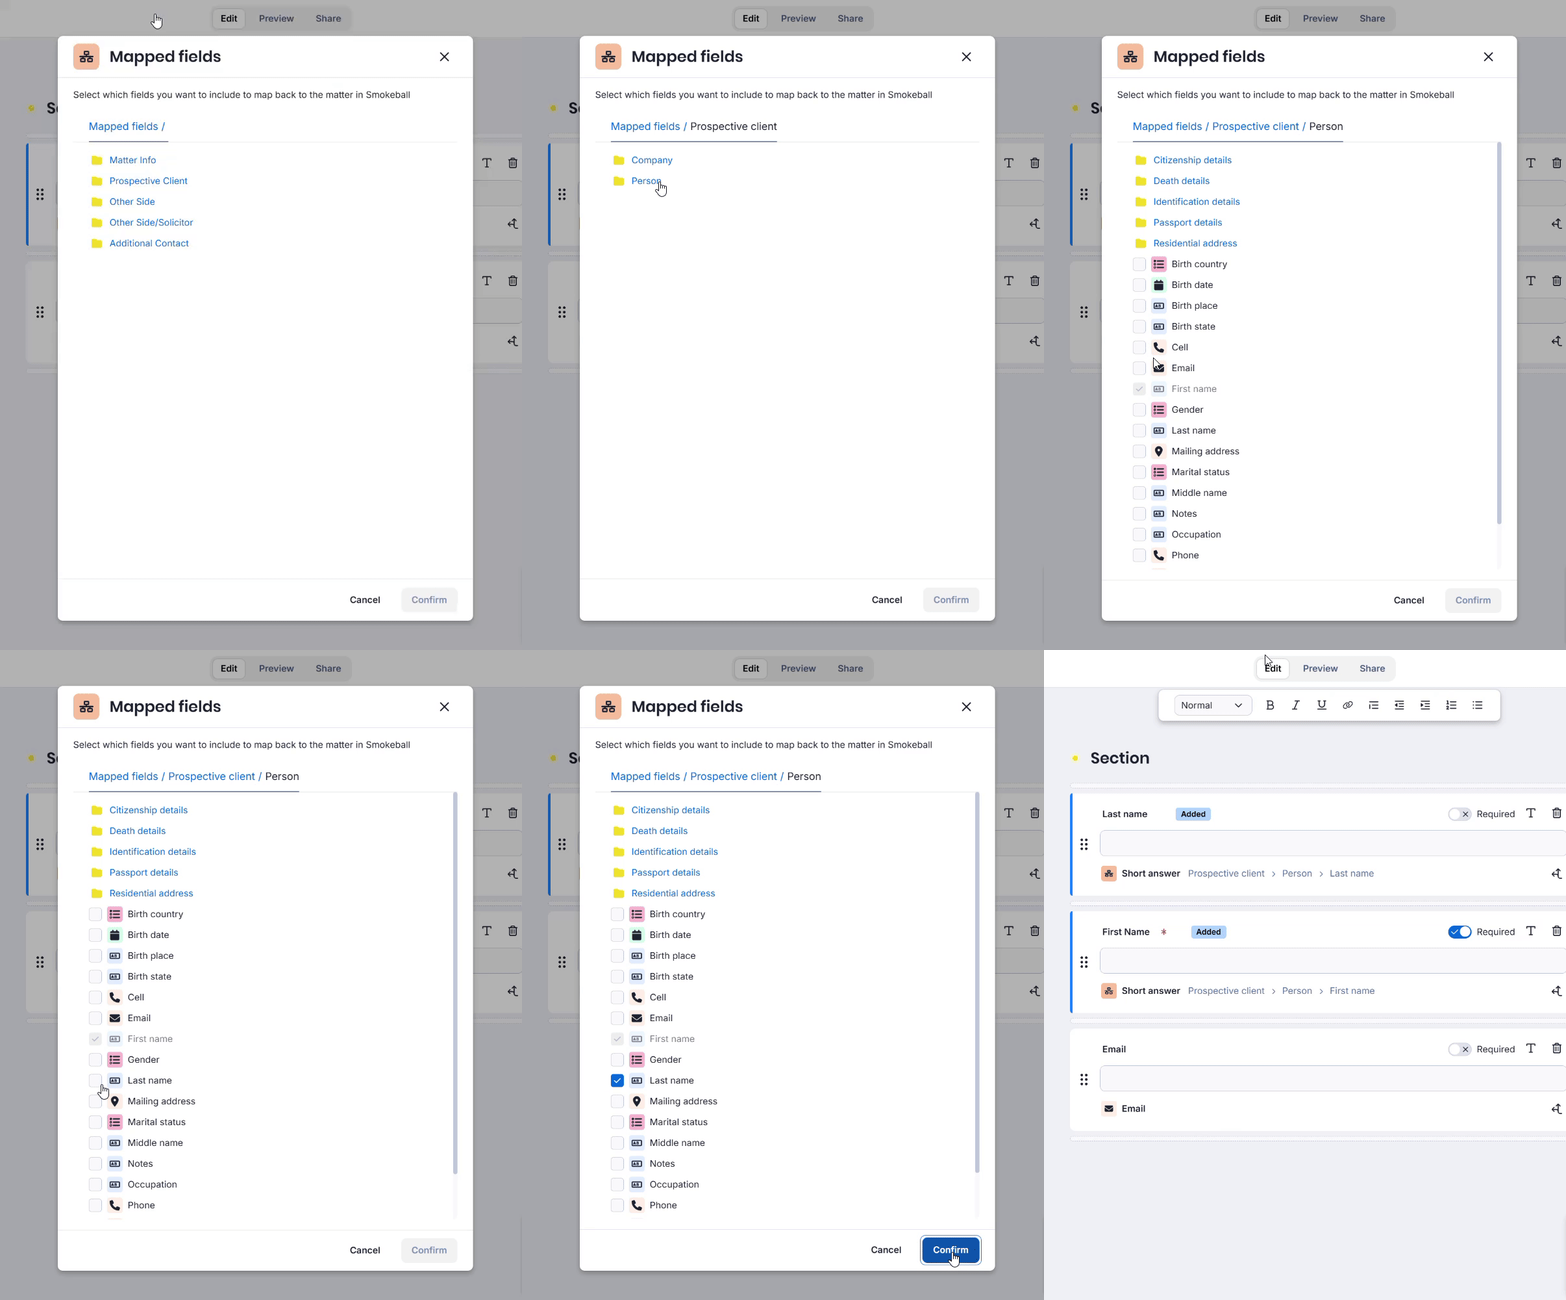
4. Toggle on Required on the top-right corner of the component.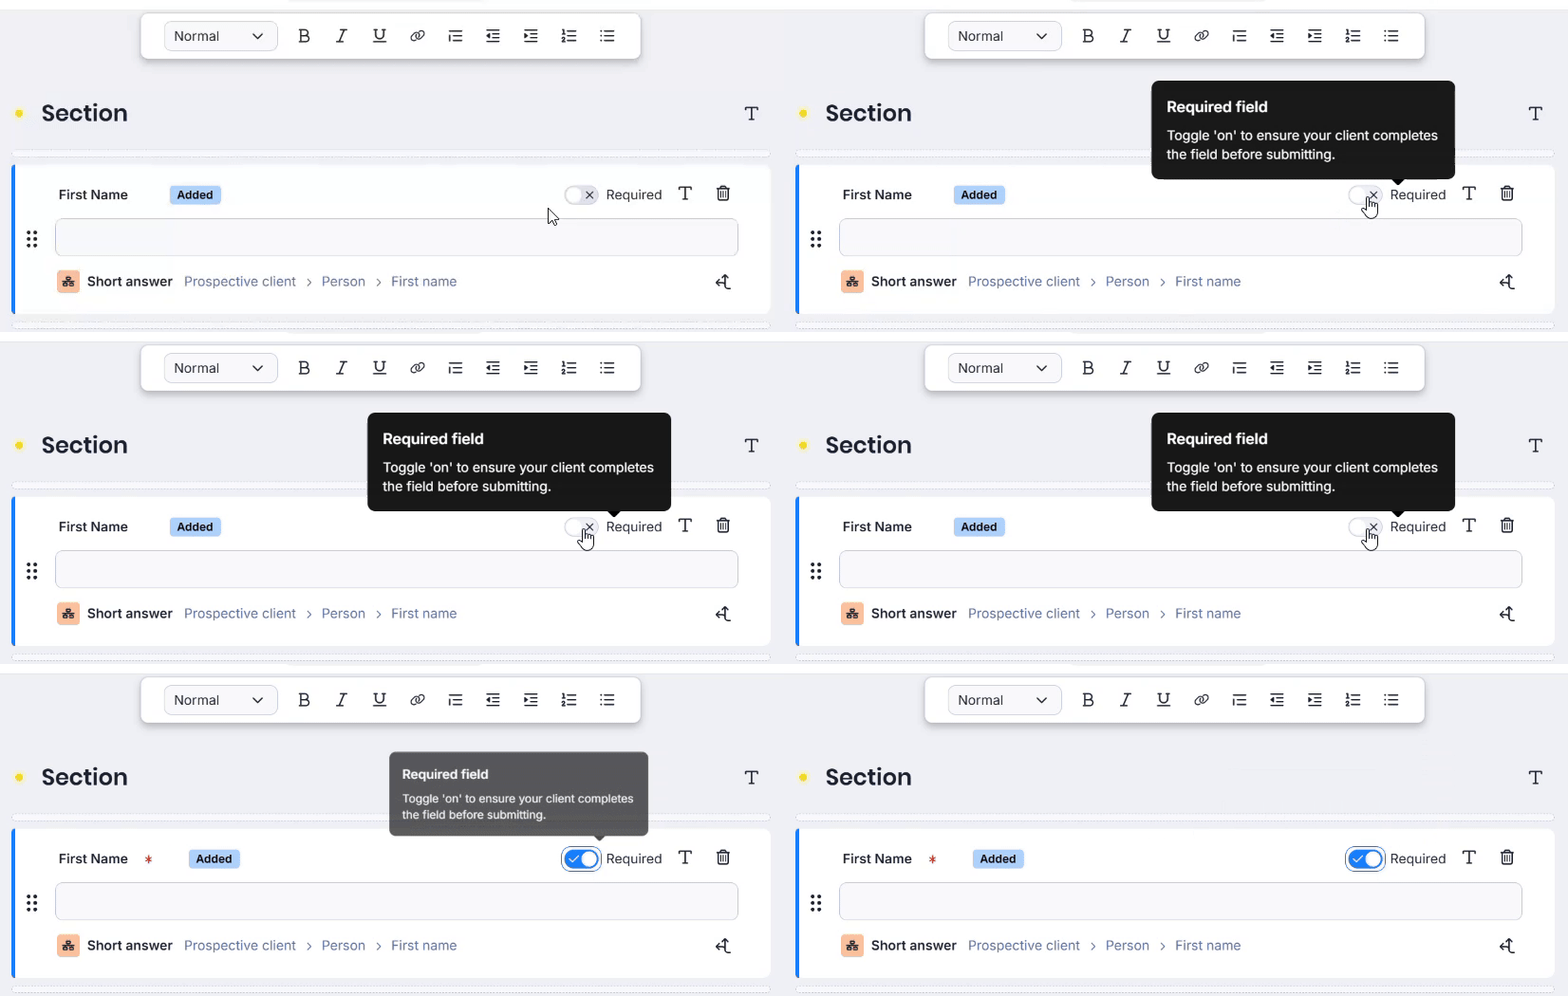
5. Repeat the above steps to add a Last Name or First Name (optional).
Was this article helpful?
That’s Great!
Thank you for your feedback
Sorry! We couldn't be helpful
Thank you for your feedback
Feedback sent
We appreciate your effort and will try to fix the article