

Learn how to create leads on the triConvey Mobile App, allowing you to capture new enquiries directly from your mobile device.
Table of Contents
Getting Started
The screenshots in this article are of the iOS App version of the Mobile App. Label names and locations of buttons may differ on the Android (Google Play) App.
Creating a Lead
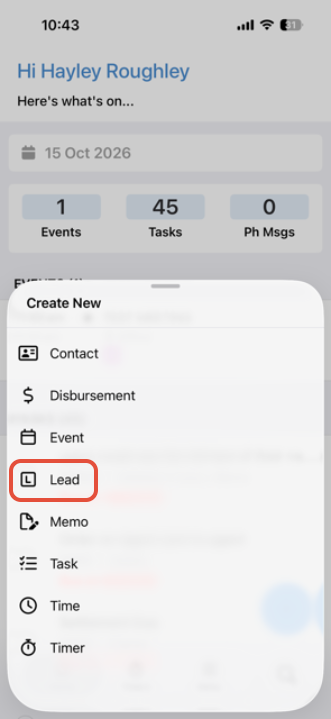
1. Select the Plus + icon on the bottom-right of the screen and then select Lead.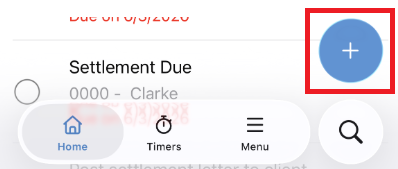
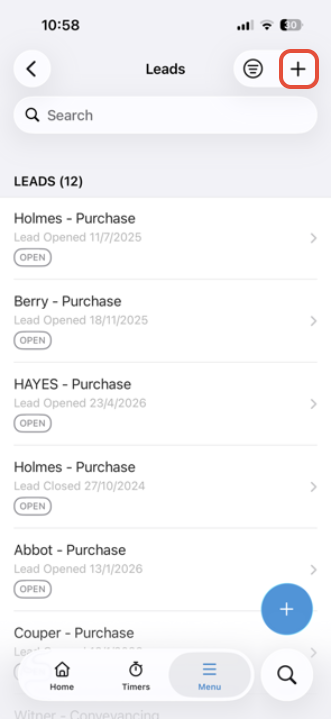
- You can also navigate to the Leads list by clicking the Menu icon and clicking Leads from the list. Then tap the Plus + button on the top-right corner of the screen.
2. Enter the lead details. You must enter a Client and a Lead Type in order to save the lead.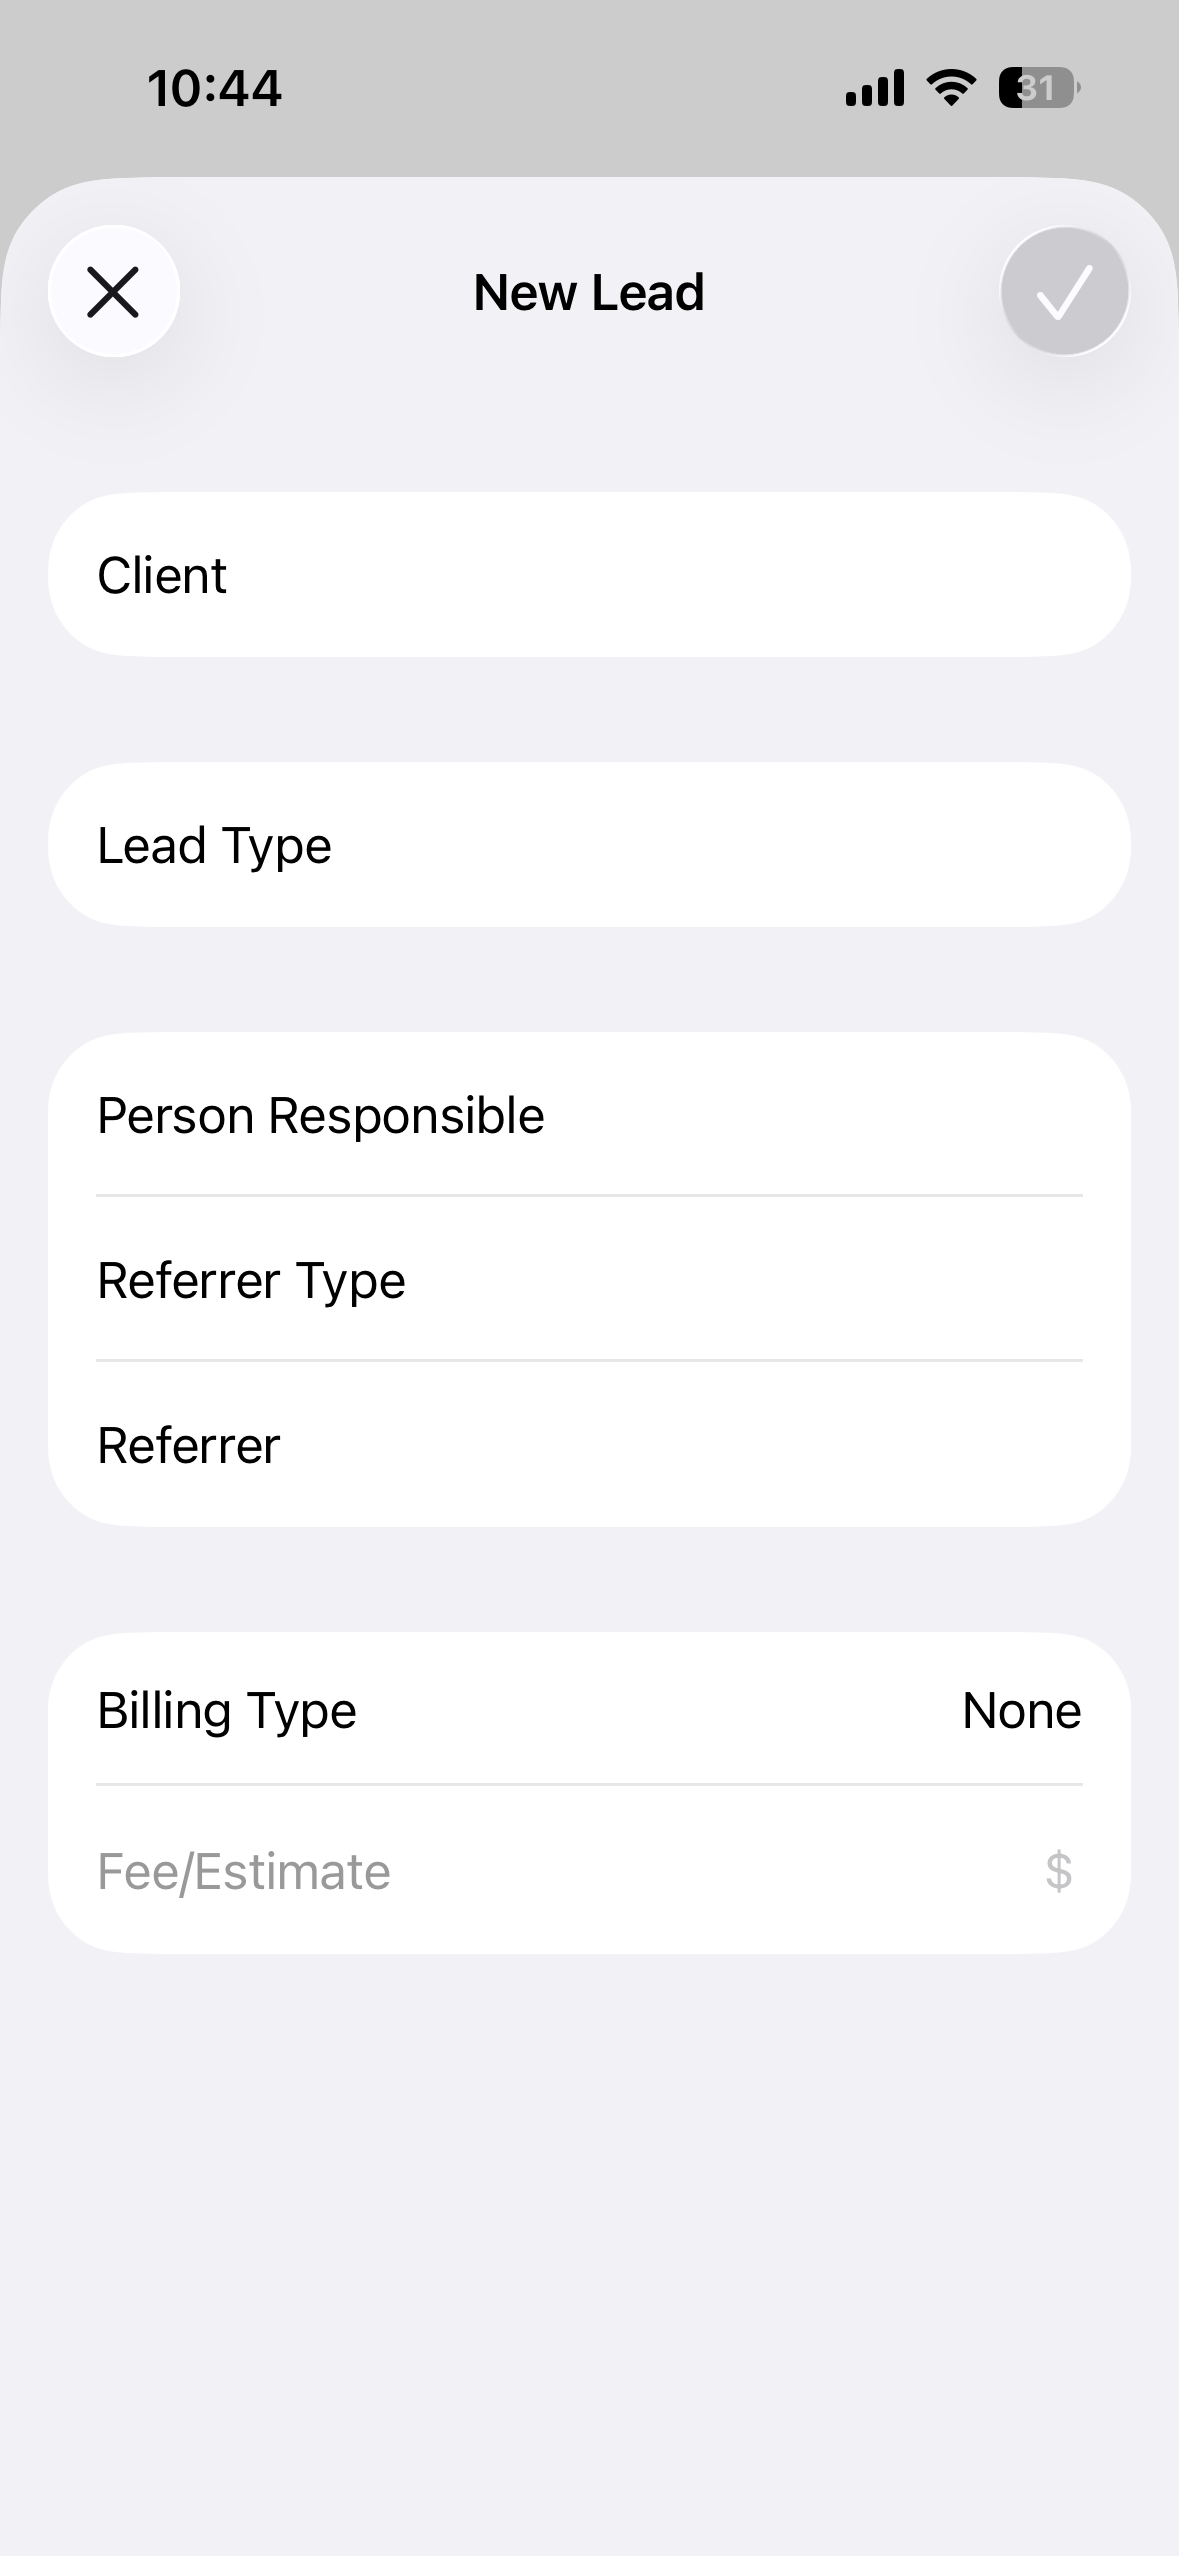
- Tap on the Client field to choose an existing contact, or tap the Plus + icon on the top-right corner of the screen to add a new contact.
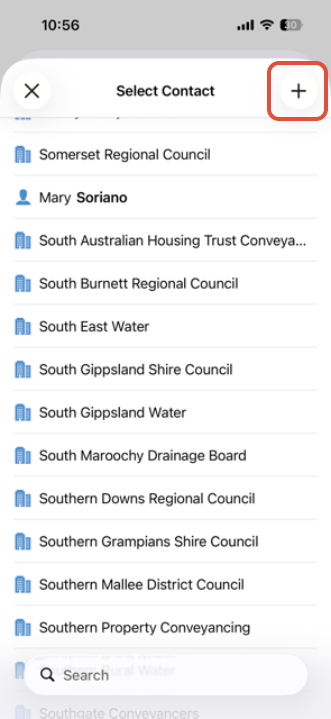
You can also enter the following optional information:
- Person Responsible
- Referrer Type
- Referrer name
- Billing Type
- Billing Estimate (if applicable)
3. Once you have finished recording the lead, tap the blue tick icon from the top-right corner. The lead can then be accessed from the triConvey Desktop App and triConvey Companion Site Web App.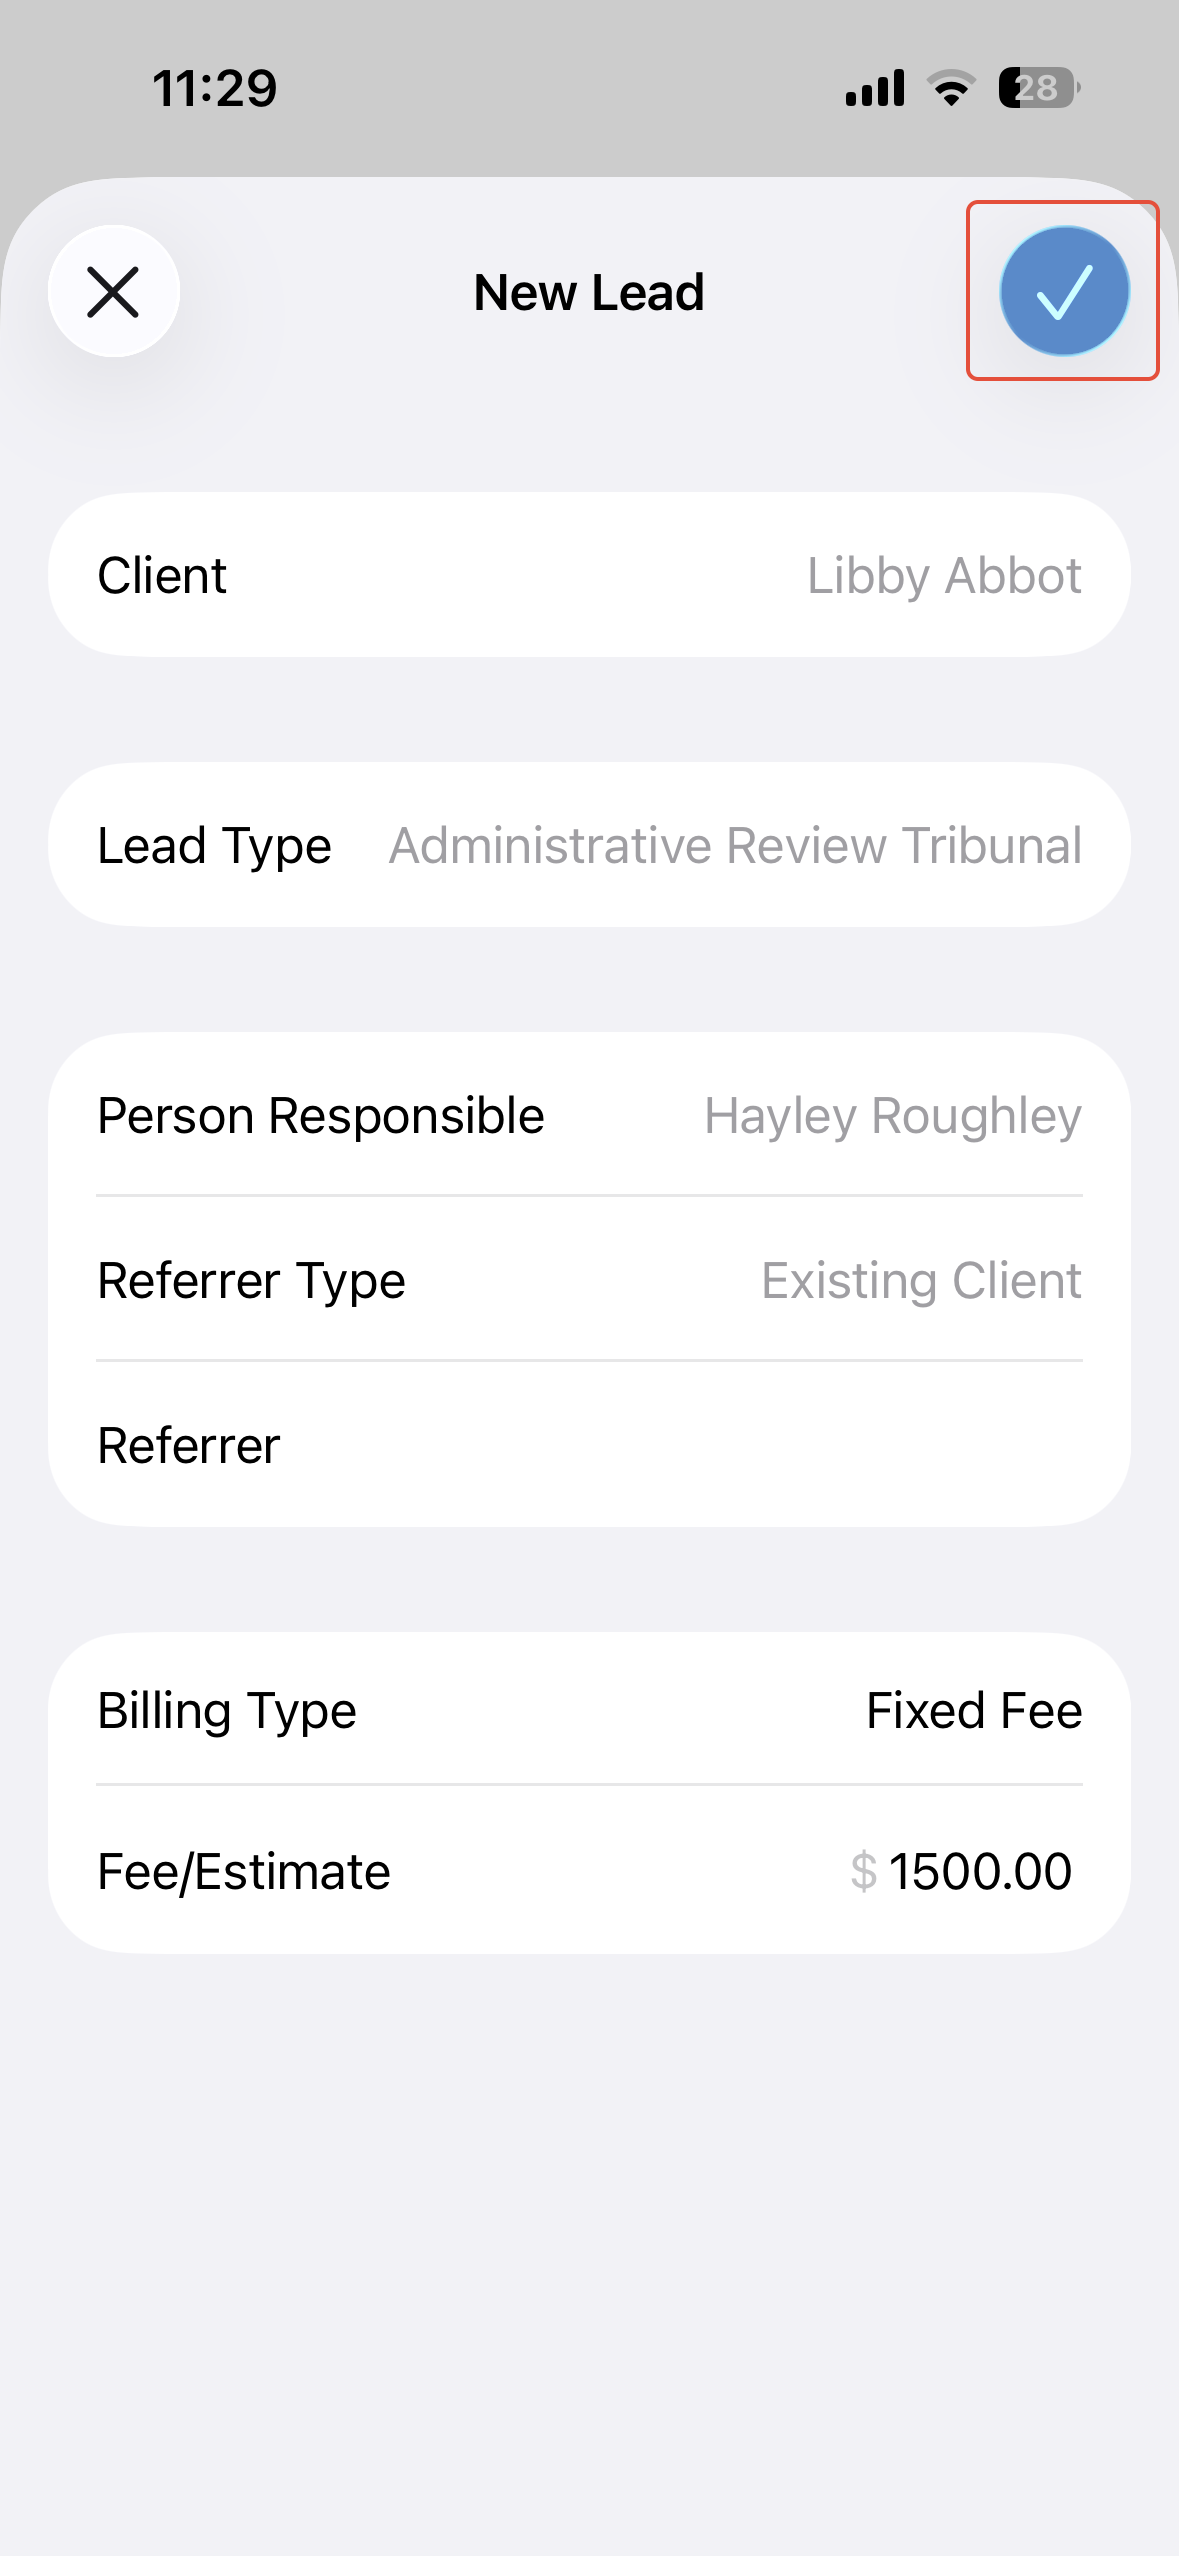
Good to Know
- You cannot convert a Lead to a Matter on the triConvey Mobile App. Instead, use the triConvey Desktop App to do this.
- You cannot create Matters on the triConvey Mobile App.
Was this article helpful?
That’s Great!
Thank you for your feedback
Sorry! We couldn't be helpful
Thank you for your feedback
Feedback sent
We appreciate your effort and will try to fix the article