

With triConvey's integration with ScanSnap, it is possible for you to scan documents and have them be saved directly to a matter. Follow this quick setup guide and start scanning today.
Table of Contents
Getting Started
triConvey is built on Smokeball, so when you connect a third-party app you'll be asked to authorise Smokeball, even though you're setting it up from triConvey.
ScanSnap Home Set Up
Note: ScanSnap Home is the most up-to-date version of ScanSnap. It is recommended that you use ScanSnap Home.
Click the Show Hidden Icons arrow on the bottom-right corner of your desktop and find the ScanSnap icon. It will be a blue or silver icon with an "S" in the centre. Right-click the icon and select Open the scan window.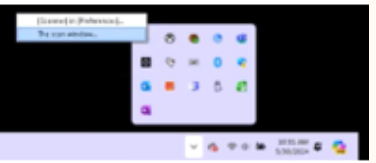
Click the + icon in the upper-right corner to create a new profile.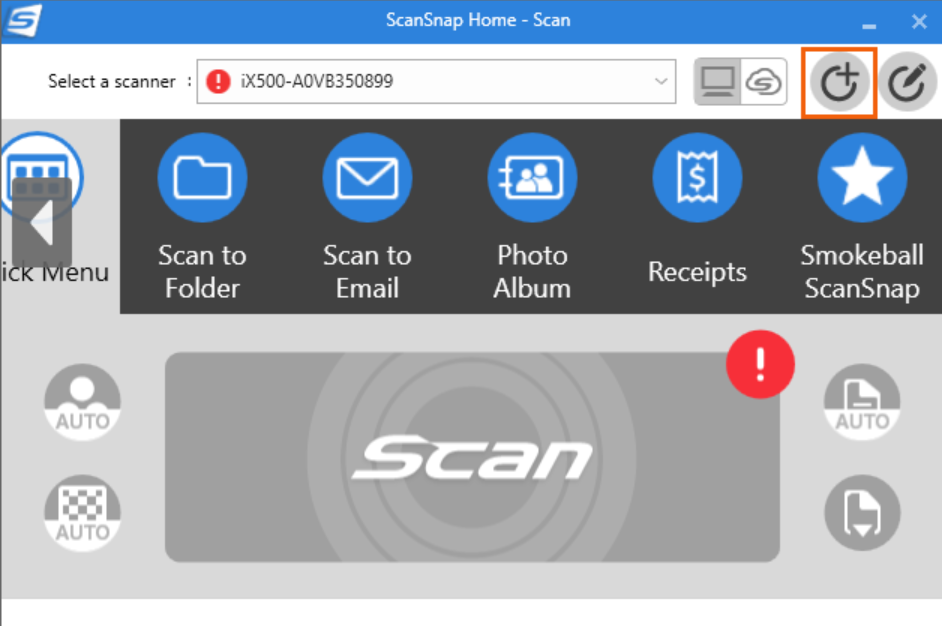
Select ScanSnap Home. Navigate to Application and select Add or remove from the dropdown menu.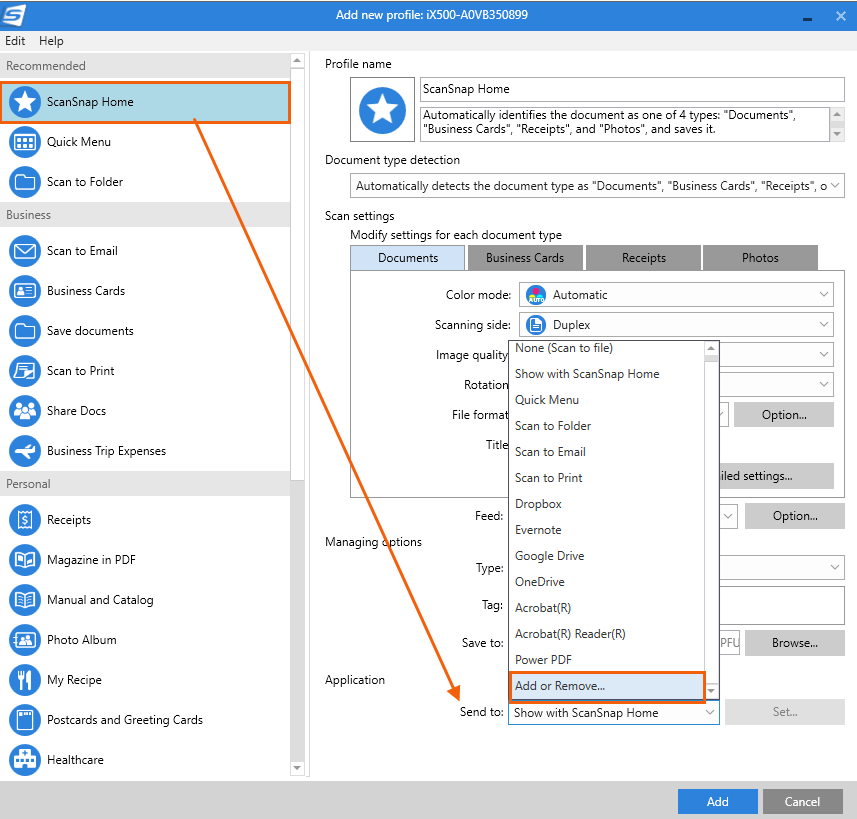
Select Add in the Application Settings window and then select the Browse button by the Application path.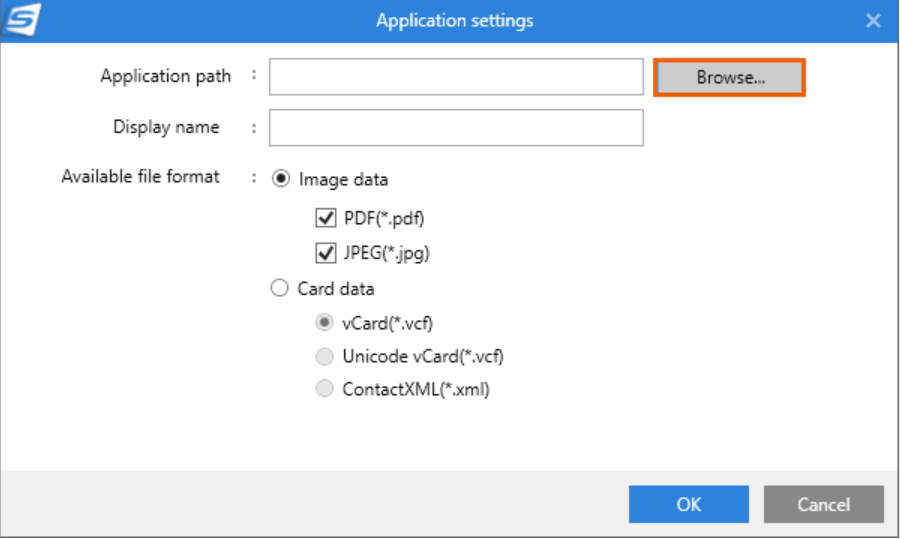
Navigate to Windows (C:) > Program Files > Smokeball > binaries and choose Smokeball Scan.exe and then select Open.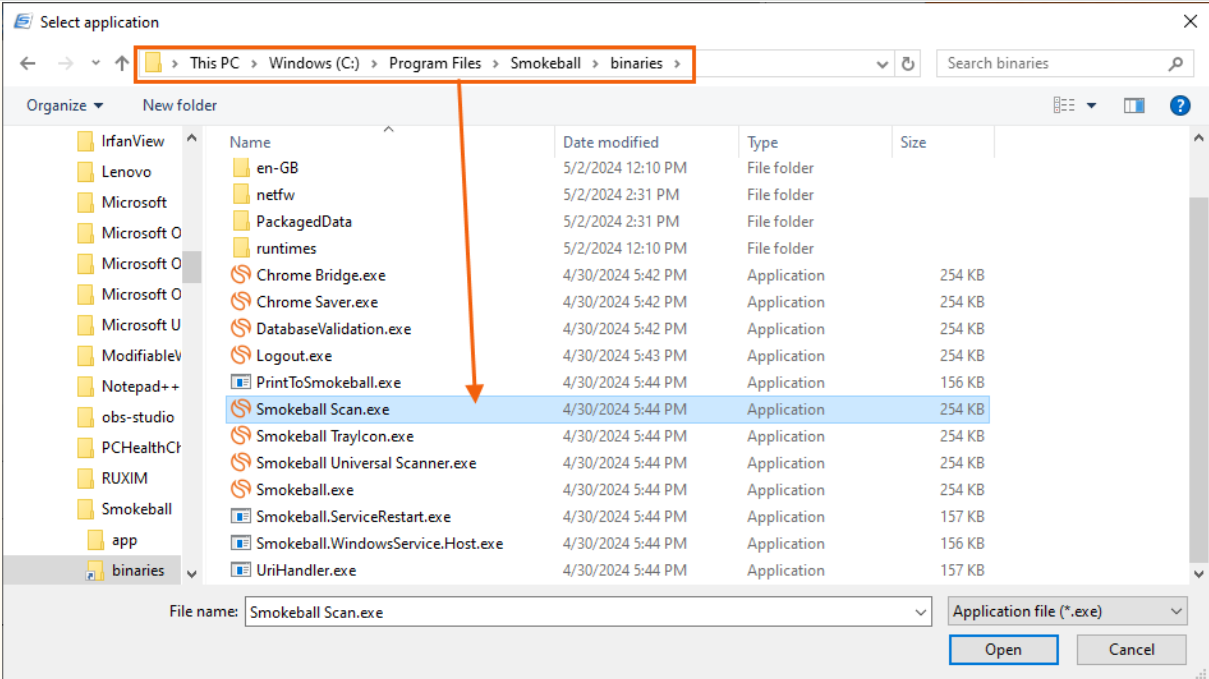
Enter Smokeball for the display name and then select OK. Select Close to exit the pop-up window.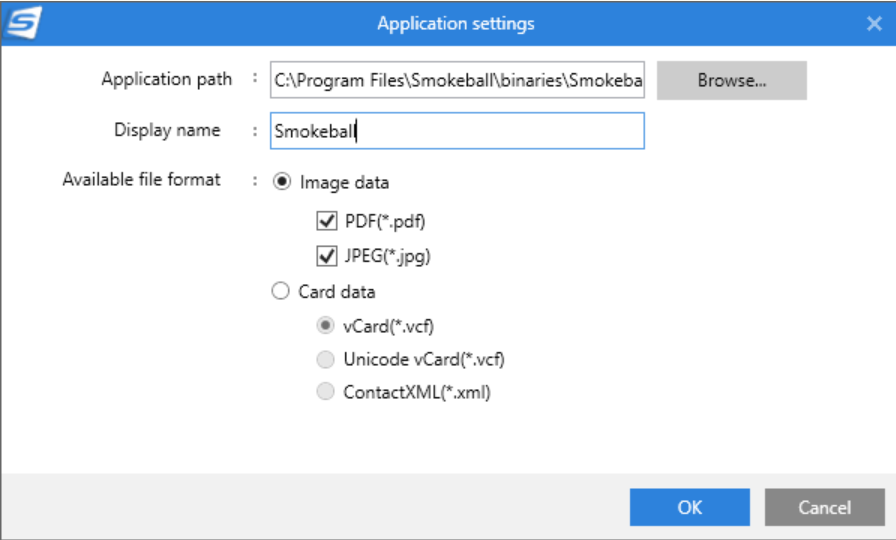
Change the option in the Send to menu to Smokeball. Select Yes when asked if you wish to continue. If you have not done so already, you should also change the Profile name at the top of the window to "Smokeball" or "Smokeball ScanSnap" and then select Add.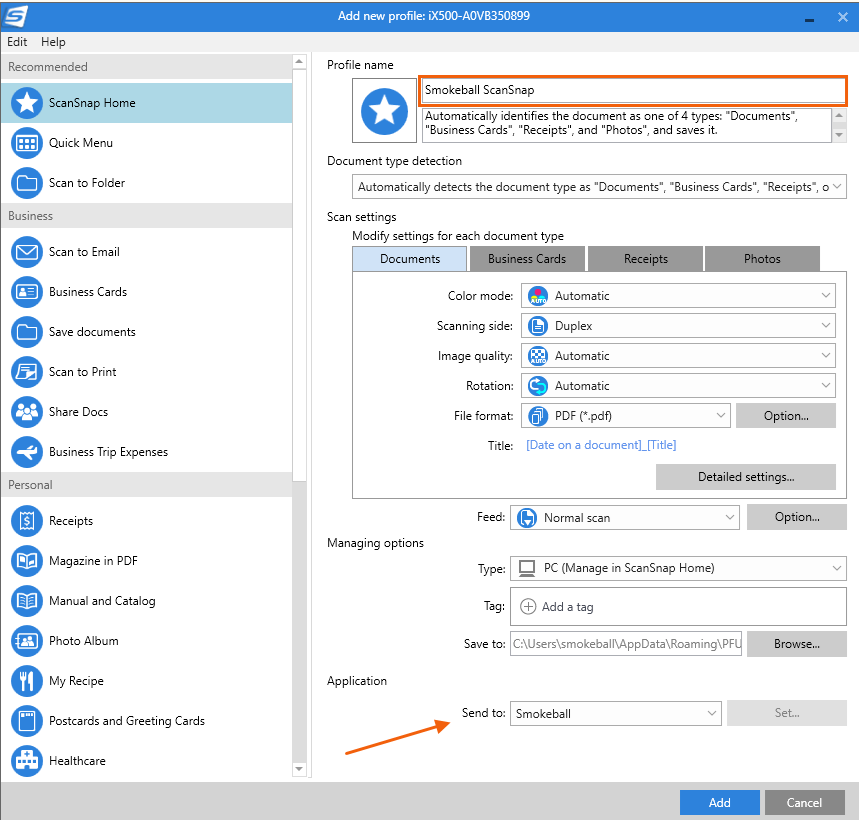
The new profile should now appear as its own button on ScanSnap Home. You may need to select the grey and white arrows to display the button. Be sure to select the profile button whenever you need to scan a document to triConvey. Once you scan a document, the Smokeball matter list will load and you can then select the matter to save the scan to triConvey.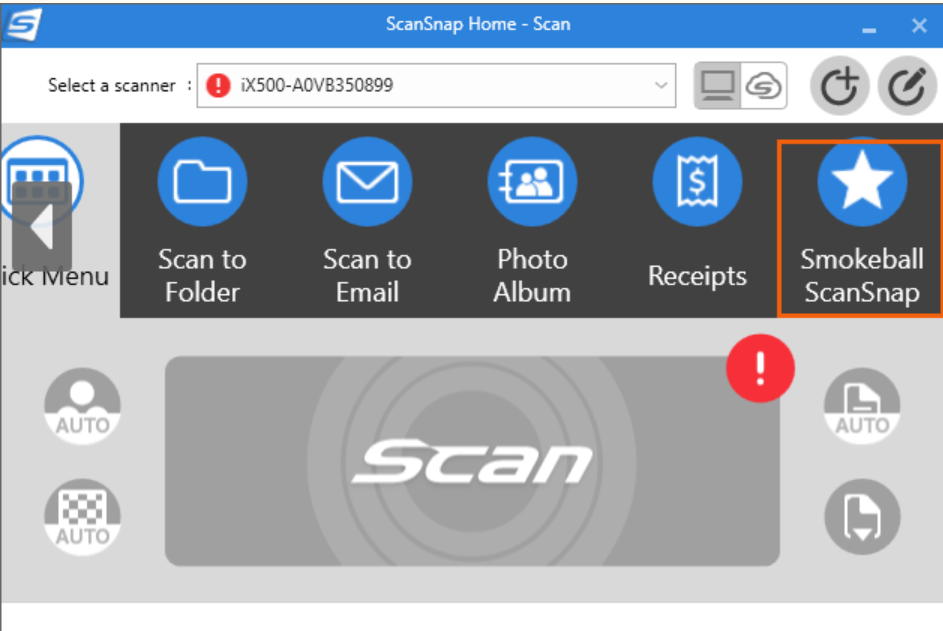
ScanSnap Manager
These instructions apply to ScanSnap Manager. Note: Ricoh no longer actively updates ScanSnap Manager, and they recommend using ScanSnap Home if possible.
1. Click the "Show Hidden Icons" button on the bottom-right corner of your desktop and find the ScanSnap icon. It will be a blue or silver icon with an "S" in the centre.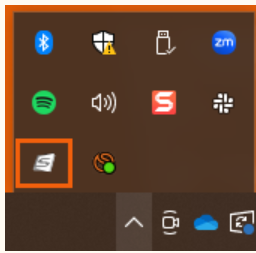
2. Right-click the ScanSnap icon and select "Scan Button Settings".
3. If it is checked, uncheck the "Use Quick Menu" box.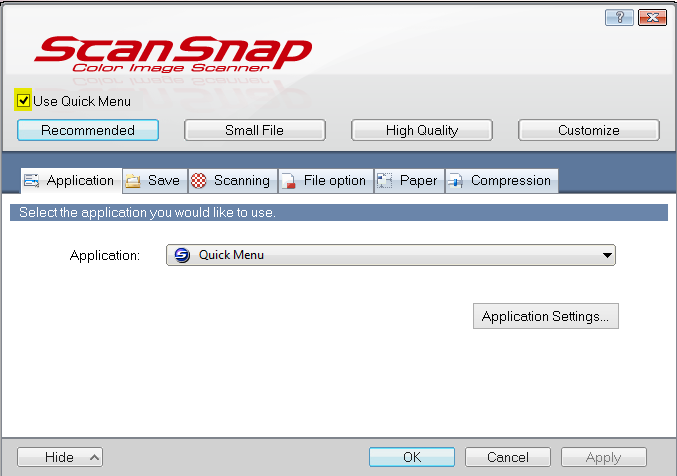
4. Click "Add or Remove..." button.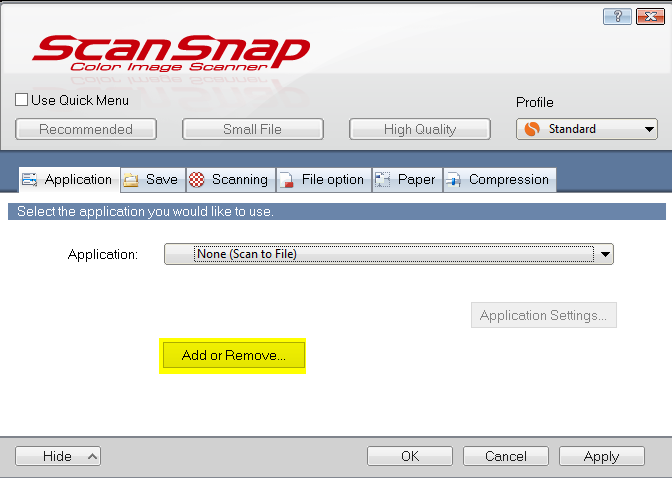
5. Click "Add" button.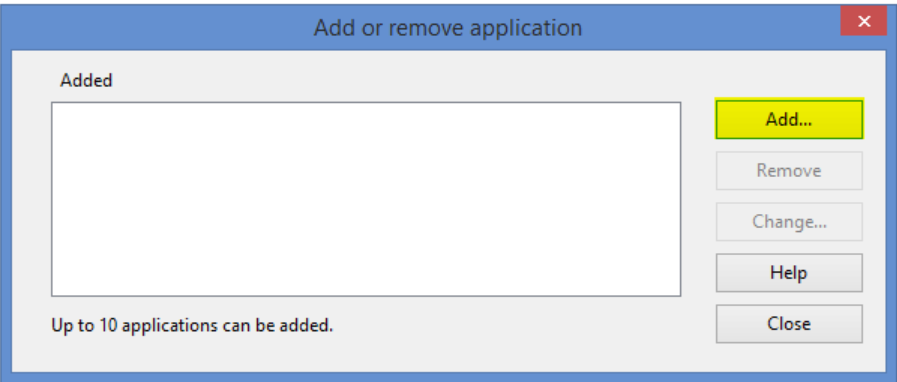
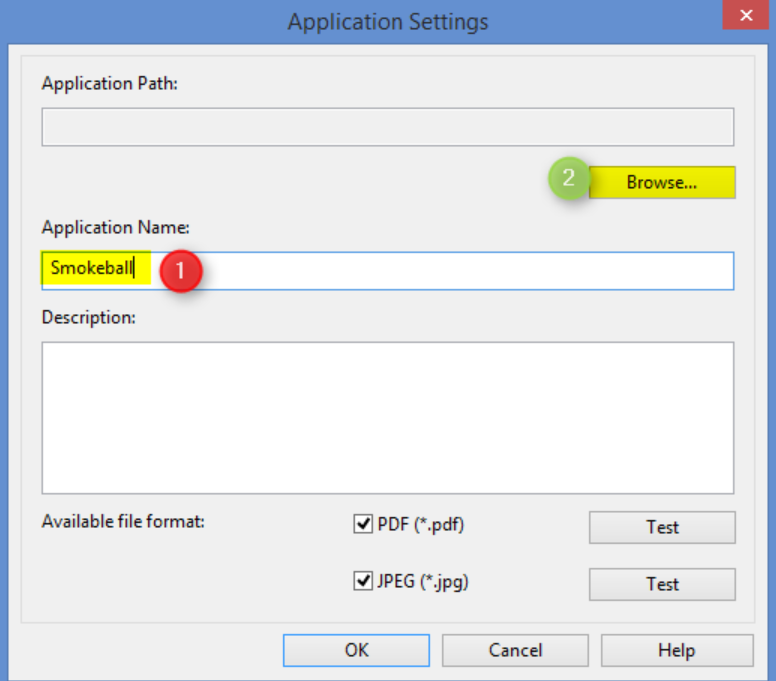
6. Type "Smokeball" into Application Name field. Then click "Browse" button.
7. Navigate to C:\Program Files\Smokeball\binaries and double-click "Smokeball Scan".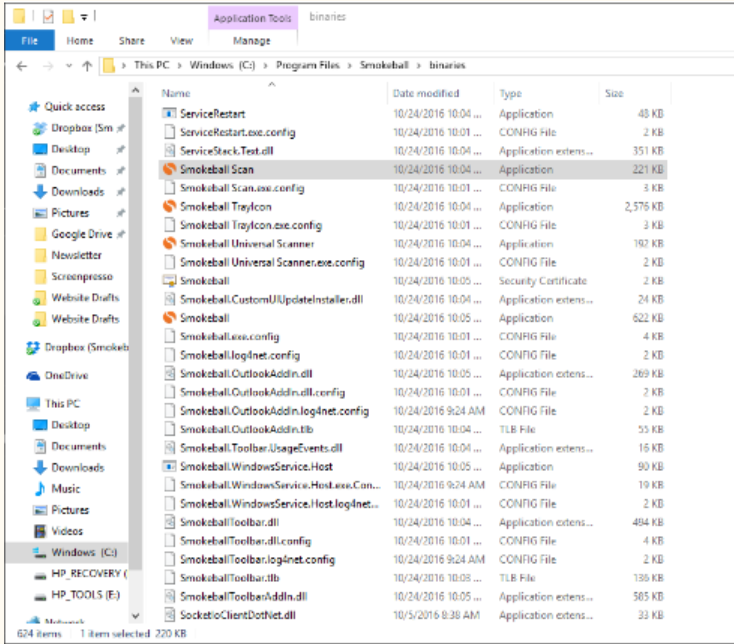
8. Click "OK.
9. Click "Close".
10. Check the box next to "Use Quick Menu".
11. Click "Apply".
12. Click "OK". You are now ready to use ScanSnap with triConvey!
Was this article helpful?
That’s Great!
Thank you for your feedback
Sorry! We couldn't be helpful
Thank you for your feedback
Feedback sent
We appreciate your effort and will try to fix the article