

Learn how to set up specific users to approve invoices before you finalise them in triConvey.
Table of Contents
- Getting Started
- Set up Invoice Approvers
- Request approval for an invoice
- View pending invoices
- Approve an invoice
- Edit and resubmit a rejected invoice
- View the approval history of an invoice
Getting Started
Only users with Firm Owner permissions can set up Invoice Approvers.
Set up Invoice Approvers
1. Select the gear icon from the bottom-left corner of the triConvey Companion Site Web App.
2. Select Firm Settings.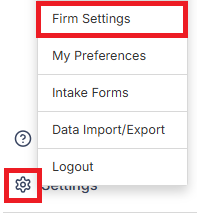
3. Select Staff & Users from the left menu and then select the Approvers tab.
4. Select the Invoice Approvals tab.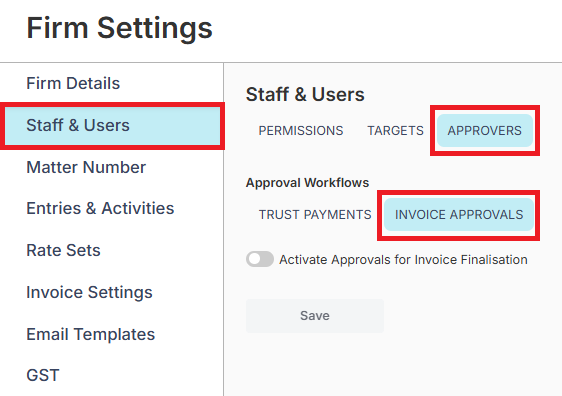
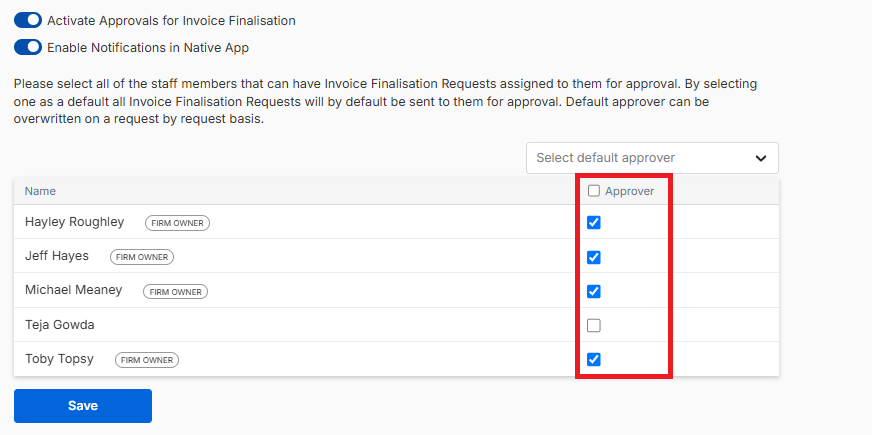
5. Toggle Activate Approvals for Invoice Finalisation on.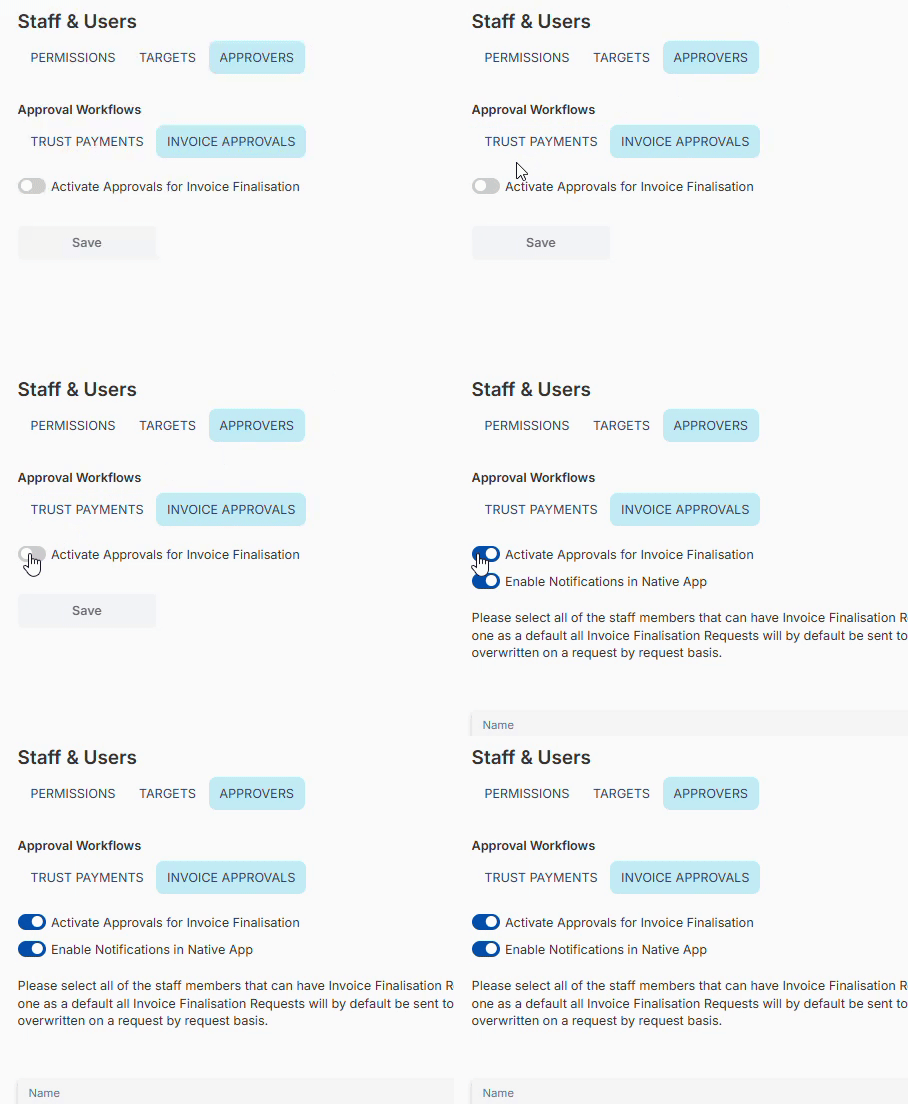
6. [Optional] Toggle Enable Notifications in Native App on. triConvey will send invoice approval related notifications to the Notification Centre of the triConvey Desktop App, in addition to displaying them in the Web App.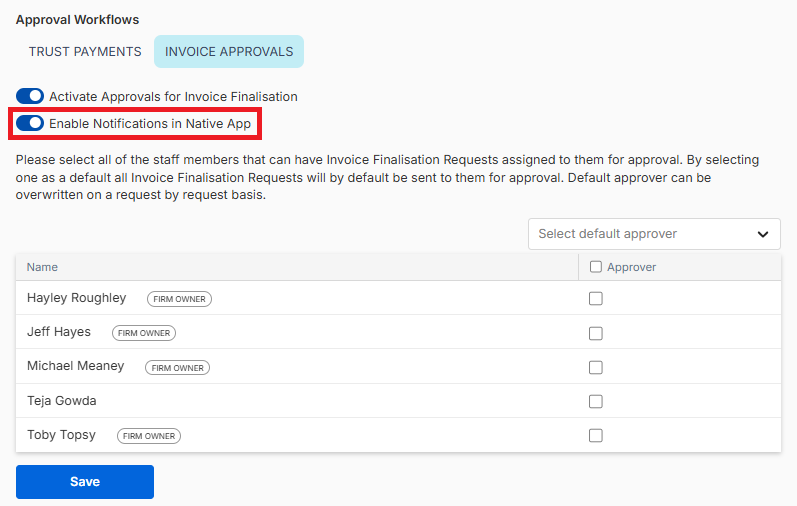
7. In the Approver column, select the checkbox next to each user who can approve invoices.
- Important Note: If a Firm Owner user is not selected as an approver, they will not be able to approve invoices. However, they have the option to bypass the approval process entirely.
8. [Optional] Use the Select default approver drop-down menu to choose a default approver. This user will automatically be selected as an approver on any invoice, however you can still remove them from the approver list if needed.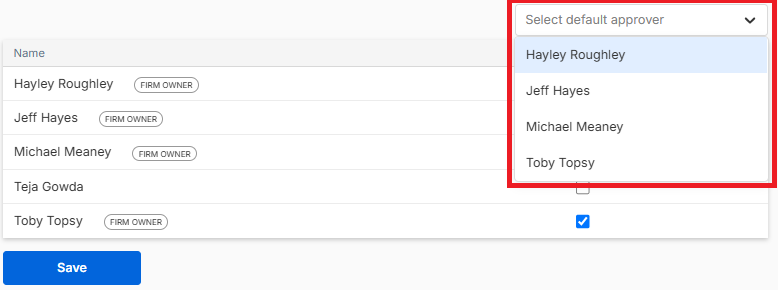
9. Select Save.
Once Invoice Approvals have been activated, all draft invoices raised by staff will enter the approval workflow.
Request approval for an invoice
1. Create a draft invoice, or open an existing draft invoice.
2. Once the invoice is ready for approval, select Final at the top of the right-hand panel.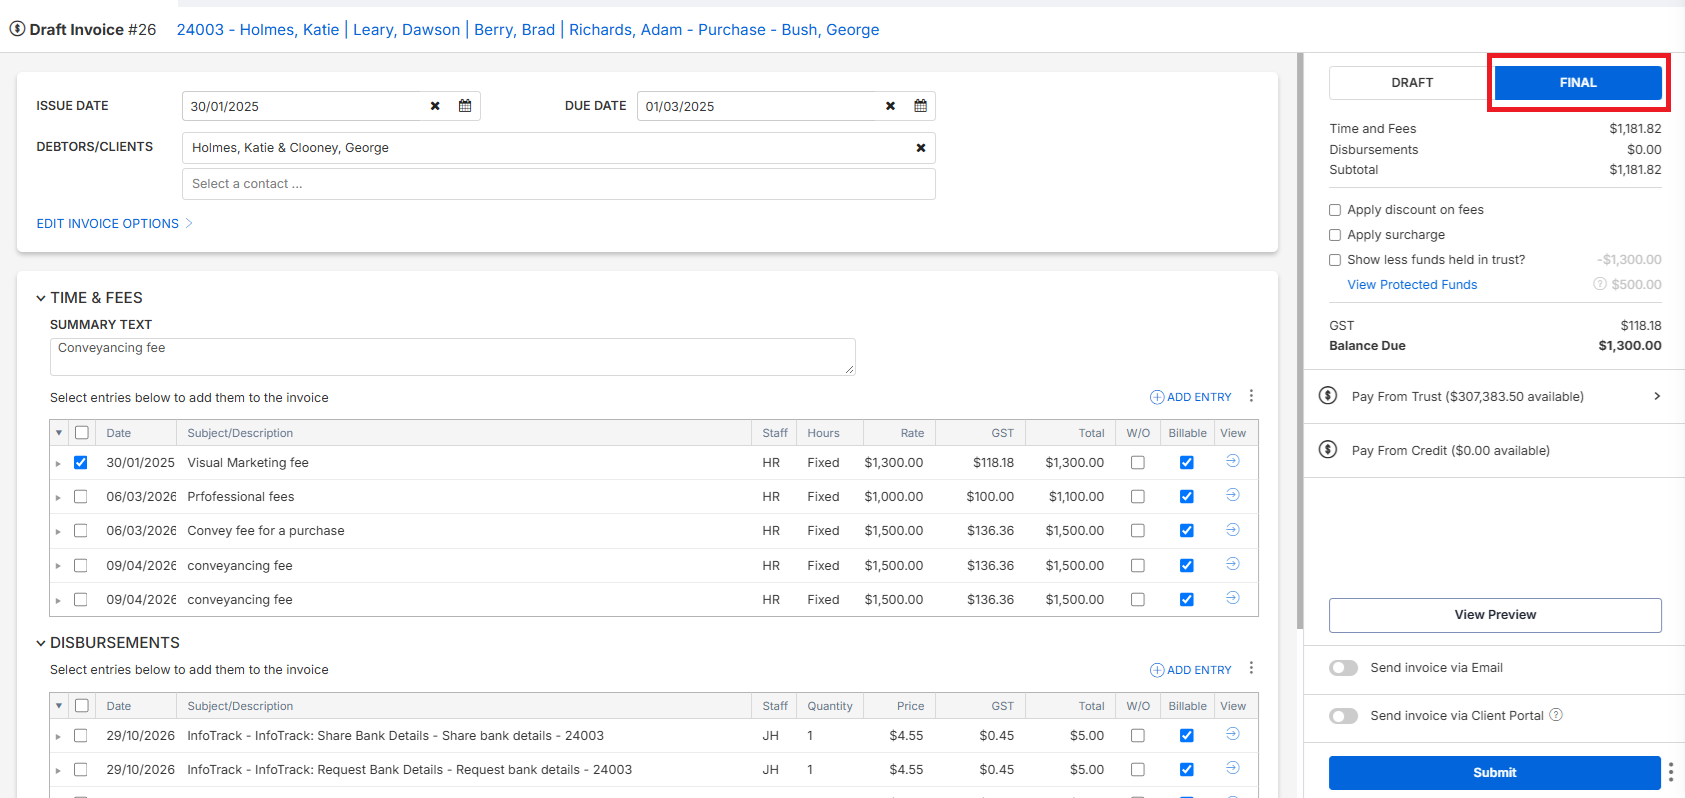
3. Select Submit.
- If you are sending the invoice via Email, finalise the invoice email and select Save Email Settings.
- If you are sending the invoice via Client Portal, accept any confirmation messages that appear and finalise the Client Portal message. Then, select Save Message Settings.
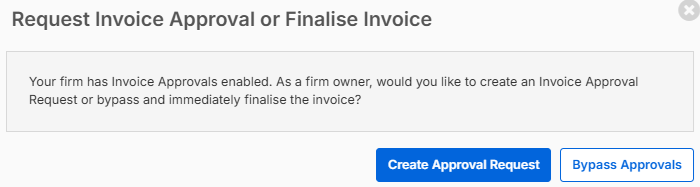
4. The Request Invoice Approval or Finalise Invoice window appears. Select Create Approval Request.
Tip: If you are a Firm Owner user, you have the option to skip the approval process by selecting Bypass Approvals. triConvey finalises the invoice straight away.
5. In the Request Invoice Approval window, use the Approver drop-down menu to choose an approver.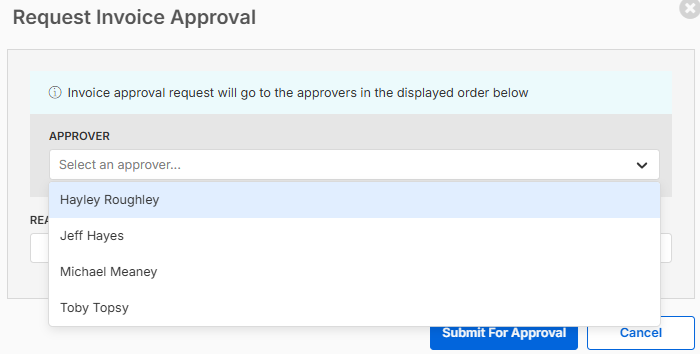
- If a Default Approver was nominated in Firm Settings, they will appear in the Approver list automatically. You can remove them from the list by choosing another approver, then clicking the X icon next to their name.
- The invoice requester cannot be the approver. If you wish to approve an invoice you created, select Bypass Approvals from the previous screen.
- triConvey sends the request to approvers in the order shown in the window.
6. Enter a note in the Reason field.
7. Select Submit for Approval.
View pending invoices
1. Navigate to Invoices in the left menu, then select the Invoice Approvals tab. As anapprover, you see invoice approval requests in the Invoice Approvals tab. A red numberon the tab shows how many requests need your action.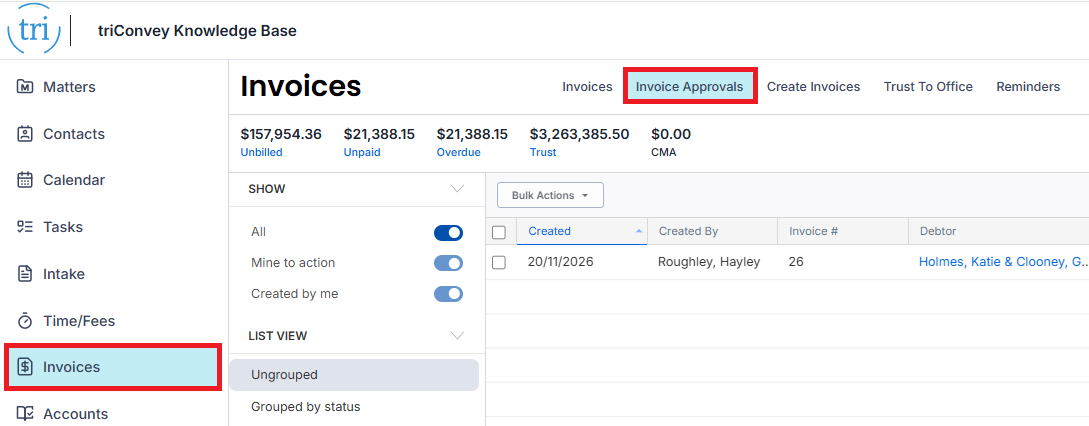
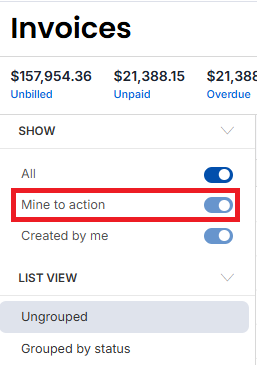
2. Use the Show filters on the left to change the list:
- All shows all requests.
- Mine to action shows requests that you have rejected and requests that requireyour approval.
- Created by me shows requests that you submitted.
3. Use List View to choose Ungrouped or Grouped by status. The status of a request is In Review, Final Review (i.e. you are the last approver on the chain) or Rejected.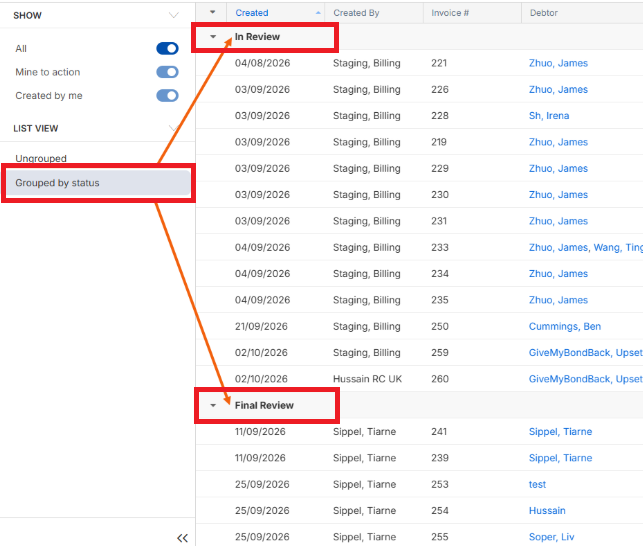
4. Click on Review on the right-most column to view it, withdraw it from approval, orapprove it.
Approve an invoice
Invoices must be approved individually, i.e. there is no way to approve invoices in bulk. To approve an invoice:
1. Select Review on the right-most column next to the relevant invoice.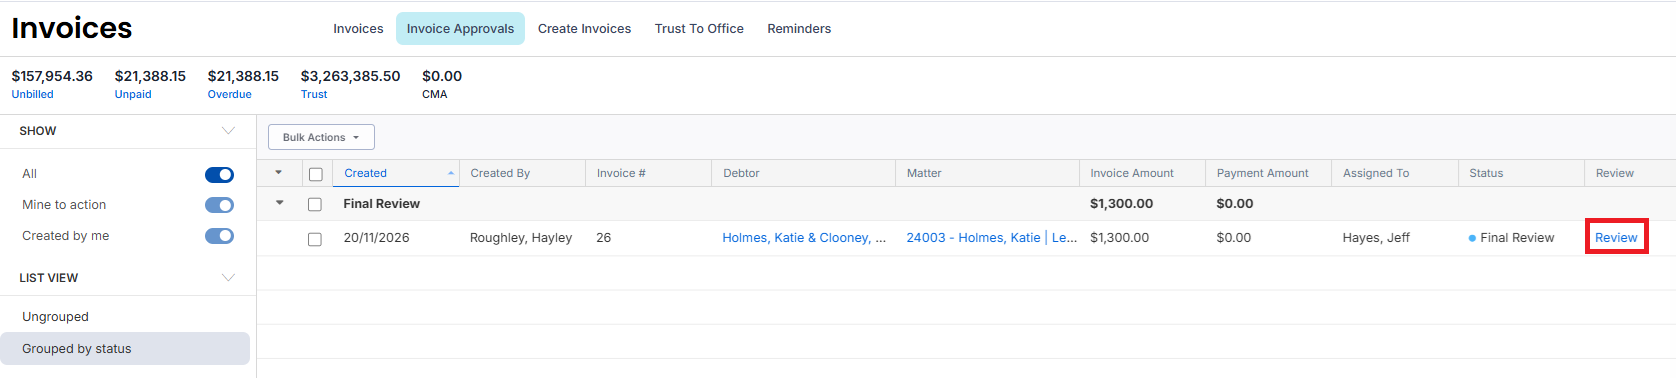
2. Check the invoice.
- Select View Preview from the right-hand panel to see the invoice as the client sees it.
- Select View Approval History to see earlier actions on the invoice.
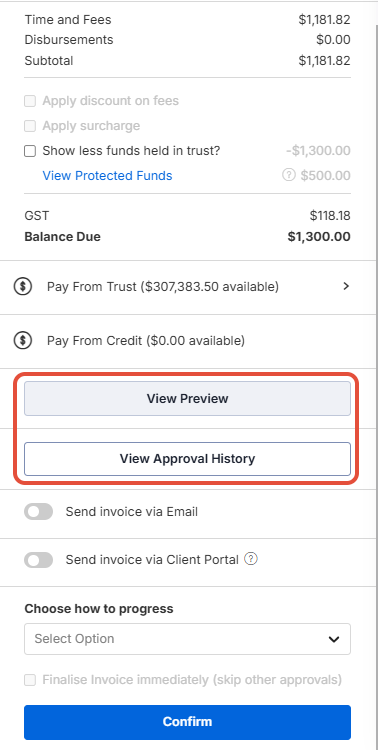
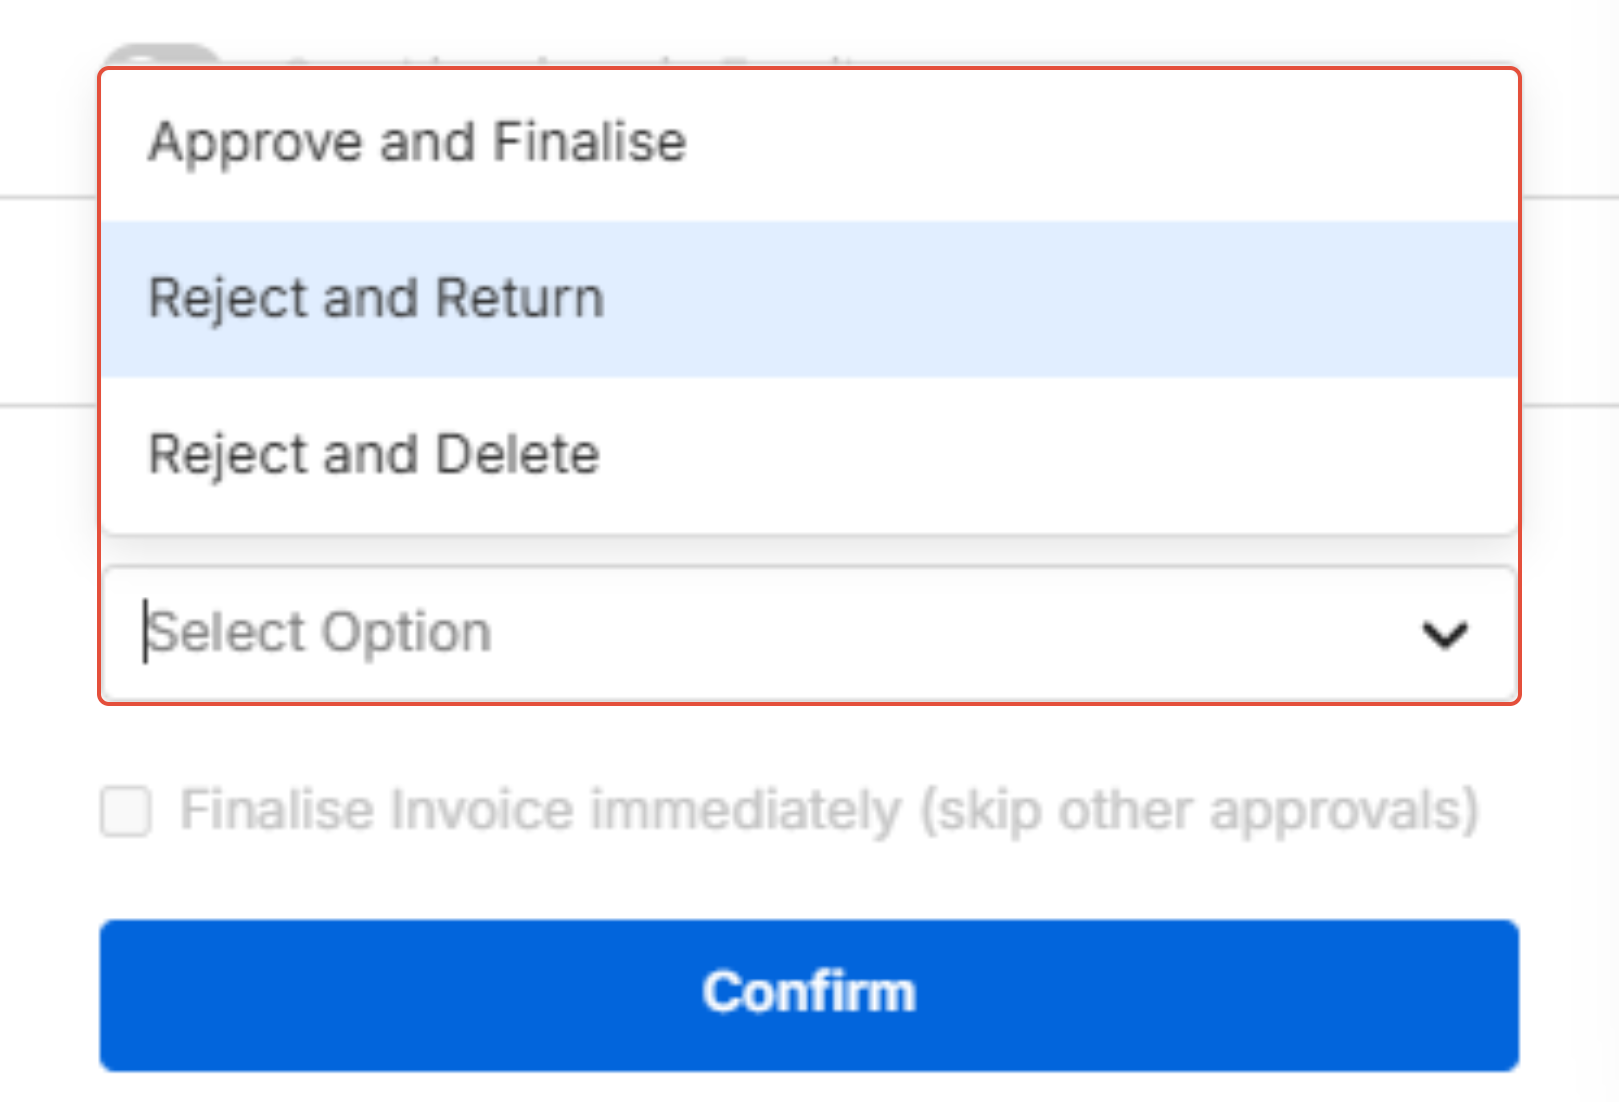
3. Under Choose how to progress, select an option from the drop-down menu:
- Approve and Finalise approves the invoice and finalises it.
- Reject and Return sends the invoice back to the requester for changes.
- Reject and Delete deletes the draft invoice.
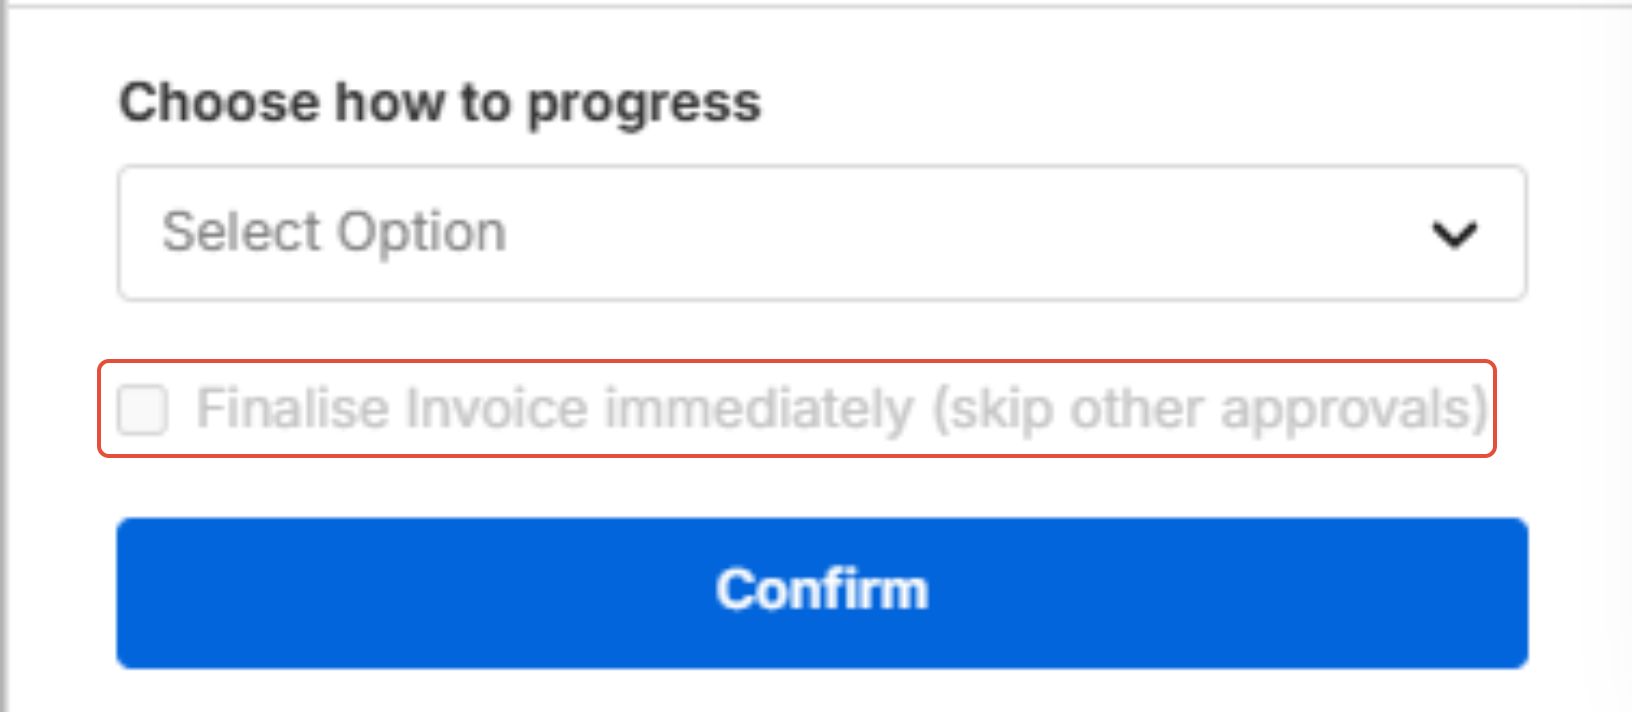
- If you are a Firm Owner that is listed as one of the approvers, a checkbox to Finalise Invoice immediately is also available to bypass all other approvers andapprove the invoice on the spot. This is useful if one or more approvers are away orunavailable to approve the invoice.
4. Select Confirm.
- When you select Approve and Finalise, a success message appears and triConvey finalises the invoice.
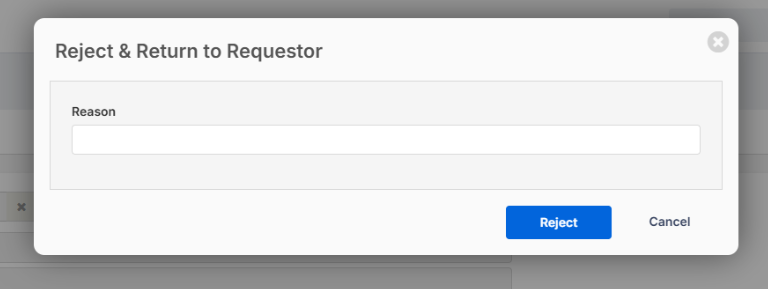
- When you select Reject and Return, the Reject & Return to Requestor window appears. Enter a Reason, then select Reject.
- When you select Reject and Delete, the Delete Draft Invoice window appears. Select Delete Draft to confirm. triConvey unassigns all Time, Fee and Expense entries on the invoice, so you can add them to another invoice.
Edit and resubmit a rejected invoice
When an approver selects Reject and Return, the invoice returns to you as a draft. A yellow banner at the top of the invoice shows who rejected it, the date and the reason.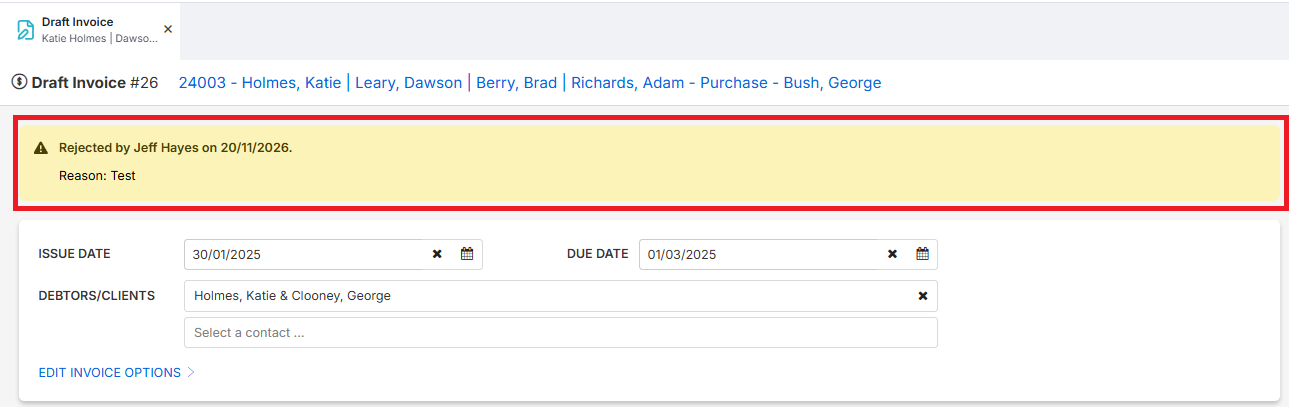
To resubmit the invoice:
1. Navigate to Invoices, then select the Invoice Approvals tab.
2. Select Review next to the rejected invoice to open it.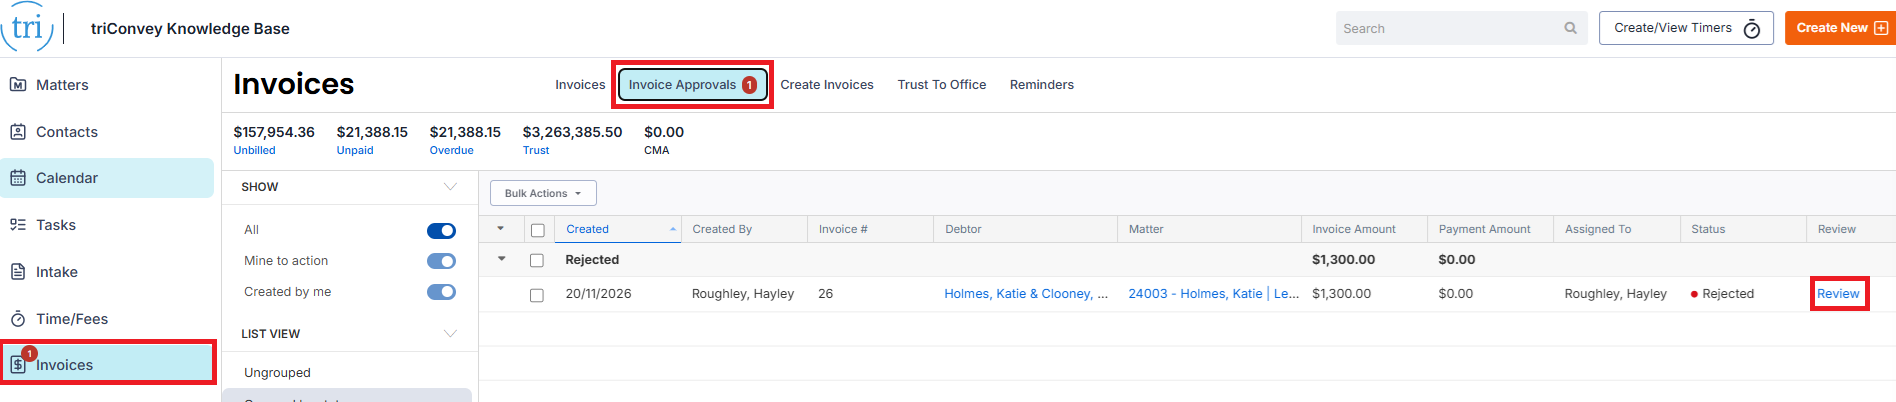
3. Make the changes that the approver asked for.
4. Select Final on the top-right corner, then select Submit. 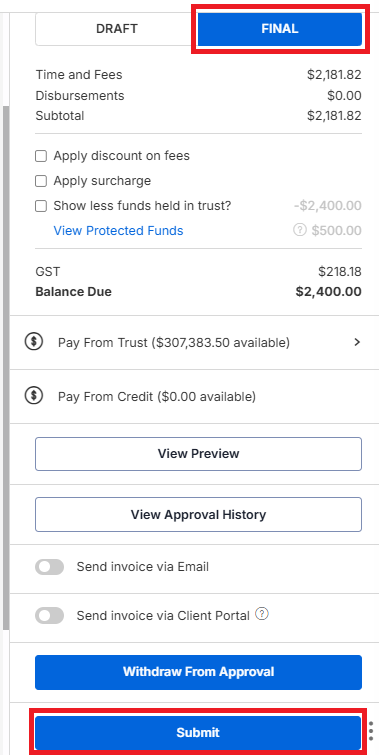
5. Select Create Approval Request, then complete the request. See Request approval for an invoice.
View the approval history of an invoice
To see all approval actions on an invoice, select View Approval History on the draft invoice.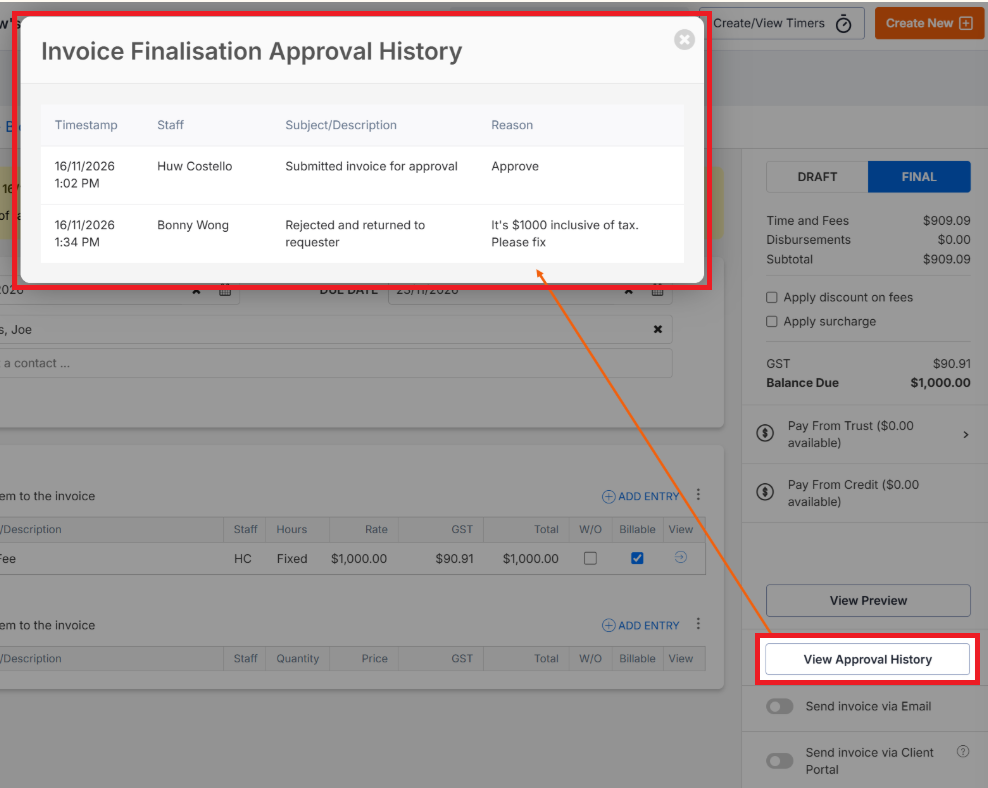
The Invoice Finalisation Approval History window shows the following for each action:
- Timestamp
- Staff member
- Subject or description
- Reason
Note: Once an invoice has been finalised, you can no longer view the Approval History
Was this article helpful?
That’s Great!
Thank you for your feedback
Sorry! We couldn't be helpful
Thank you for your feedback
Feedback sent
We appreciate your effort and will try to fix the article