

Rate increases commonly occur as you grow and manage your business. Use the Rate Sets feature to efficiently incorporate rate increases and stay on top of your rate increase schedule.
Rate Sets can be configured in the triConvey Desktop App or triConvey Companion Site Web App. Information entered in one will sync to the other, and vice versa.
Table of Contents
triConvey Desktop App
Rate Sets can be accessed by users with the Billing App permission enabled. Learn more about triConvey permissions.
Create a rate set
1. Select the gear icon from the triConvey Home Dashboard.
2. Select Time & Billing and then select the Rate Sets tab.
3. Select Add New.

4. Enter a Rate Set Name.
5. Under Current Rate Set, select a staff member from the Staff Rates drop-down menu and enter their hourly rates in the number field next to their name. Then, click ADD to the right to add them to the Rate Set.
6. Repeat step 5 for each staff member which needs to be included in the Rate Set.
7. (Optional) Under the Future Rates section, you can enter a separate Rate Set that will apply on a certain date. This is useful for situations like a yearly rate rise.
- Select a date in the Update Rates On date picker. This unlocks the ability to add staff members and their future rates.
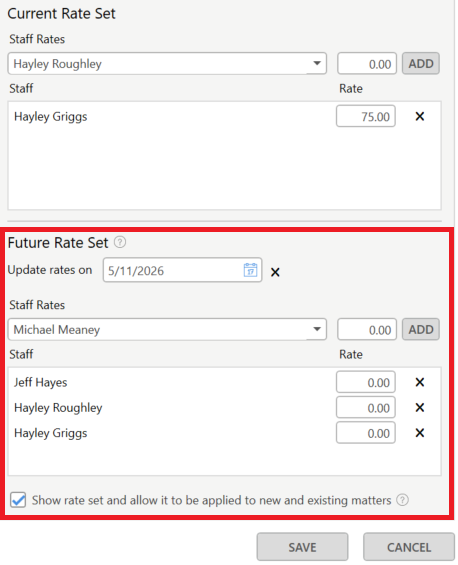
8. Tick the Show Rate Set and allow it to be applied to new and existing matters box in order for the Rate Set to appear in matters.
- Turn this off to prevent a Rate Set from being attached to a matter. A “hidden” Rate Set will continue to work for existing matters that it has already been applied to but no longer be selectable for additional matters.
9. Select Save.
Edit a Rate Set
To edit a Rate Set, navigate back to triConvey Settings > Time & Billing > Rate Sets and double-click on the relevant Rate Set.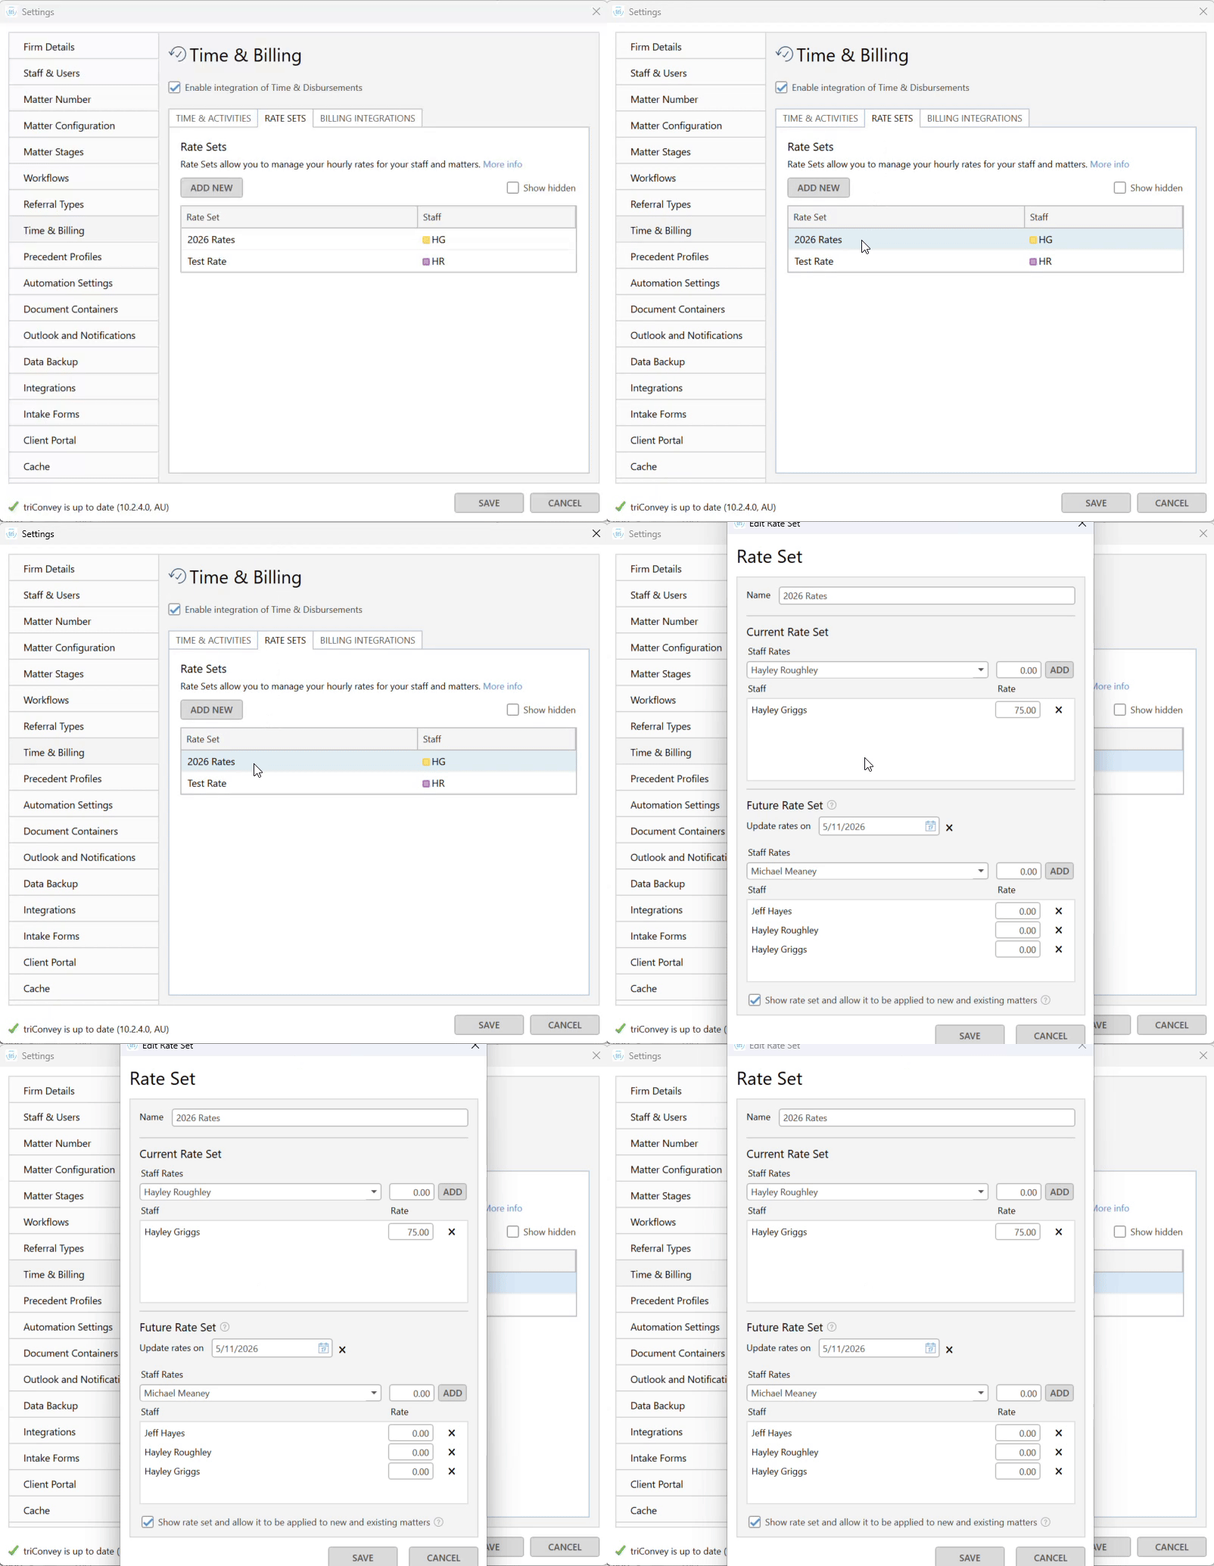
Note: You cannot delete a Rate Set. If the Rate Set is not attached to any matters, you can hide it from the Rate Sets list. To do so, double-click on the Rate Set and turn off Show Rate Set and allow it to be applied to new and existing matters.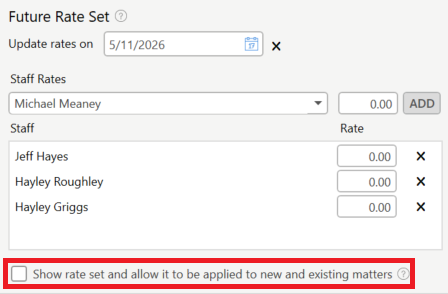
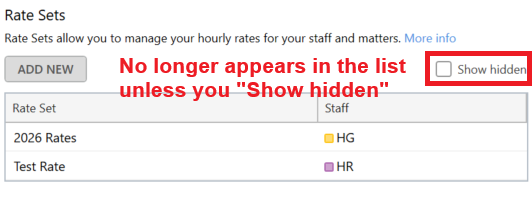
To view all hidden Rate Sets, toggle on Show hidden at the top of the Rate Sets list.
Apply a Rate Set to an existing matter
1. Open a Matter and double-click on the Info field.
2. Select the Billing tab.
3. Select Use rate set option, next to Hourly Rate, and use the dropdown menu to pick the desired Rate Set.
Tip: You can only choose one rate set.
4. Select OK.
Apply a Rate Set to a matter configuration
You can specify in a Matter Configuration to have a Rate Set apply upon creating a new matter.
1. Select the gear icon from the triConvey Home Dashboard.
2. Select Matter Configuration.
3. Select Add New or right-click on an existing matter configuration and select Edit.
4. Select Time & Fees.
5. Use the dropdown menu next to Rate Set to choose the desired rate set.
6. Select Save.
triConvey Companion Site Web App
Create a Rate Set
1. Select the gear icon from the bottom-left corner and select Firm Settings.
2. Select Rate Sets from the left panel.
3. Select Add Rate Set.

4. Enter a Rate Set Name.
5. Under Current Rates, select a staff member from the drop-down menu and enter their hourly rates in the $ field next to their name. Then, click on the Plus icon to the right to add them to the Rate Set.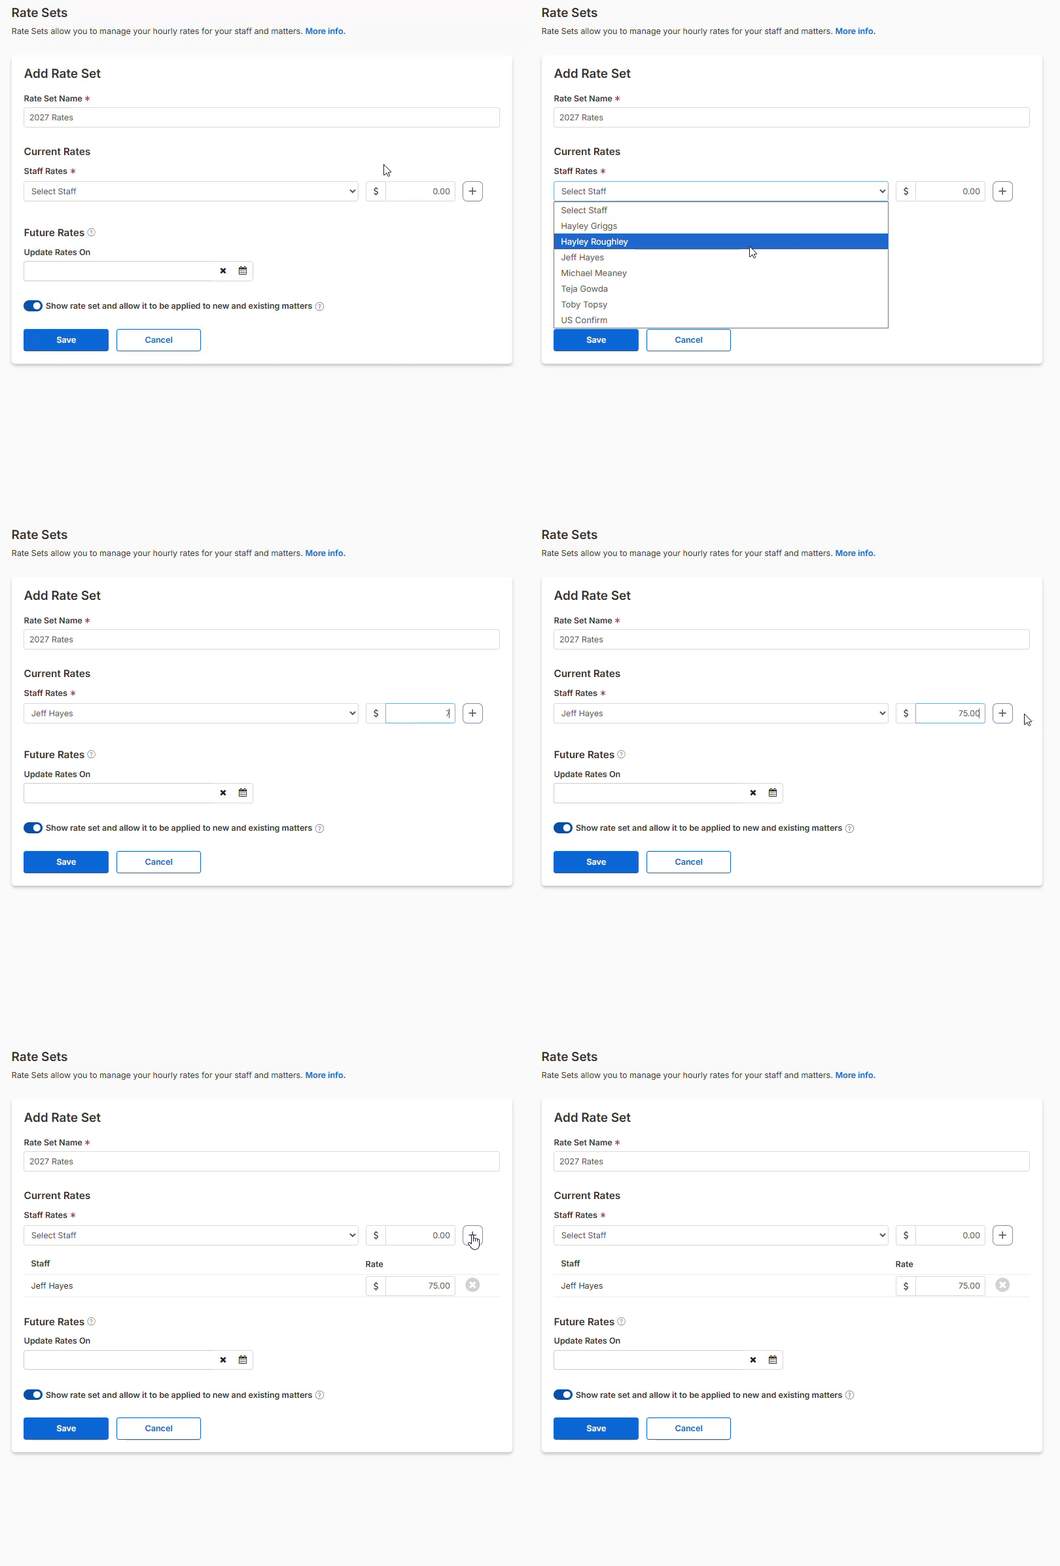
6. Repeat Step 5 for each staff member which needs to be included in the Rate Set.
7. (Optional) Under the Future Rates section, you can enter a separate Rate Set that will apply on a certain date. This is useful for situations like a yearly rate rise.
- Select a date in the Update Rates On date picker. This unlocks the ability to add staff members and their future rates.
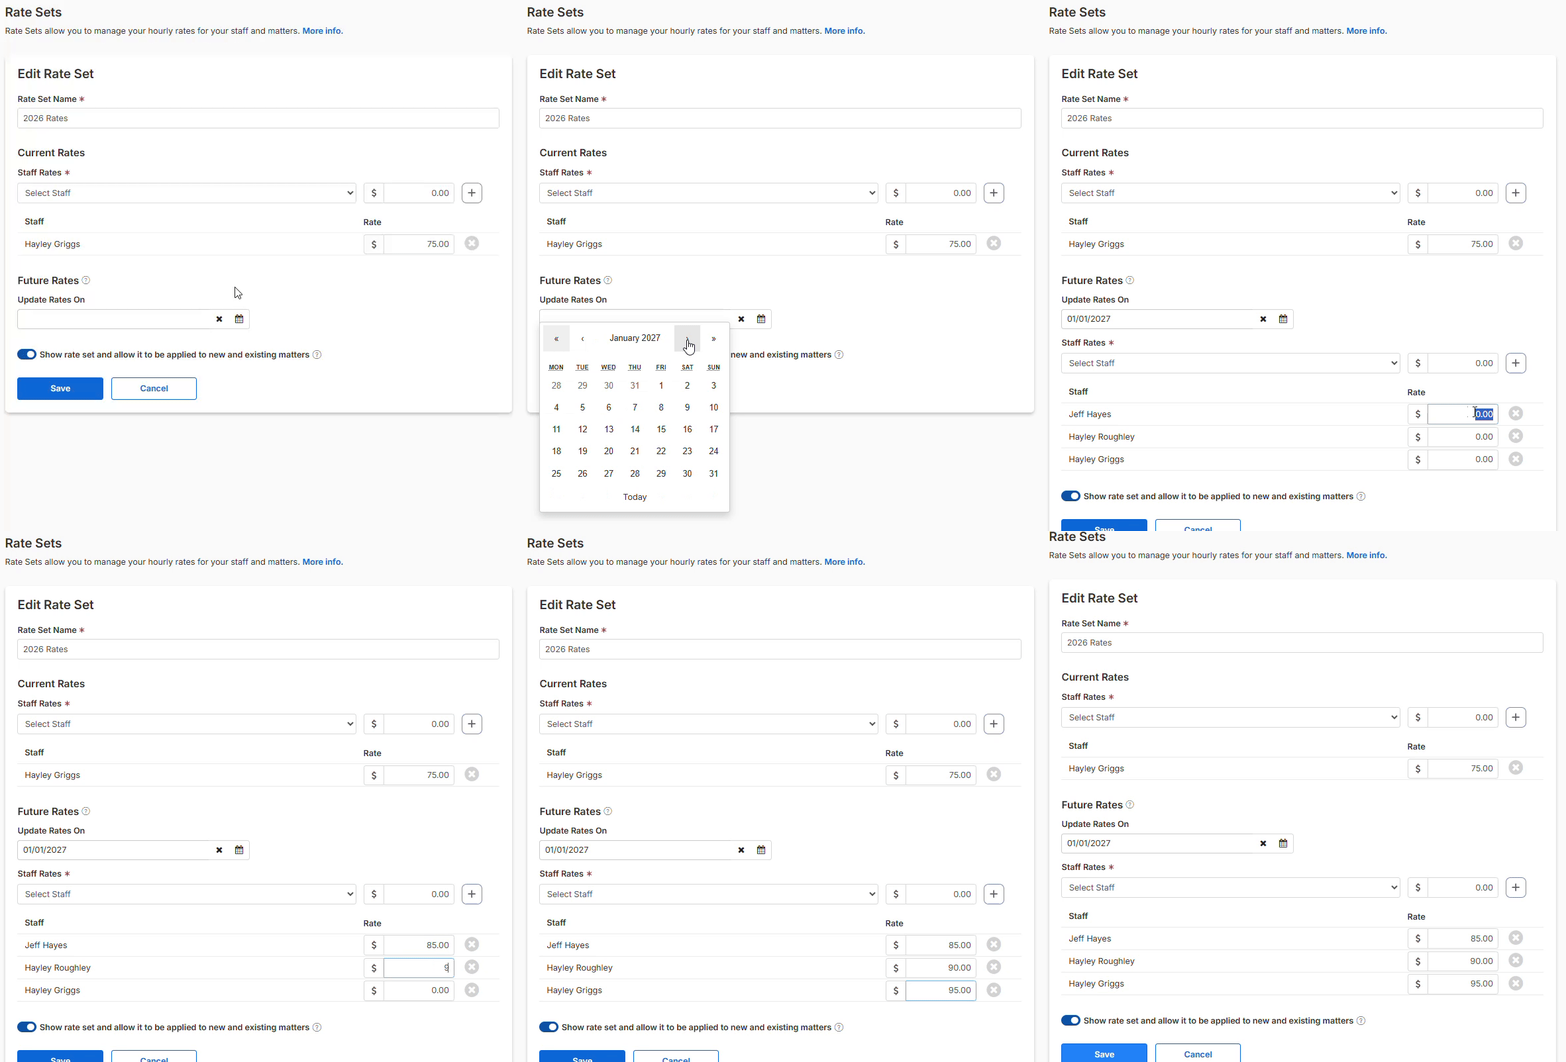
8. Toggle the Show Rate Set and allow it to be applied to new and existing matters, in order for the Rate Set to appear in matters.
- Turn this off to prevent a Rate Set from being attached to a matter. A “hidden” Rate Set will continue to work for existing matters that it has already been applied to but no longer be selectable for additional matters.
9. Select Save.
Edit a Rate Set
To edit a Rate Set, navigate back to Rate Sets in Firm Settings and click on the relevant Rate Set.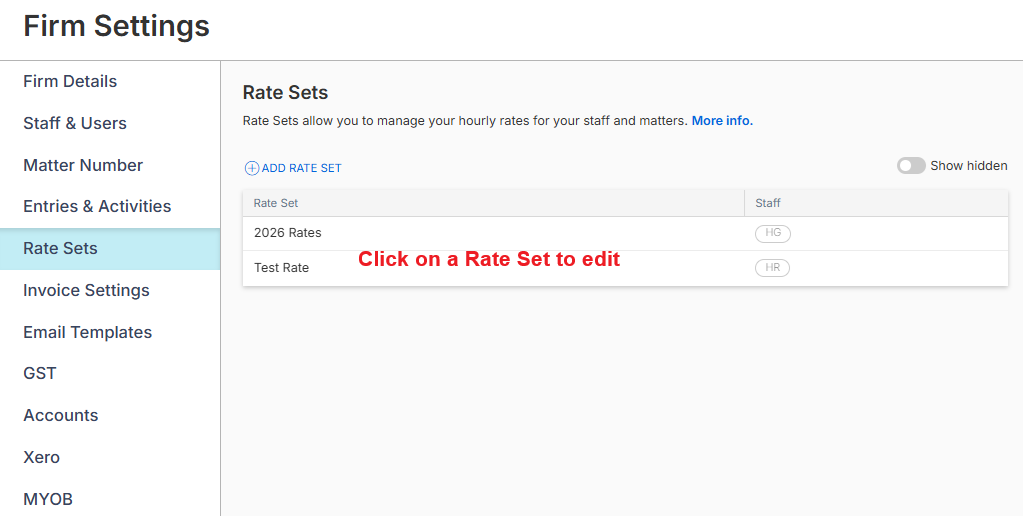
Note: You cannot delete a Rate Set. If the Rate Set is not attached to any matters, you can hide it from the Rate Sets list. To do so, click on the Rate Set and turn off Show Rate Set and allow it to be applied to new and existing matters.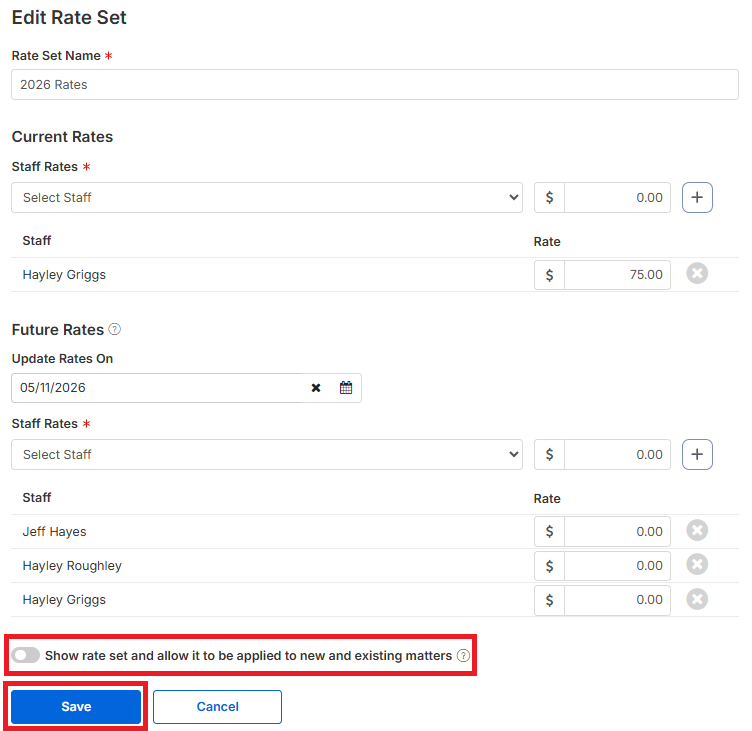
To view all hidden Rate Sets, toggle on Show hidden at the top of the Rate Sets list.
Apply a Rate Set to a matter
1. Open a Matter and select Edit Matter.

2. Select Billing Fees & Rates from the Quick Links menu.
3. Under Hourly Rates, select Use rate sets and use the dropdown menu to pick the desired Rate Set.

4. Scroll to the bottom of the page and select Save Matter.
Tip: You can only choose one rate set.Apply Rate Sets to matters in bulk
1. Navigate to Time & Fees from the left panel.
2. Select the Rate Sets tab.
3. Filter matters by Client, Current Rate Set, Matter Type, Date Opened, Matter Status or Person Responsible.
4. Use the checkboxes to select which matter(s) will be updated.
5. Select Apply Rate Set.
6. Use the dropdown menu to pick the desired Rate Set.
7. Select Save.

Was this article helpful?
That’s Great!
Thank you for your feedback
Sorry! We couldn't be helpful
Thank you for your feedback
Feedback sent
We appreciate your effort and will try to fix the article