

When you are on the go, use the triConvey Mobile App to keep track of any time and fee entries that aren't normally captured by Activity Intelligence or AutoTime.
Table of Contents
- Getting Started
- View time entries for a specific date or staff member
- View time entries related to a matter
- Add a time entry
- Edit or delete a time entry
Getting Started
The screenshots in this article are of the iOS App version of the Mobile App. Label names and locations of buttons may differ on the Android (Google Play) App.
View time entries for a specific date or staff member
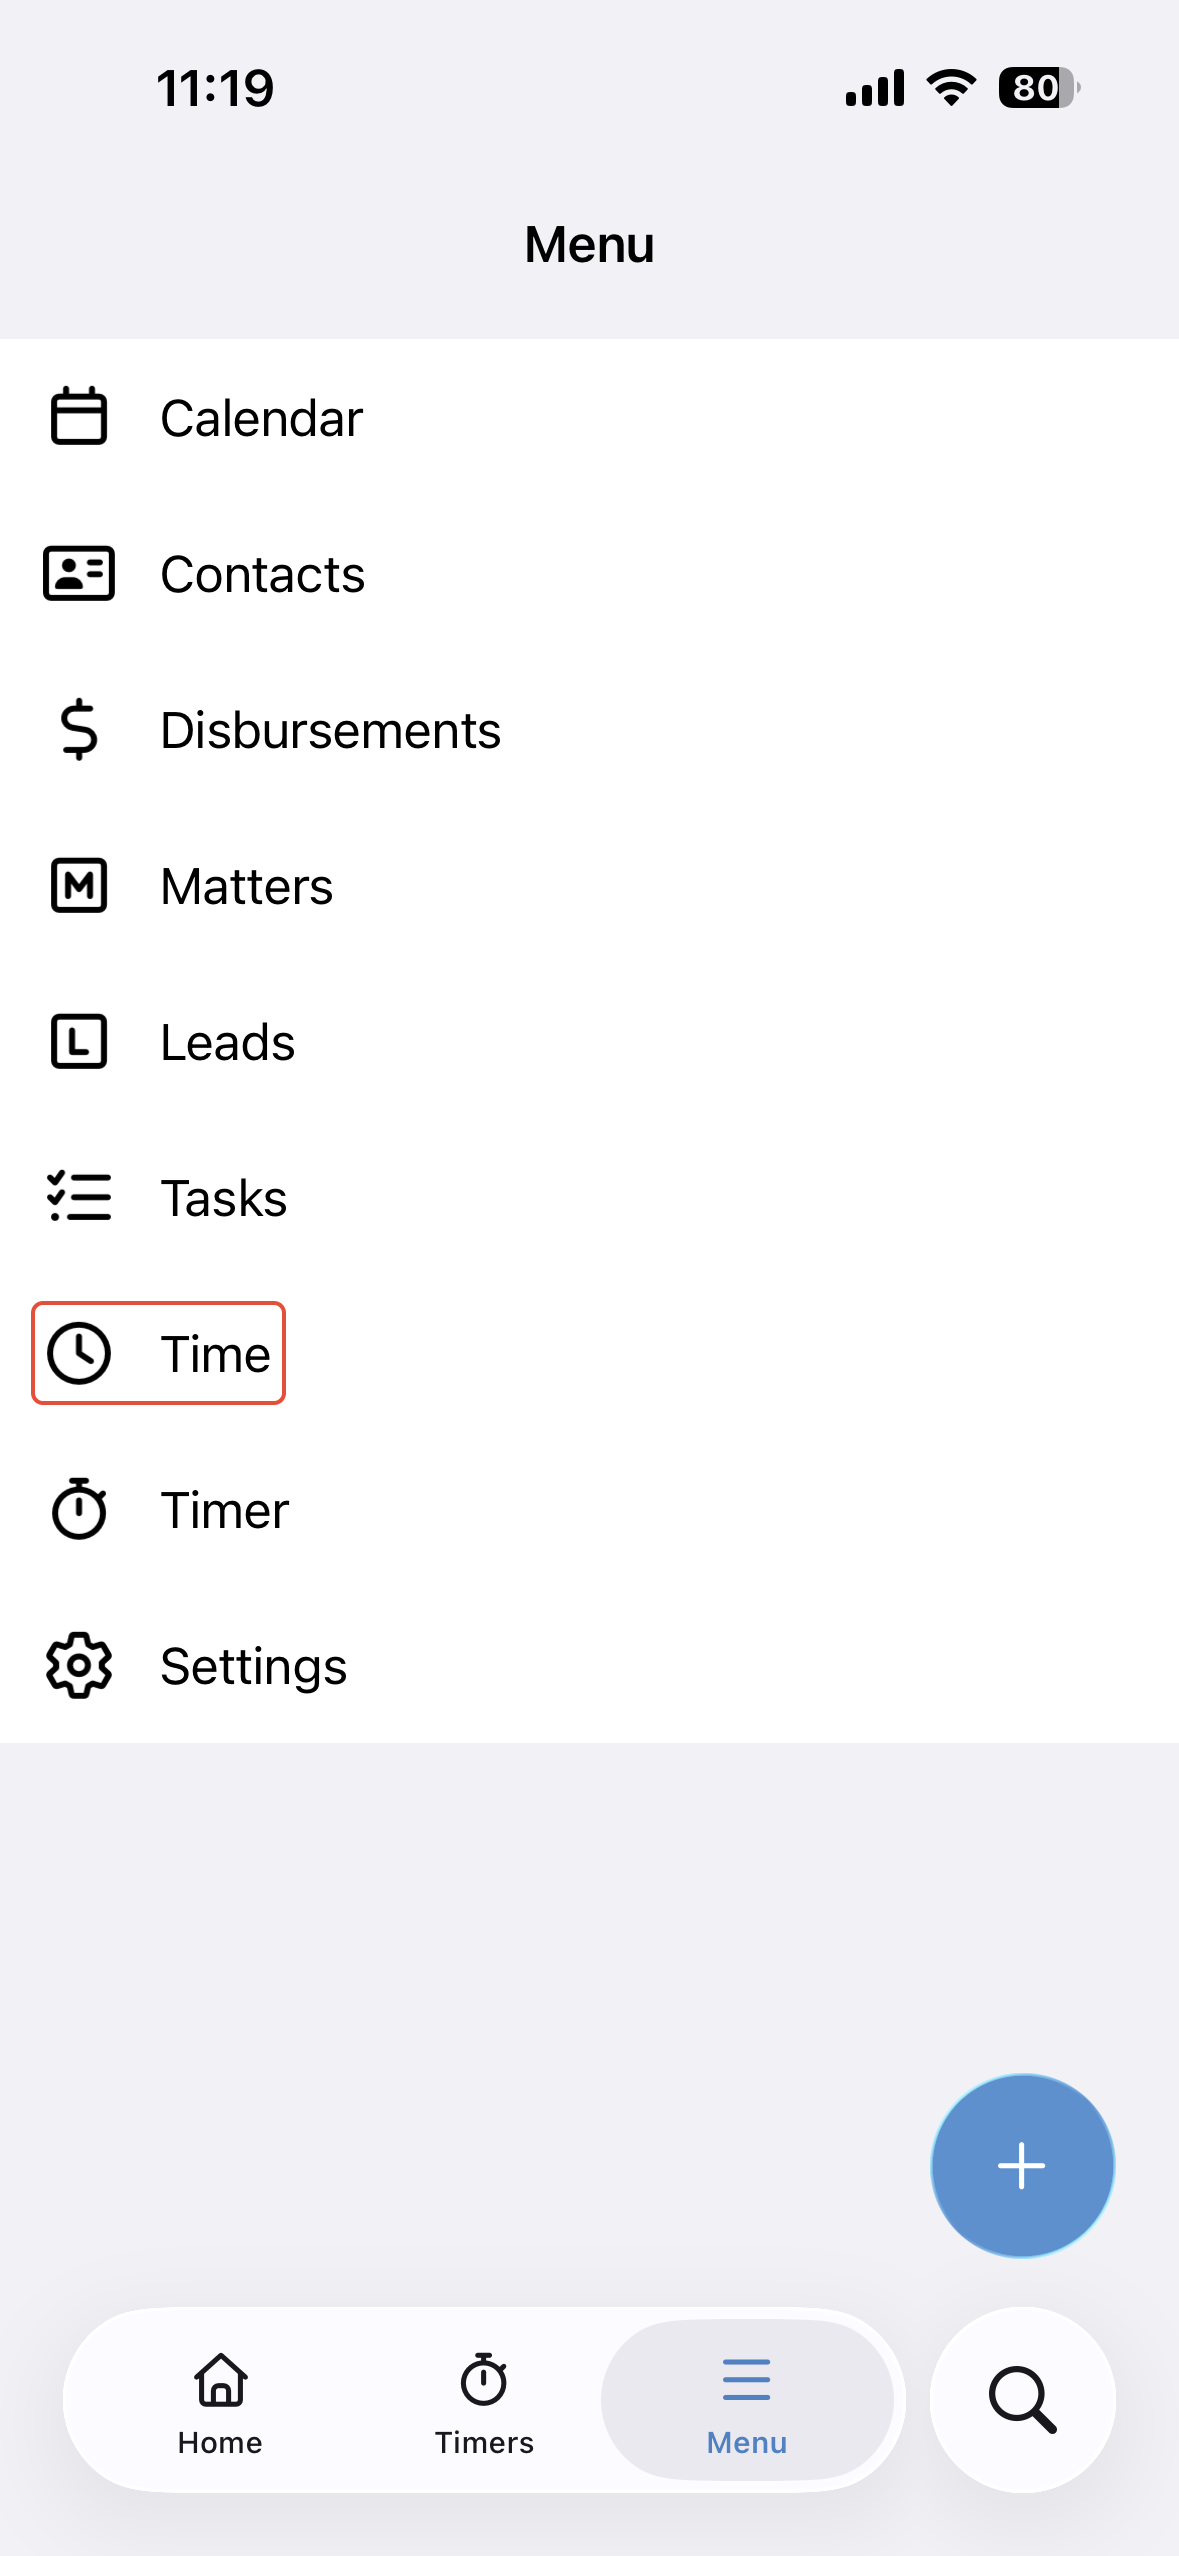
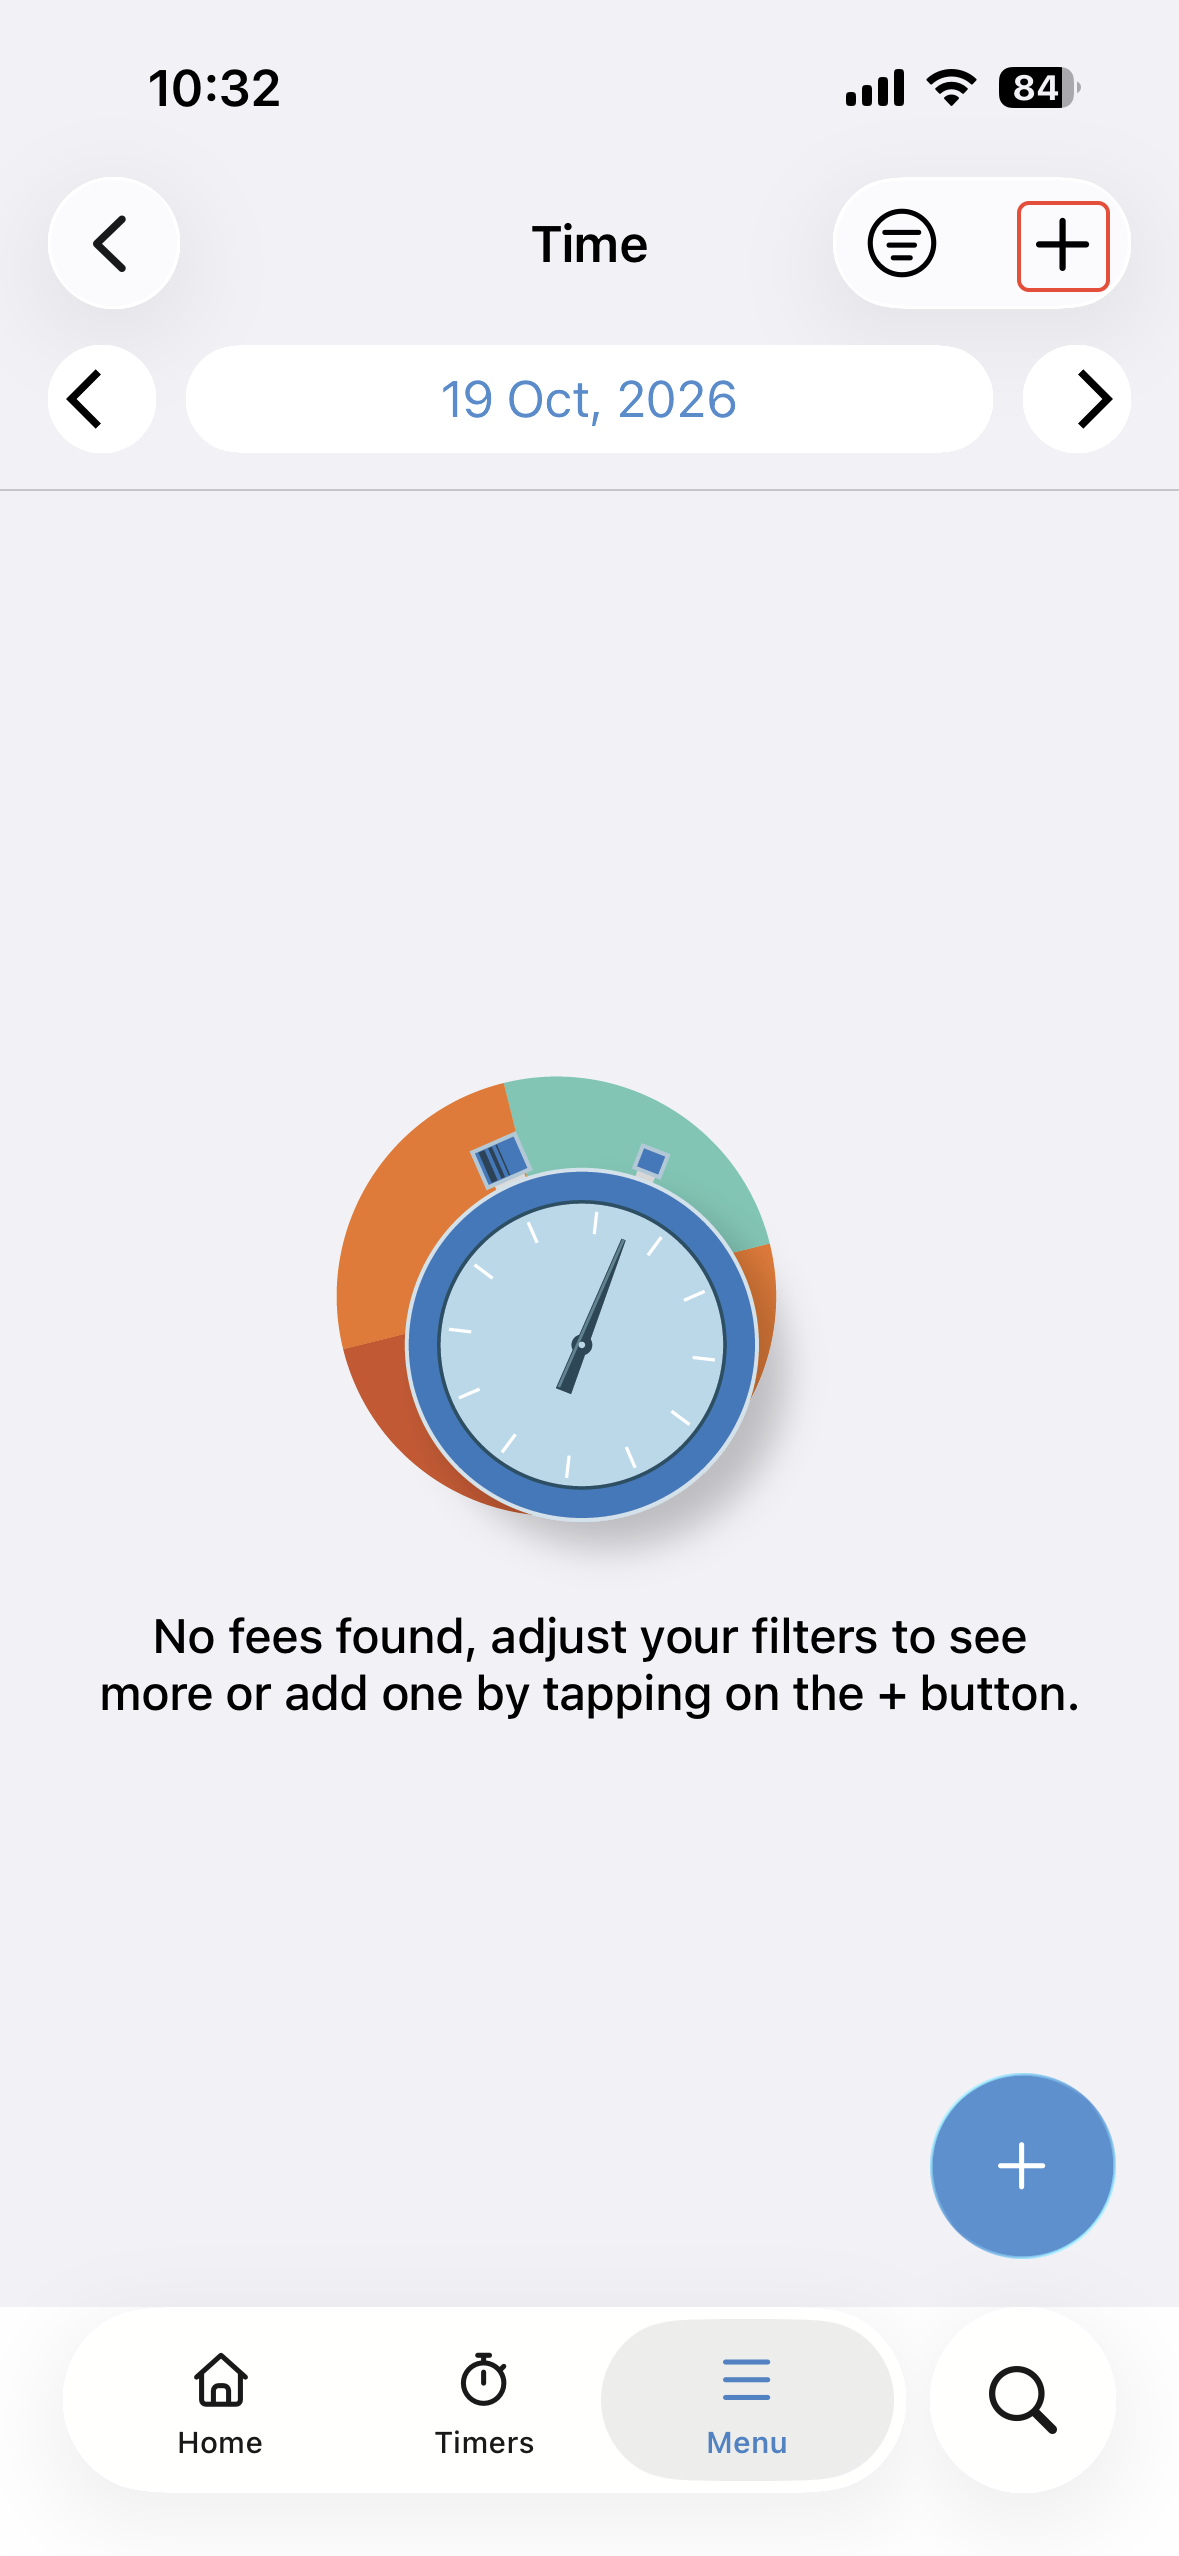
1. Tap on the hamburger icon on the bottom-right corner of the screen, then tap on Time.
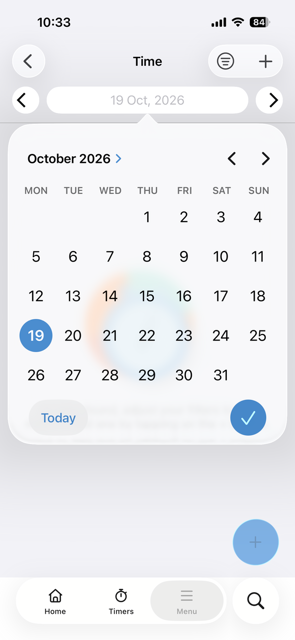
2. You'll be presented with all of today's time entries. To view other dates, tap on the date and select the date you wish to see. You can also tap on the left and right arrows to change the date.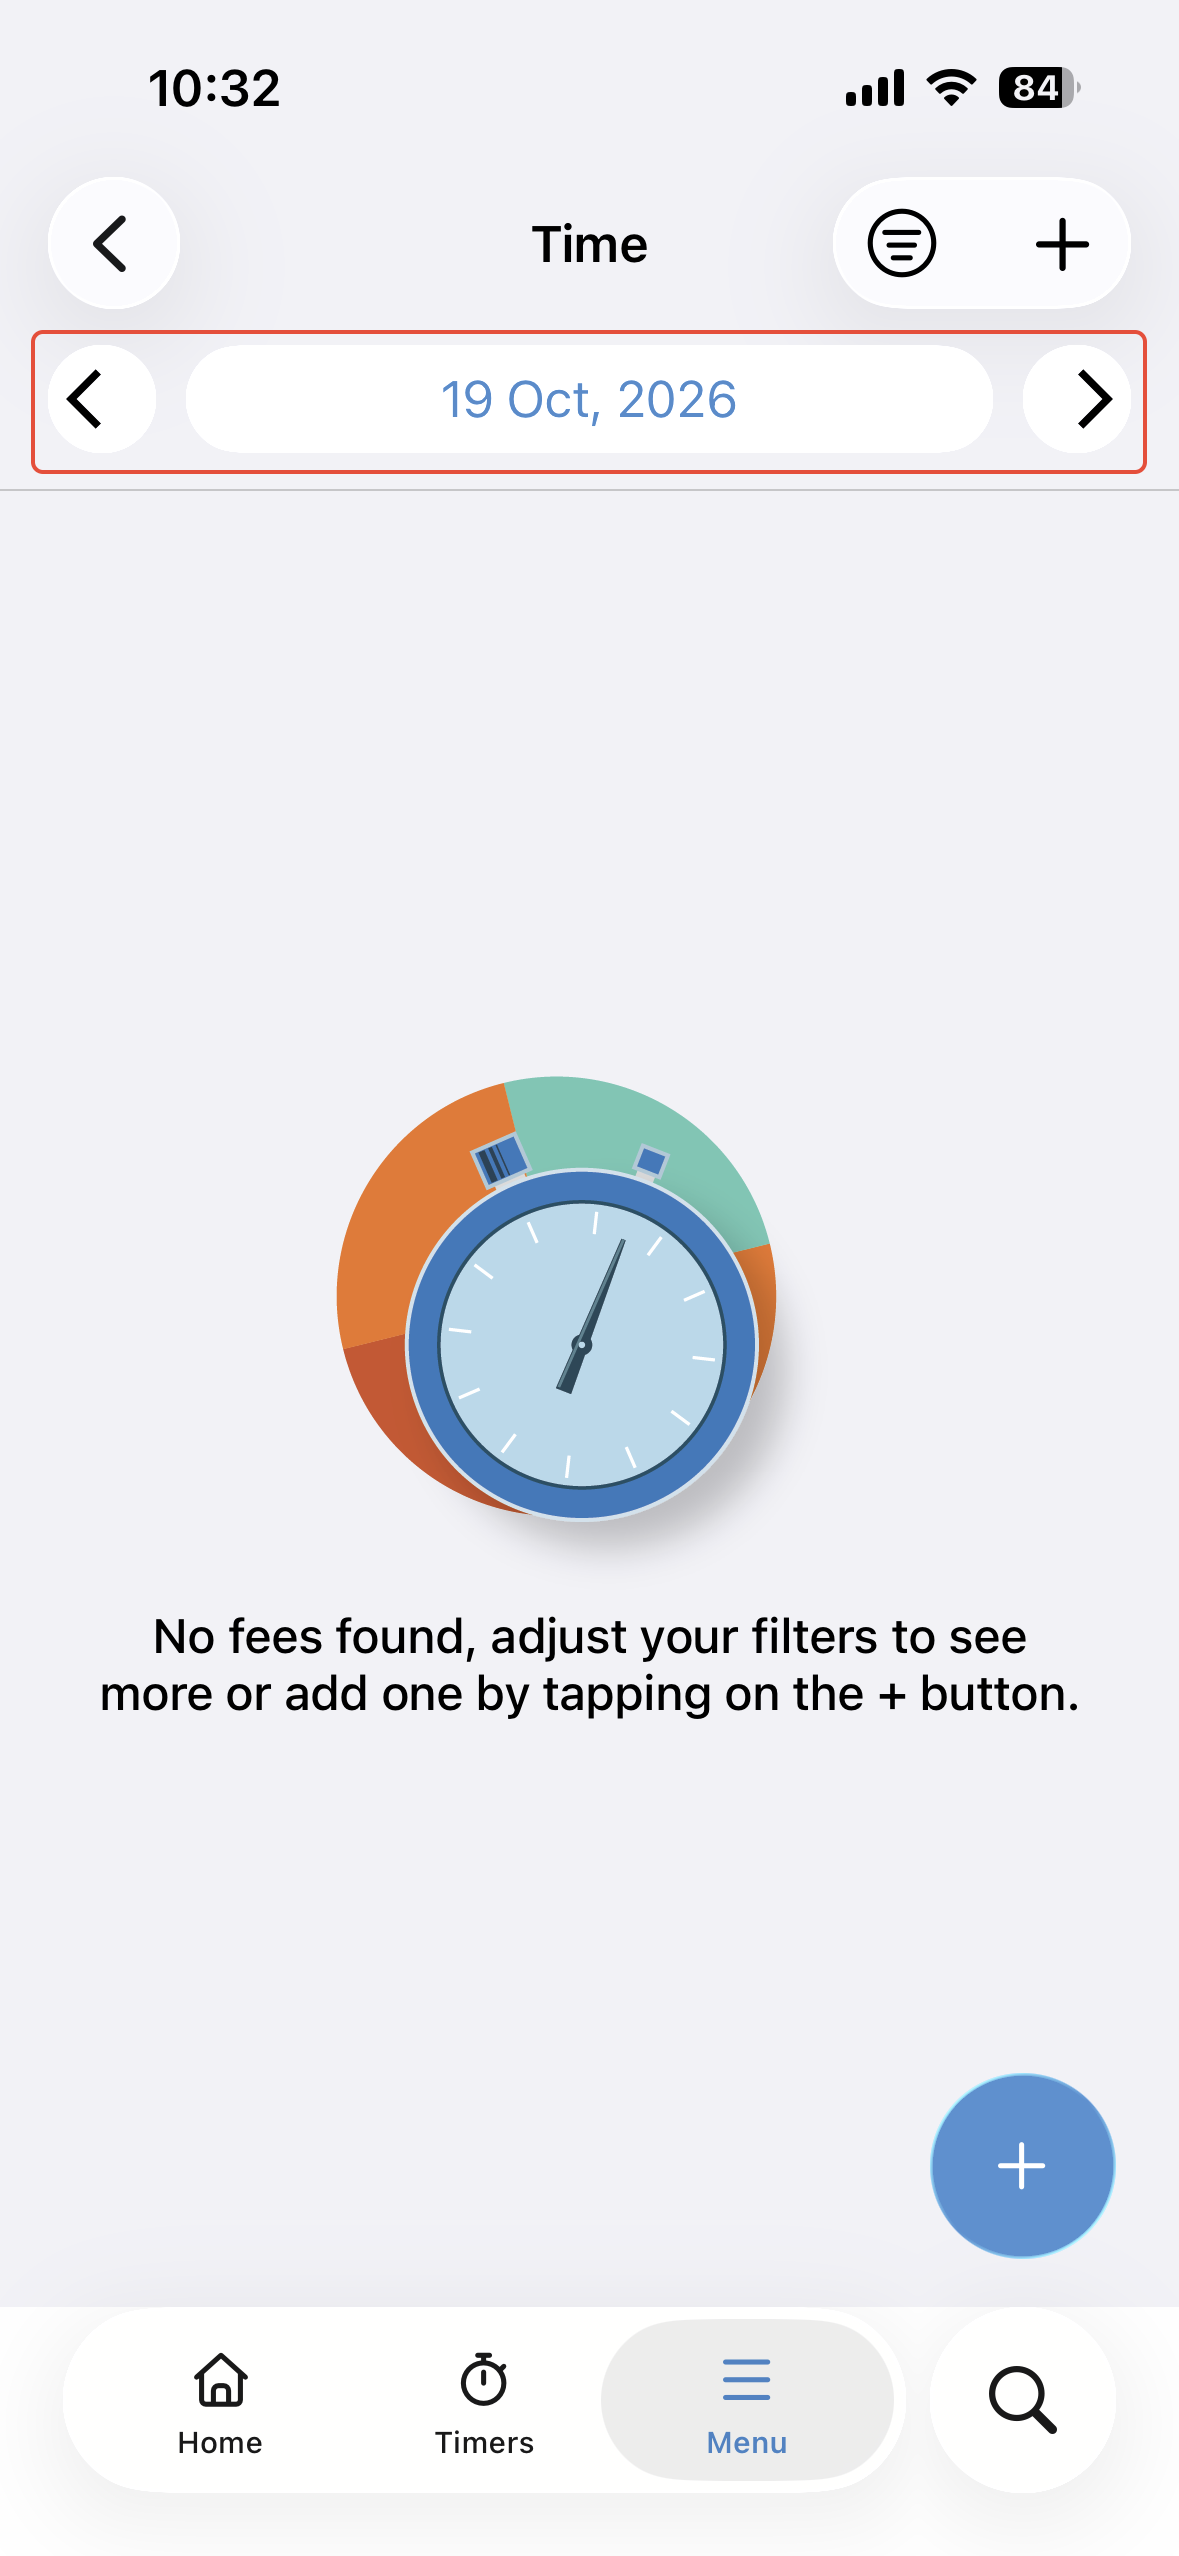
3. You can also sort time entries to only show certain staff members by selecting the filter icon on the top bar.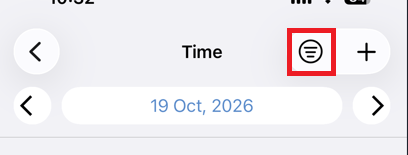
4. Tap on the time entry to view its full details.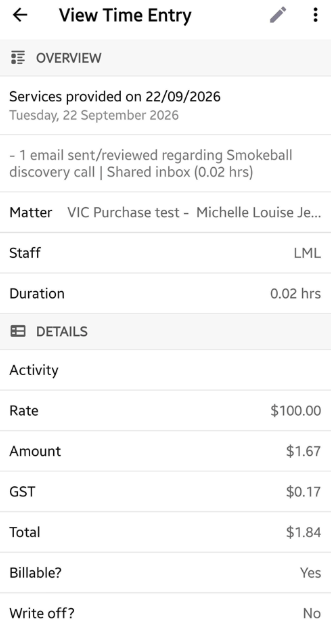
View time entries related to a matter
To view time entries for a specific matter, tap the Hamburger icon on the bottom-right corner of the app and tap Matters.
Find the matter from the list and tap on the Time tab, which can be found when scrolling horizontally along the matter bar.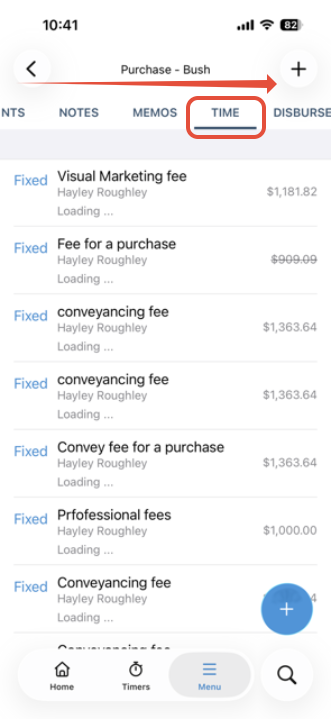
Add a time entry
To add a time entry, select the plus icon on the bottom-right corner of the screen while in a matter.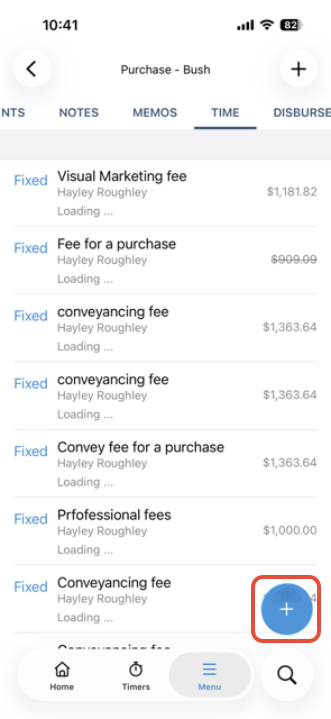
You'll then be taken to the New Time Entry screen. Enter the details of the time entry here, then tap the blue tick on the top-right corner.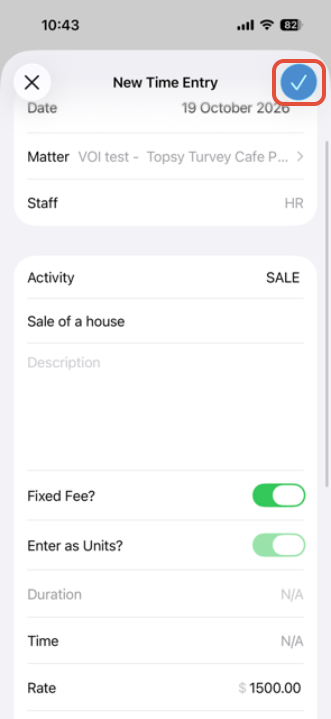
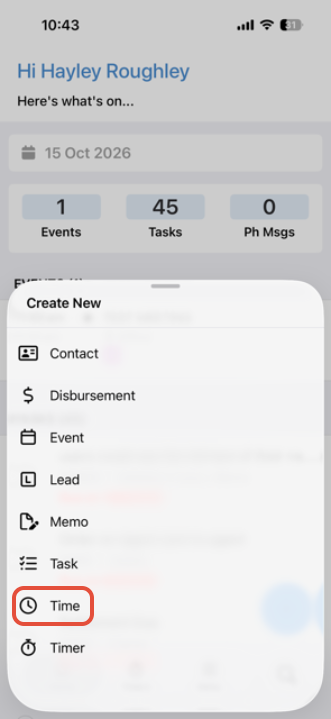
Another way to add a time entry is to tap on the Plus icon on the bottom of the screen if you are not in a matter or lead. If you use this method, you will have to browse for the matter to link this time entry to, before you can save the entry.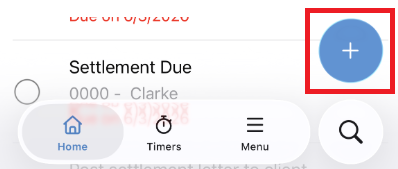
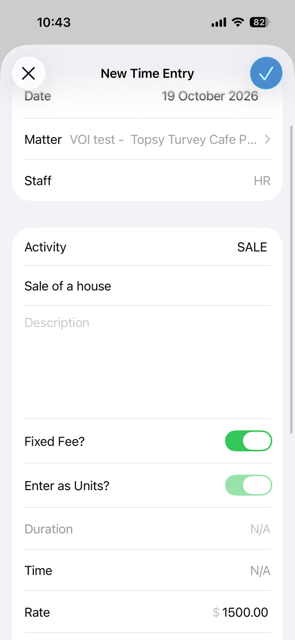
Note: The blue tick button will be greyed out until all mandatory fields - Matter and Subject - are filled in.
Recording a time entry using the timer
The triConvey Mobile App contains a built-in timer, so you can use it to time keep and easily save these entries to a matter. Learn more about using the timer.
Edit or delete a time entry
Tap on an entry, then select the Edit button on the top-right corner. This will open up the Edit Time Entry screen where you can make changes to the time entry. Once done, tap the blue tick button on the top-right corner.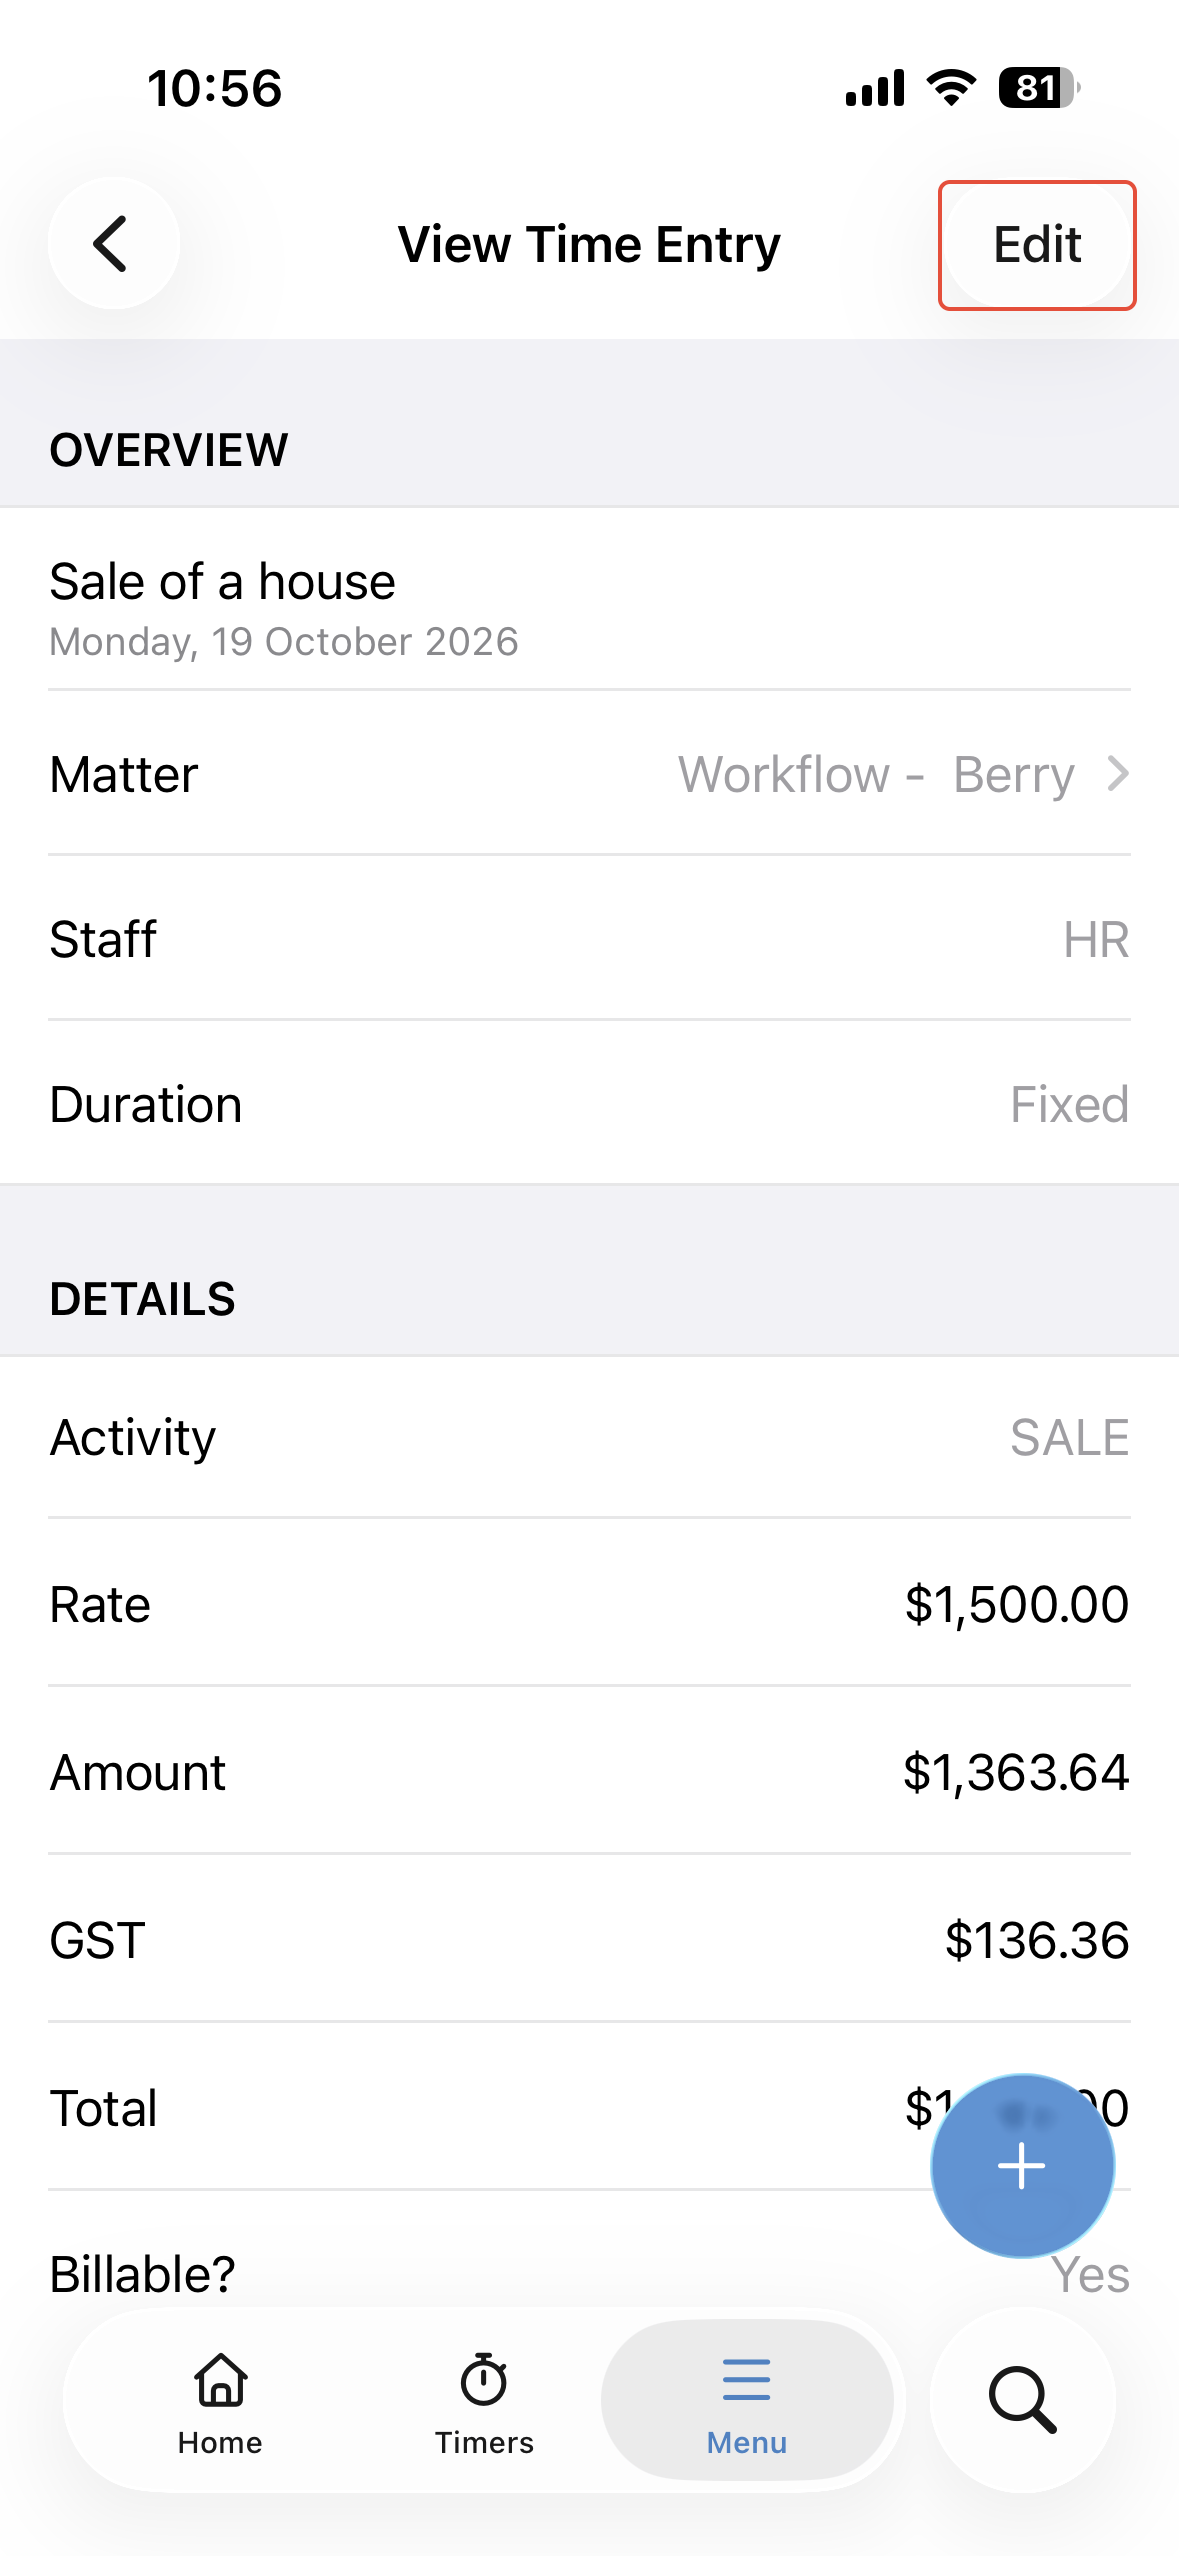
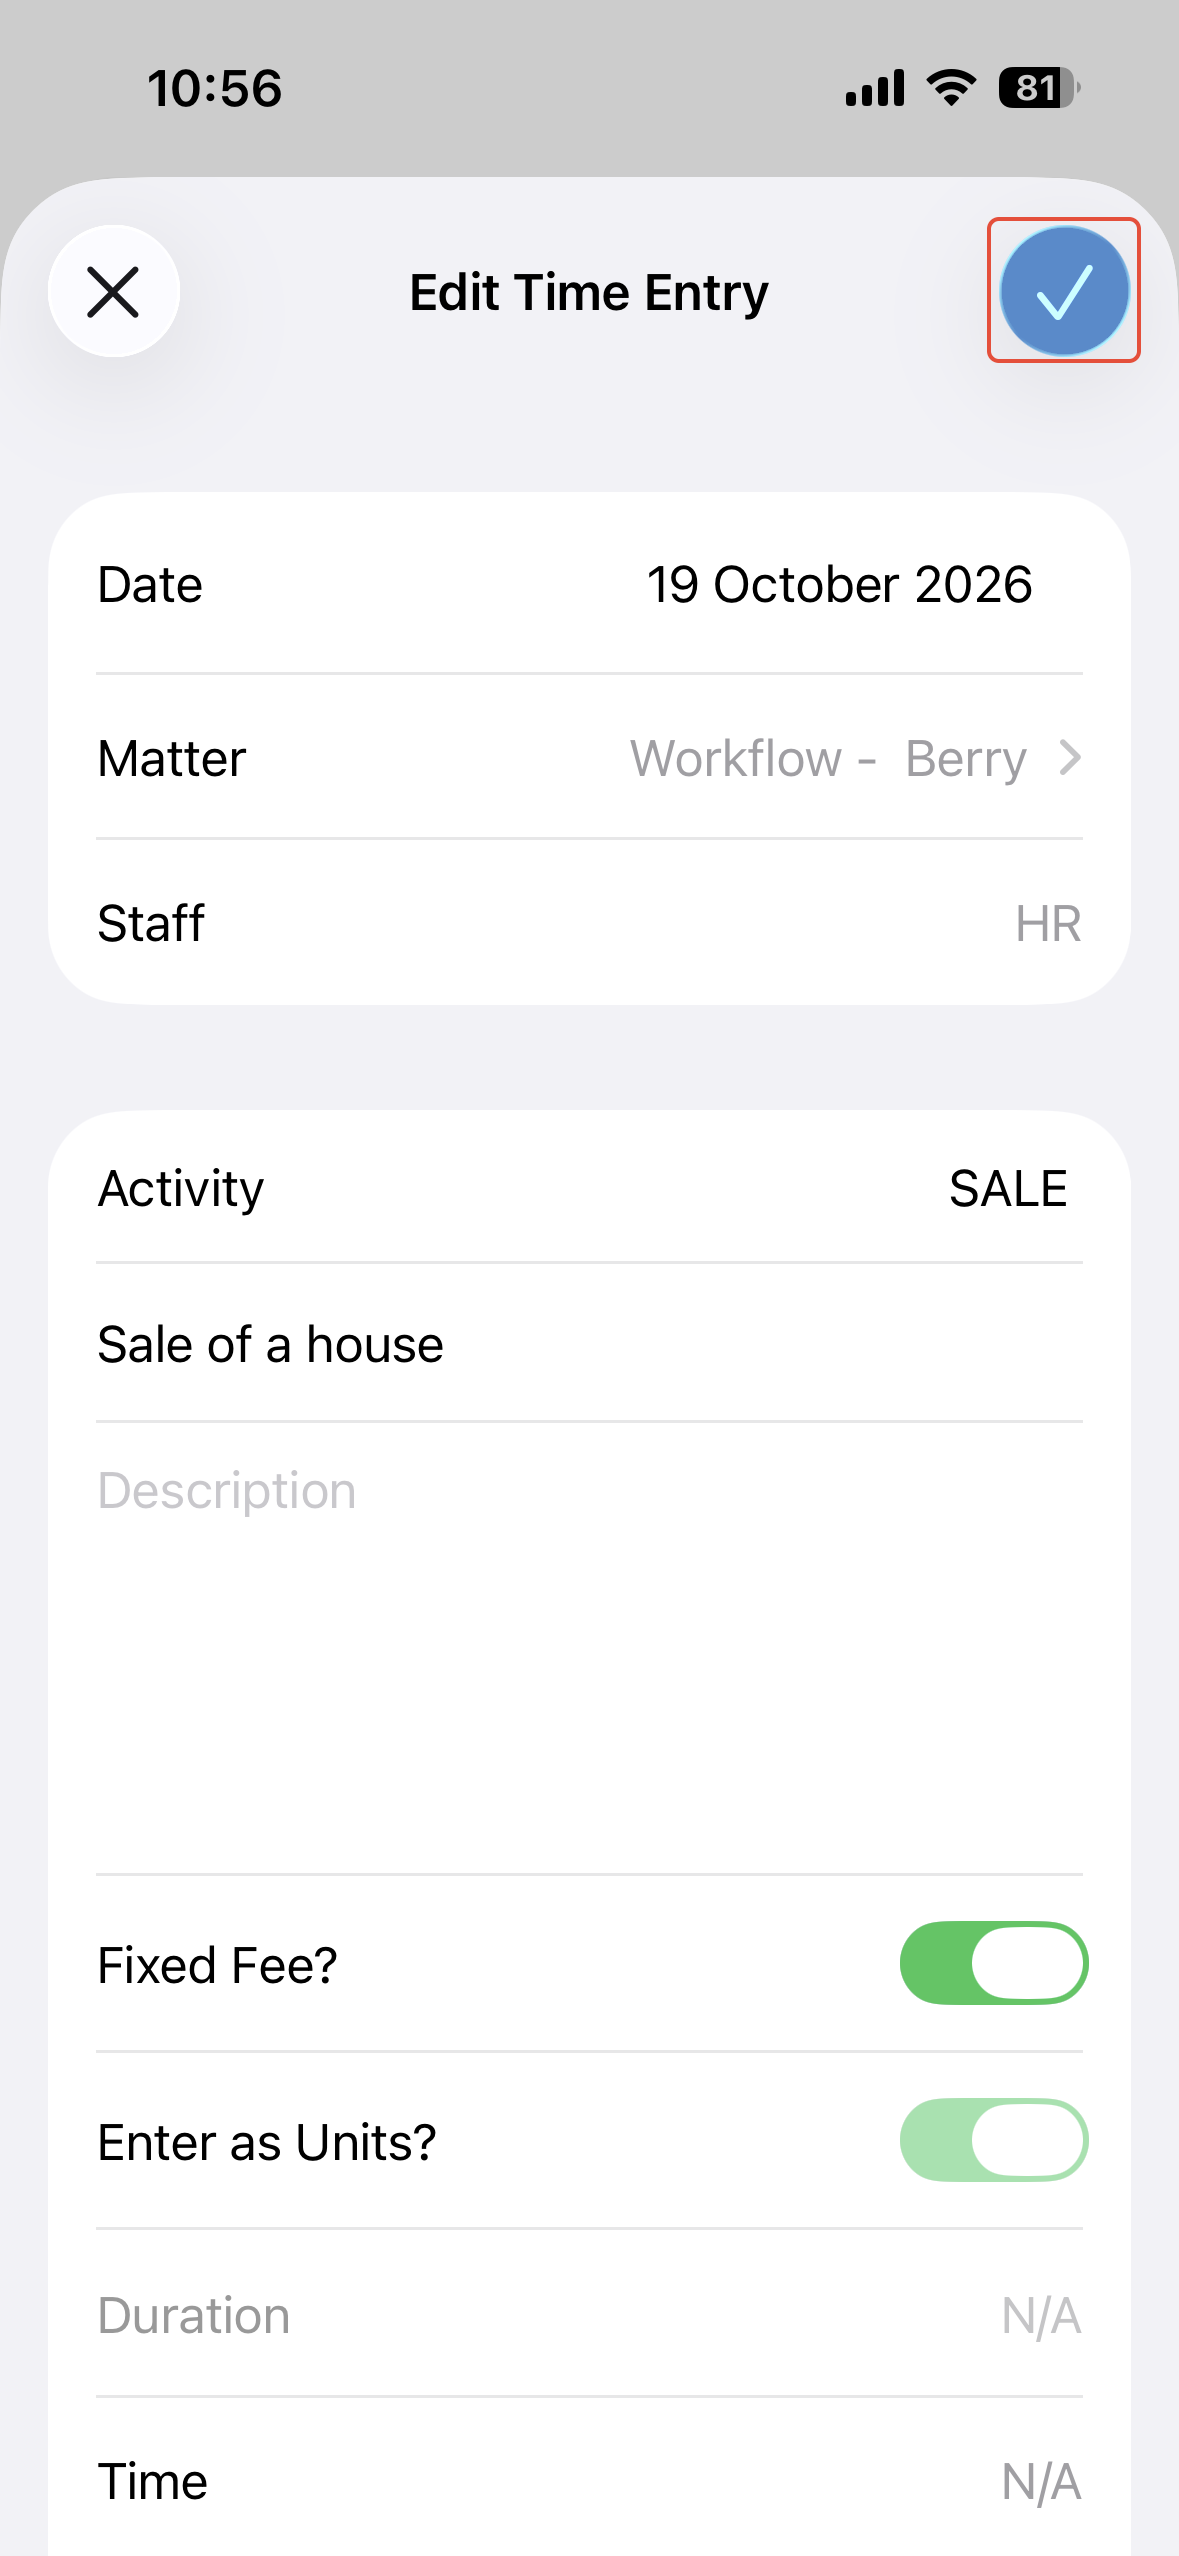
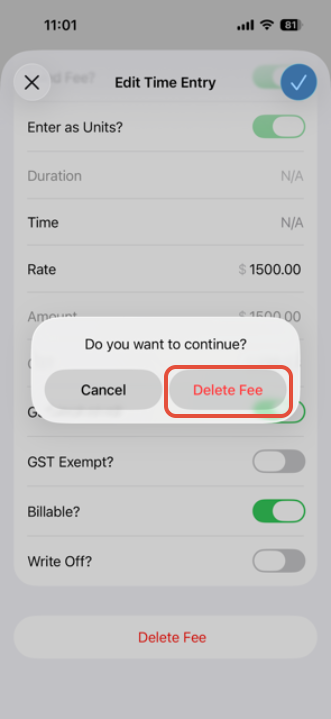
To delete a time entry, scroll down to the bottom of the Edit Time Entry screen and select Delete Fee.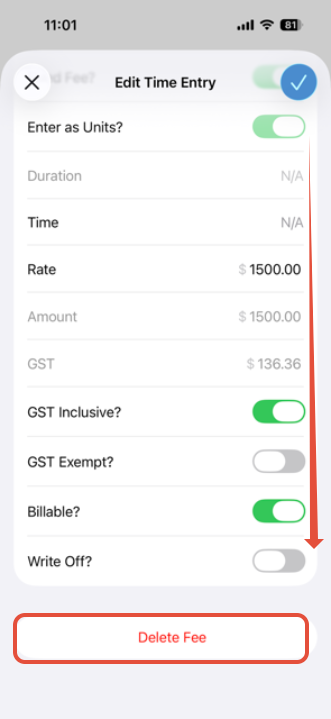
Was this article helpful?
That’s Great!
Thank you for your feedback
Sorry! We couldn't be helpful
Thank you for your feedback
Feedback sent
We appreciate your effort and will try to fix the article