

Learn how to enter, view, edit and delete time and fixed fee entries in triConvey to keep track of billable and fixed work.
Table of Contents
Getting Started
Consider using AutoTime to automatically generate time entries based on the user activities tracked in triConvey.
triConvey Desktop App
1. Open an existing Matter and select the Time & Disbursements tab.
2. Select Time/Fee to open the Time/Fee entry window.
- Select Fixed to enter fixed fees. When you select this, enter the fixed amount in the Rate field.

- Select Hrs to record time entries in hours.
- Record the time worked and time you intend to bill in the Working and Billing fields.
- By default, the Working and Billing fields are the same number.
- You can adjust Working hours in the draft invoice later.
- By default, the Working and Billing fields are the same number.
- Enter the hourly rate amount in the Rate field.
- The Billing hours multiplied by the Rate amount will appear in the Total field, with GST added if applicable.
- Record the time worked and time you intend to bill in the Working and Billing fields.

- Select Units to record custom time.
- Record the time worked and time you intend to bill in the Working and Billing fields.
- By default, the Working and Billing fields are the same number.
- You can adjust Working hours in the draft invoice later.
- By default, the Working and Billing fields are the same number.
- Enter the unit rate amount in the Rate field.
- By default, 1 unit is equivalent to 6 minutes. In the above example, 6 minutes is 10% of 1 hour (6 minutes out of 60 minutes). This means the Amount is 10% of the Rate.
- Learn how to change unit increments to suit your firm's needs.
- By default, 1 unit is equivalent to 6 minutes. In the above example, 6 minutes is 10% of 1 hour (6 minutes out of 60 minutes). This means the Amount is 10% of the Rate.
- The Billing hours multiplied by the Rate amount will appear in the Total field, with GST added if applicable.
- Record the time worked and time you intend to bill in the Working and Billing fields.

4. Either:
- select the Billable toggle if this entry is billable; or
- select the Write Off toggle to write off the amount.
Tip: Set up activity codes so you can use the Activity drop-down menu to automatically fill in most of these fields and save time entering the same time or fixed fee entry.
6. Select Save to save the entry, or Save & New if you want to save the entry and create another.
Other ways to enter a time or fixed fee entry
You can also access the Time & Disbursements window from the Time & Disbursements tab on the Home screen. Any entries created here must be assigned to a matter before saving.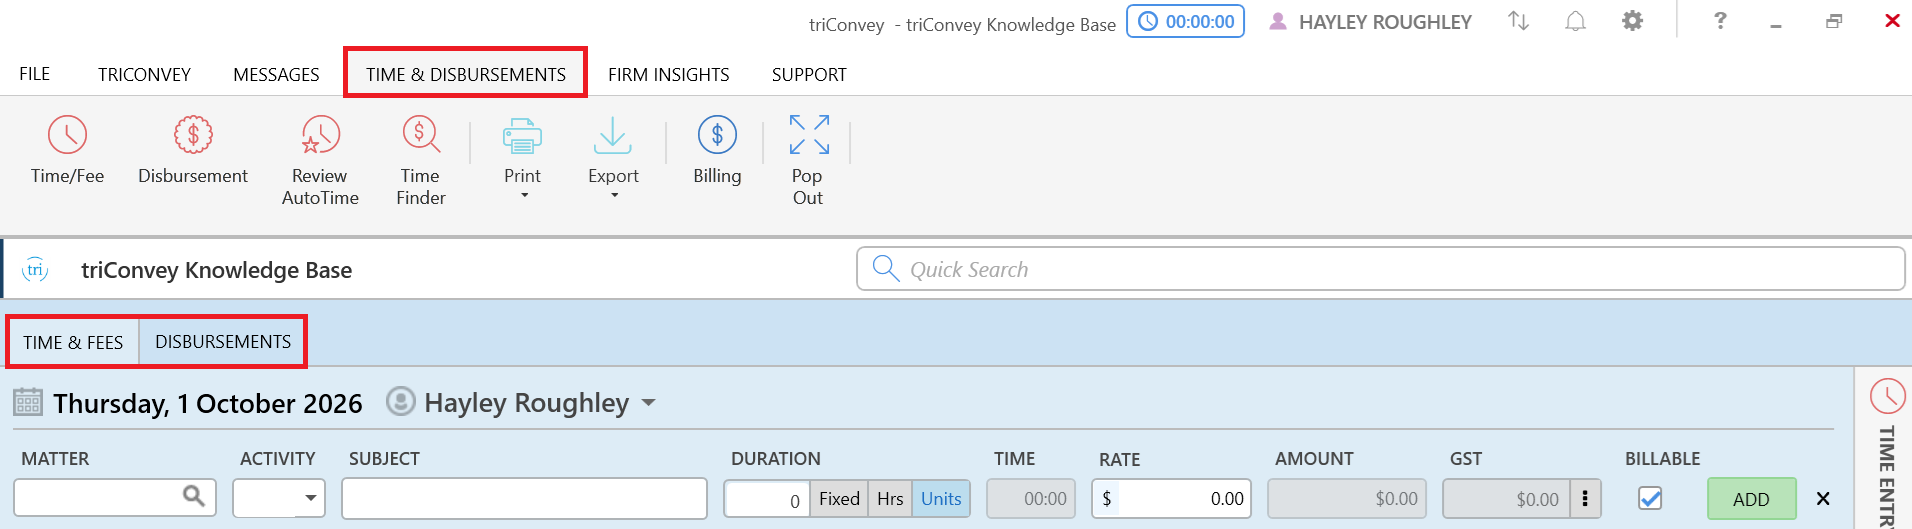
You can also create time and fixed fee entries from the bar at the top of the Time & Fees tab in a matter.
Edit a time or fixed fee entry
By clicking once onto any entry, you are able to review and edit it using the right-hand panel.
Double-clicking onto any entries will open up a new window where you can also review and edit that entry.
Delete a time or fixed fee entry
1. Open the relevant matter, then select the Time & Disbursements tab.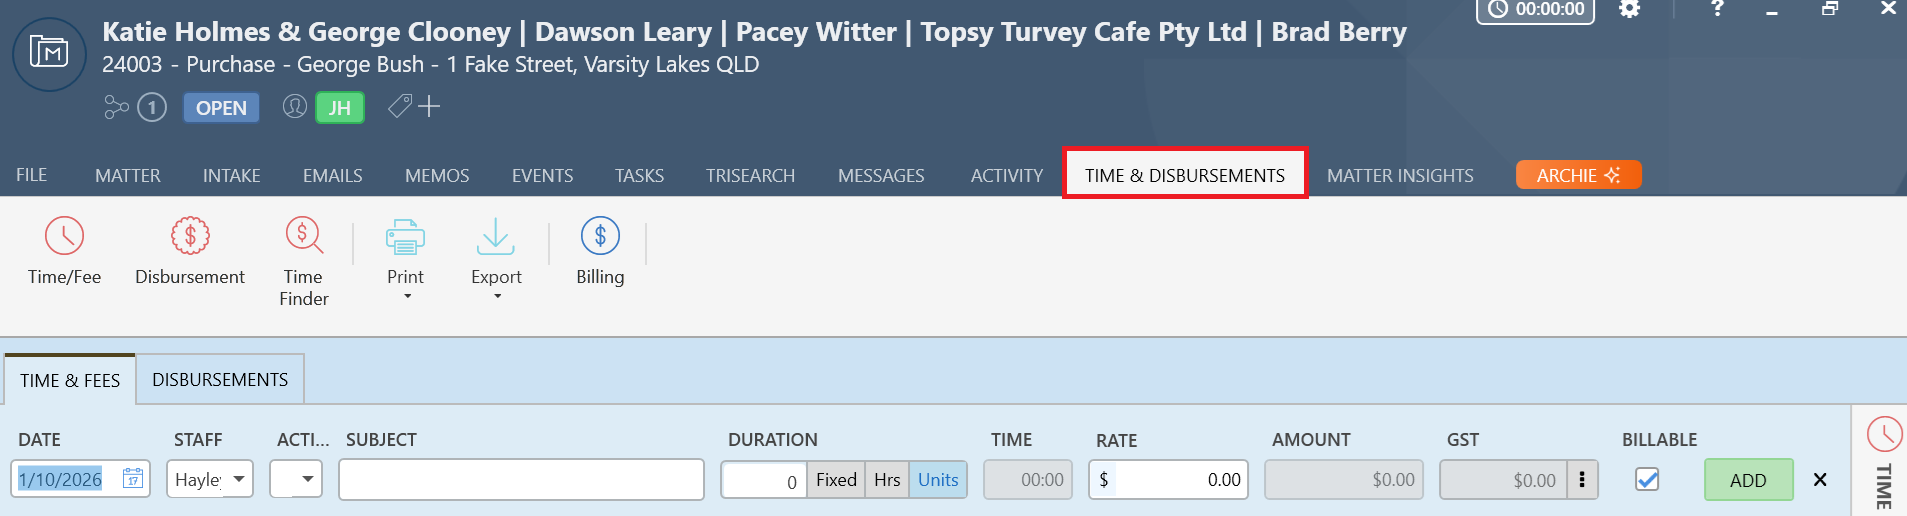
2. Select the Time & Fees tab.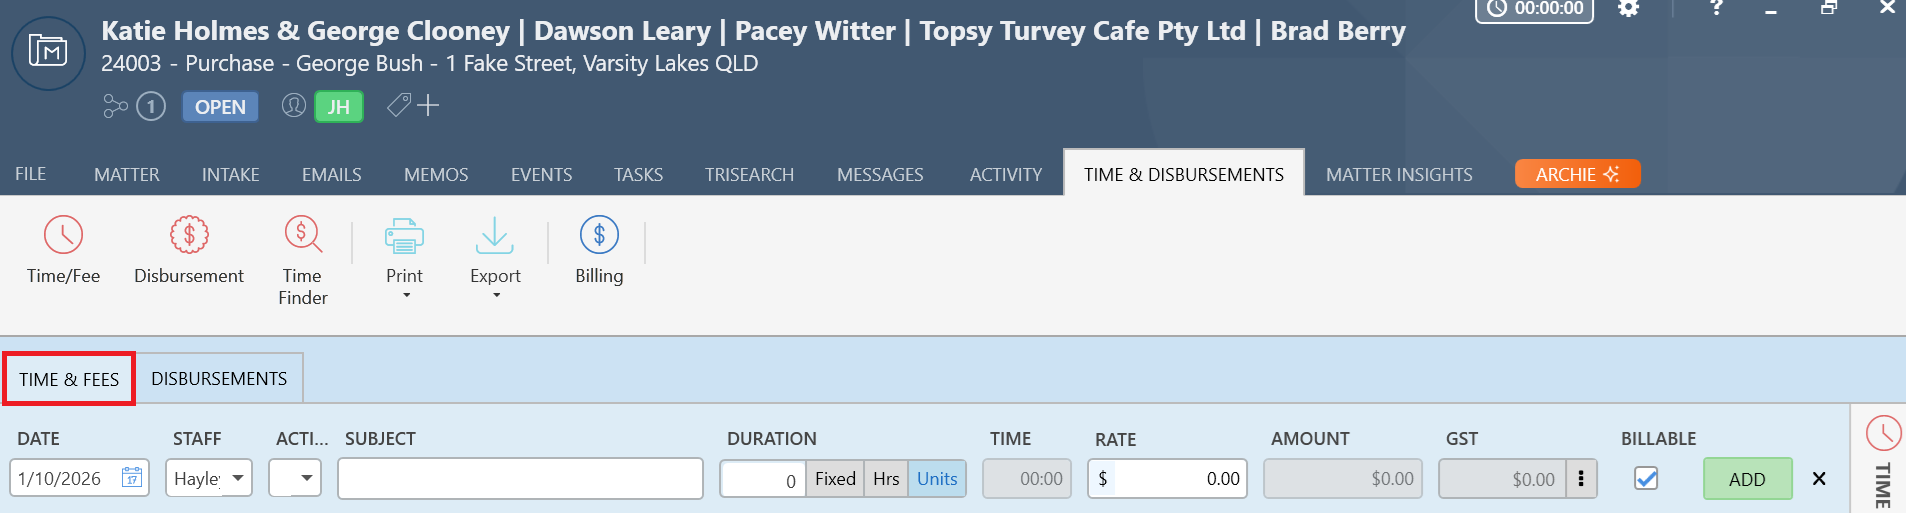
3. Right-click the entry and select Delete Fee.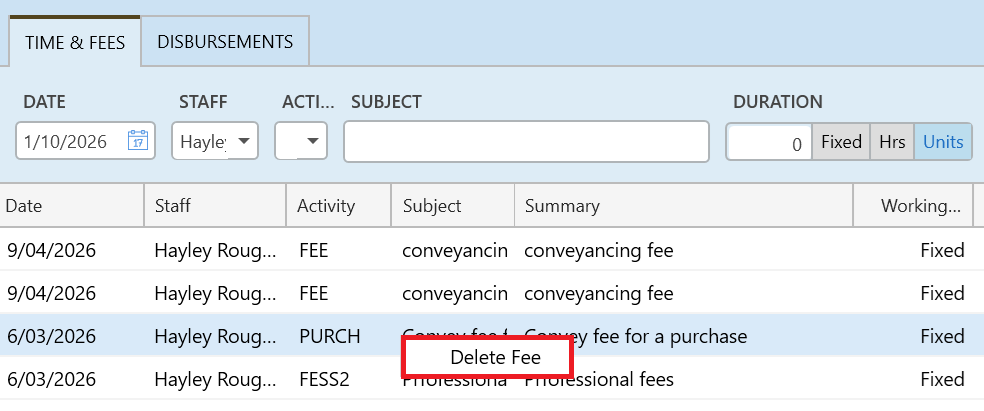
4. Confirm the deletion when prompted. This removes the fee or activity entry from the matter. Note: you cannot recover deleted time or fee entries that have not been linked to an invoice.
triConvey Companion Site Web App
1. Open a Matter and select the Time & Fees tab.
2. Select New Time Entry from the top-left corner of the Time & Fees table.
Tip: This will open the New Time/Fee Entry window.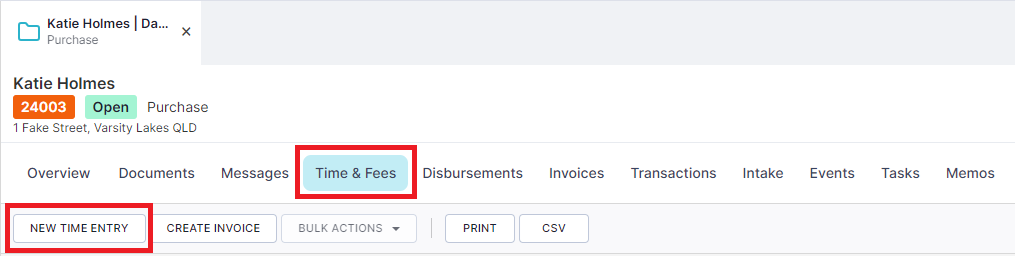
Tip: This field is mandatory and will appear in the invoice.
- Select Fixed to enter fixed fees. When you select this, enter the fixed amount in the Rate field.

- Select Hrs to record time entries in hours.
- Record the time worked and time you intend to bill in the Working and Billing fields.
- By default, the Working and Billing fields are the same number.
- If needed, you can adjust Working hours in the draft invoice.
- By default, the Working and Billing fields are the same number.
- Enter the hourly rate amount in the Rate field.
- The Billing hours multiplied by the Rate amount will appear in the Total field, with GST added if applicable.

- Record the time worked and time you intend to bill in the Working and Billing fields.
- Select Units to record custom time.
- Record the time worked and time you intend to bill in the Working and Billing fields.
- By default, the Working and Billing fields are the same number.
- If needed, you can adjust Working hours in the draft invoice.
- By default, the Working and Billing fields are the same number.
- Enter the unit rate amount in the Rate field.
- By default, 1 unit is equivalent to 6 minutes. In the above example, 6 minutes is 10% of 1 hour (6 minutes out of 60 minutes). This means the Amount is 10% of the Rate.
- Learn how to change unit increments to suit your firm's needs.
- By default, 1 unit is equivalent to 6 minutes. In the above example, 6 minutes is 10% of 1 hour (6 minutes out of 60 minutes). This means the Amount is 10% of the Rate.
- The Billing hours multiplied by the Rate amount will appear in the Total field, with GST added if applicable.

- Record the time worked and time you intend to bill in the Working and Billing fields.
7. Either:
- select the Billable toggle if this entry is billable; or
- select the Write Off toggle to write off the amount.
Notes:
- Some of the fields available to be filled out are optional but note that they will appear in invoices.
- You can set up activity codes to fill in most of these fields automatically to save time.
Other ways to enter a time or fixed fee entry
You can also access the Time/Fee Entry window by clicking the Create New button in the top-right corner of the triConvey Companion Site Web App home page and selecting Time Entry from the dropdown options. Any entries created here must be assigned to a matter before saving.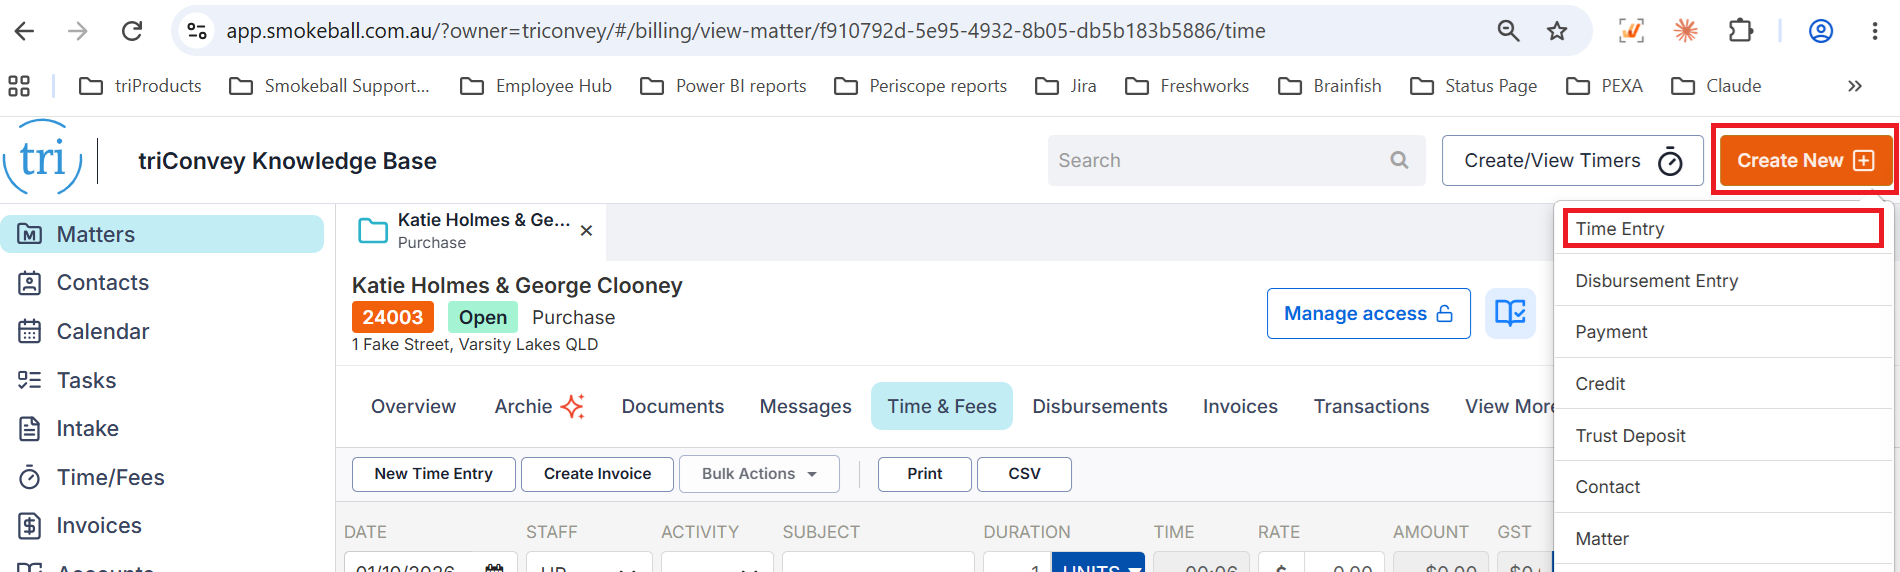
You can also create time and fixed fee entries in a matter by clicking on the bar at the top of the Time & Fees.

Edit a time or fixed fee entry
From the main Time/Fees section or the Time & Fees tab in a matter, open the Time Entry Review panel on the right-hand side to edit an entry.
When the panel is open, it will open details for the first entry listed by default. To see details for other entries, click on any other entry in the list while the review panel is still open.
You can also click on any entry listed to edit it in a separate window.
Notes:
- You can edit a time or fixed fee entry at any time before it's added to a finalised invoice.
- If an entry has already been added to a finalised invoice, follow the steps under Delete an entry from a finalised invoice to edit the invoice first.
Delete a fee or activity entry
1. Open the relevant matter, then select the Time & Fees tab.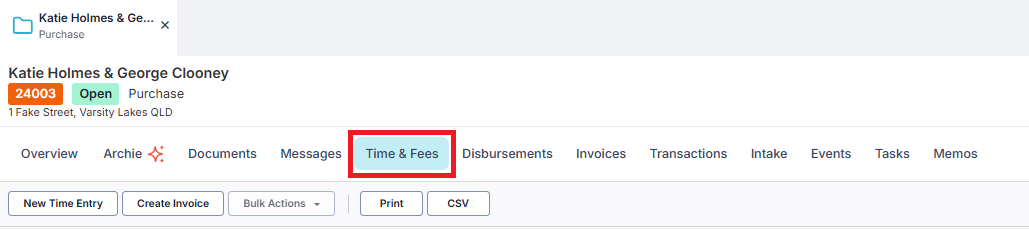
2. Click the entry from the list and select Delete this fee.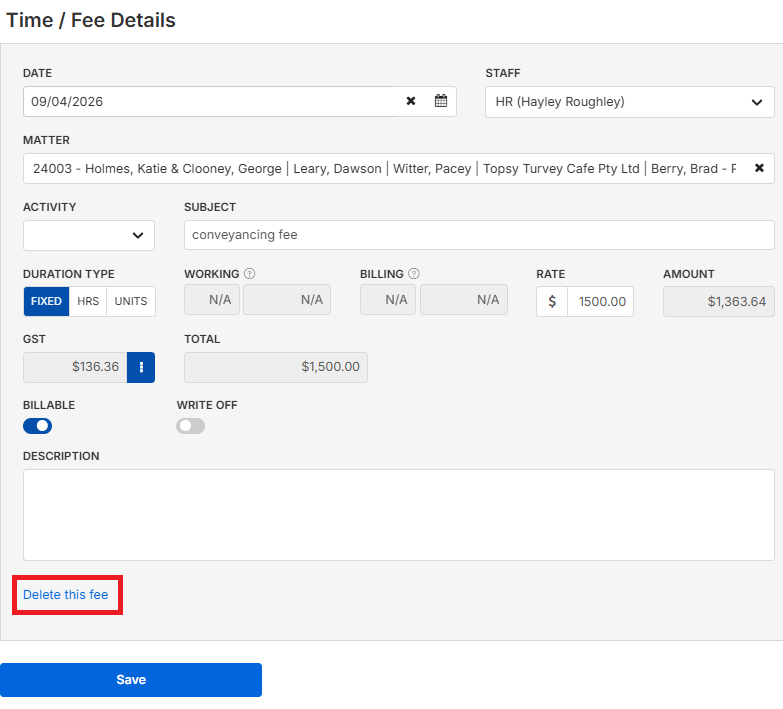
Delete an entry from a finalised invoice
If the time or fee entry has been added to a finalised invoice, you'll need to complete a few extra steps to remove it.
Before you begin, ensure the invoice does not have any payments applied to it before removing time or fixed fee entries from it.
1. Open the relevant invoice in the triConvey Companion Site Web App.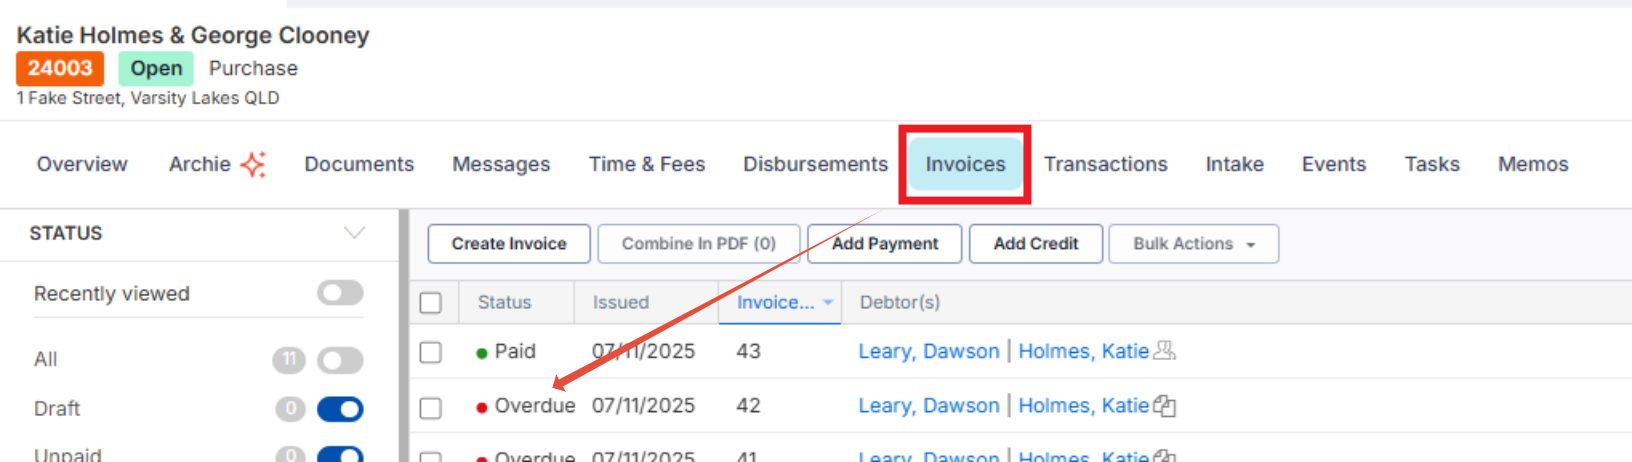
2. Select Edit above the invoice preview.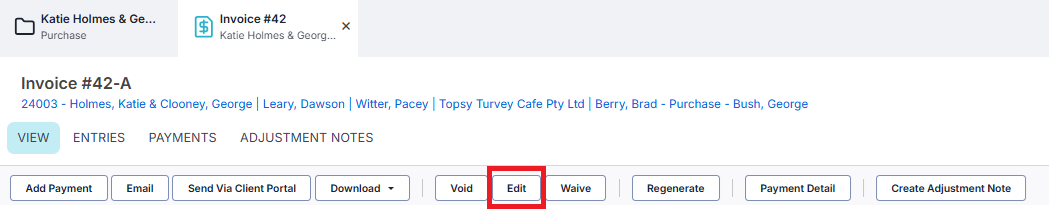
3. Select Edit This Invoice.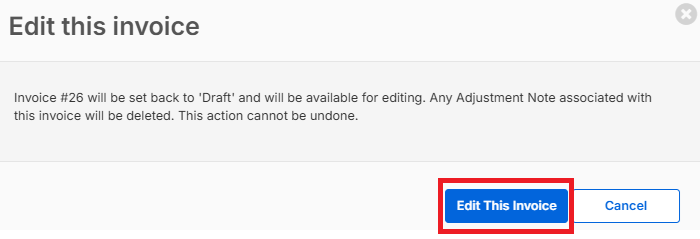
4. Locate the fee or activity entry under the invoice details.
5. Click the View icon to open the entry.
6. Select Delete this fee.
7. Preview the invoice to check all details are correct.
8. Finalise the invoice again to lock in the changes.
Helpful Tips
- If you do not have AutoTime enabled, use the Time Finder to convert activities into time entries. Learn more about the Time Finder so you don't miss out on potential billable hours and profit.
- The Subject field for Time & Fee entries is limited to 1,000 characters.
Was this article helpful?
That’s Great!
Thank you for your feedback
Sorry! We couldn't be helpful
Thank you for your feedback
Feedback sent
We appreciate your effort and will try to fix the article